Optional lt-71: controls and connections, Redmike vc : charging redmike vc : initial set-up – LightSpeed Technologies CAT 860 User Manual
Page 37
72
73
1. Overview
2. Setup & Use
3. Optional
Accessories
2. Setup & Use
3. Optional
Accessories
4. T
roubleshooting
5. W
arranty
, Safety
& Specifications
1. Overview
4. T
roubleshooting
5. W
arranty
, Safety
& Specifications
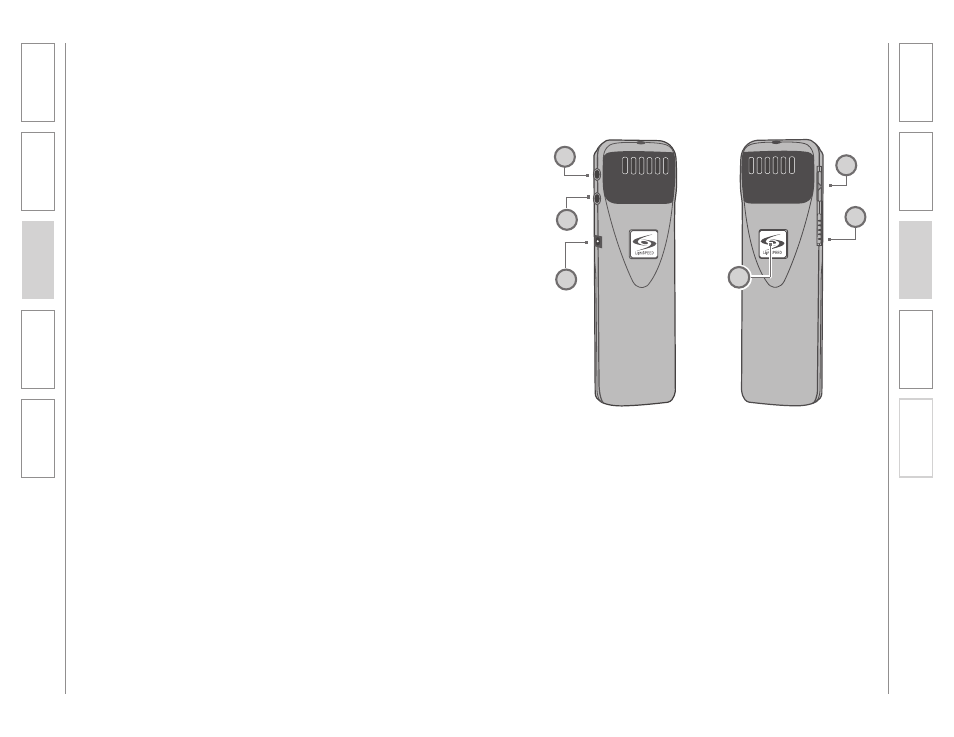
1. ON/OFF/MUTE Switch
2. CHANNEL SELECT SWITCH (CH
A/B): Use this to choose Channel
A or B. If you are using a single
microphone, we recommend using
Channel A.
3. POWER/CHARGE INDICATOR: A
BLUE light indicates the REDMIKE
VC is on and fully charged. A RED
light indicates a charge is needed.
4. EXTERNAL MICROPHONE
INPUT (MIC): Use the 3.5mm
MIC jack for the optional TK-250
headset microphone (part# MC-
TK250LTM).
5. AUXILIARY (AUX): Plug a laptop,
MP3 player or other audio source
into this jack to wirelessly transmit
the audio signal to be played
through the system.
6. CHARGER INPUT (CHARGER):
Plug the charging cable from the
charger into this jack for daily
charging. The LED on the front will
glow RED to indicate charging.
OPTIONAL LT-71: Controls and Connections
LT-71
LT-71
1
2
4
5
6
3
REDMIKE VC : Charging
REDMIKE VC : Initial Set-up
Before use, the REDMIKE VC should
be charged. See page 20 and
follow the same instructions for the
REDMIKE.
See page 17 and follow the same
instructions for the REDMIKE to setup
the REDMIKE VC.
NOTE: A nominal volume level must be
set on the CAT 805iX before adjusting
controls on the REDMIKE VC.
The teacher can now use the controls
on the REDMIKE VC to adjust the
volume level from anywhere in the
room. The microphone volume control
has 4 steps up and 4 steps down from
the mid point (9 levels total).