Tk-8180, Disassembly for repair – Kenwood TK-8180 User Manual
Page 15
TK-8180
15
q
w
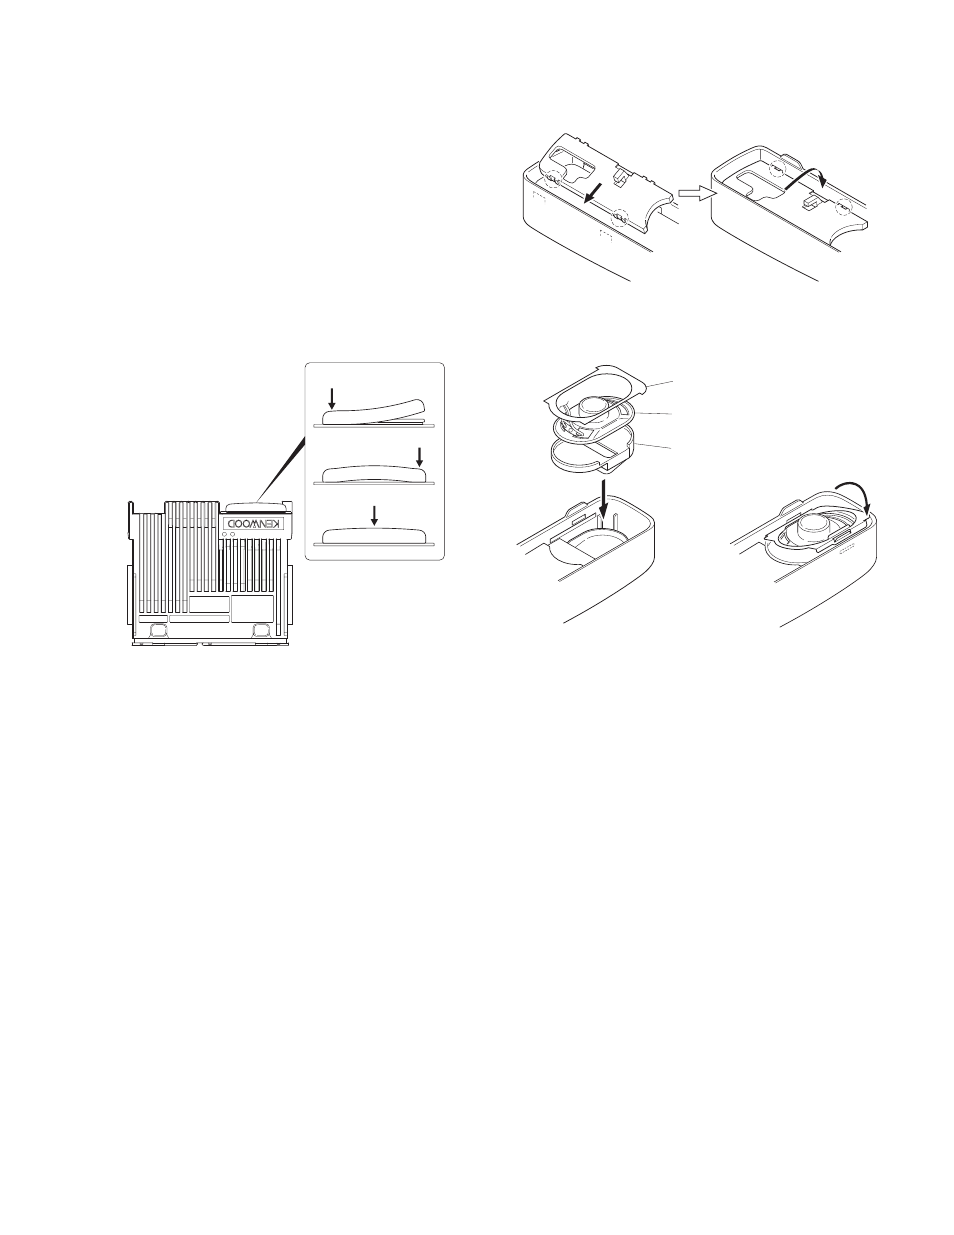
■ Installing the holder (J19-5468-03) and speaker
hardware fixture (J21-8481-03)
1. Insert two tabs of the holder (J19-5468-03) into the hol-
lows in the top of the panel. ( q )
2. Push the two tabs of the holder in on the opposite side of
those in step 1 above and fit them into the hollow in the
bottom of the panel. ( w )
Note : Push in the holder until it snaps in place.
3. Install the speaker holder onto the panel. ( e )
Note : To improve water resistance, fit the panel into the
groove of the holder.
4. Place the speaker into the speaker holder.
Note : The speaker must not ride on the holder rib.
5. Place the spacer on the speaker.
6. Insert the hardware fixture (J21-8481-03) into the hollow
of the panel as shown in Figure 7-3, then push two parts
of the hardware fixture and fit it into the hollow of the top
of the panel. (Fig. 7-3 r )
Note : Push in the hardware fixture until it snaps in place.
7. Insert the speaker connector into the display unit connec-
tor (CN901).
8. Place the speaker lead on the holder hook.
■ D-sub cap installation procedure
To improve water resistance, fit the D-sub cap into the D-
sub terminal hardware fixture of the transceiver in the follow-
ing order:
1. Fit the left side ( q ) of the D-sub cap into the hardware
fixture.
2. Fit the right side ( w ) of the D-sub cap into the hardware
fixture.
3. Fit the center ( e ) of the D-sub cap into the hardware fix-
ture.
Verify that the D-sub cap is in close contact with the hard-
ware fixture.
q
w
e
Fig. 6
Fig. 7-1
DISASSEMBLY FOR REPAIR
Spacer
Speaker
Speaker holder
r
e
Fig. 7-2
Fig. 7-3