Assembly – Simplicity 1691620 User Manual
Page 10
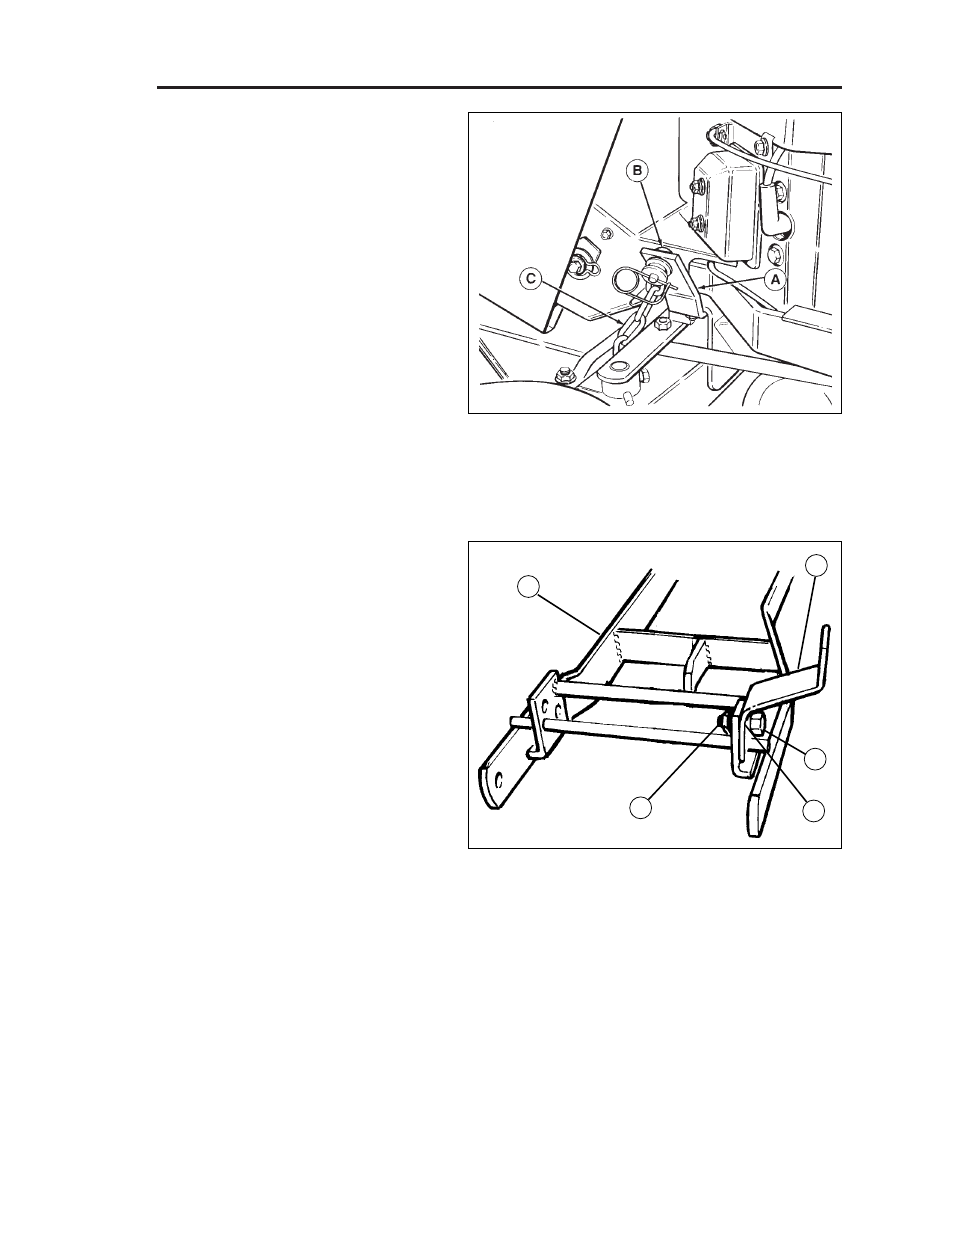
NOTE:
On single cylinder tractors, clevis pin (B,
Figure 6) must be installed to bracket before mount-
ing bracket on tractor frame.
NOTE: Spring-assist bracket (A, Figure 6) does not
need to be installed on units with electric lift.
Broadmoor/LT/1600/2600 Series &
Landlord/GT/1700/2700 Series Only:
7. See Figure 6. Install the spring-assist bracket (A)
to tractor frame (bracket is mounted underneath
frame). Secure with capscrew (from top), lock-
washer, and nut. Place clevis pin (B) through
bracket and install flat washer, chain (C), flat
washer, and safety clip.
8
Assembly
Figure 6. Spring Assist Bracket
A. Bracket
B. Clevis Pin
C. 4-Link Chain
Figure 7. Spring Assist Bracket
A. Spring Assist Bracket
B. Capscrew, 1/2-13 x 1-1/4
C. Lockwasher, 1/2
D. Hex Nut, 1/2-13
E. Hitch
B
D
C
Regent/500/2500 Series Only:
8. See Figure 7. Assemble the spring-assist bracket
(A) to the hitch assembly (E). Secure with cap-
screw, lockwasher, and nut.
9. See Figure 7. Insert spring assist clevis pin
through inside of spring-assist bracket (A), and
secure spring assist chain using flat washers and
safety clip in same manner as shown in Figure 6.
A
Regent/500/2500 Series &
Broadmoor/LT/1600/2600 Series
NOTE: If your tractor is not equipped with the Large
Lift Lever, install it at this time. Follow the instructions
supplied with the kit.
- Broadmoor/LT/1600/2600 Series, order Lift Lever
Kit, mfg. no. 1691832.
- Regent/500/2500 Series, order Lift Lever Kit, mfg.
no. 1692623.
E