Focus adjustment, Fig-7, Fig-6 – Sanyo LNS-W32 User Manual
Page 7
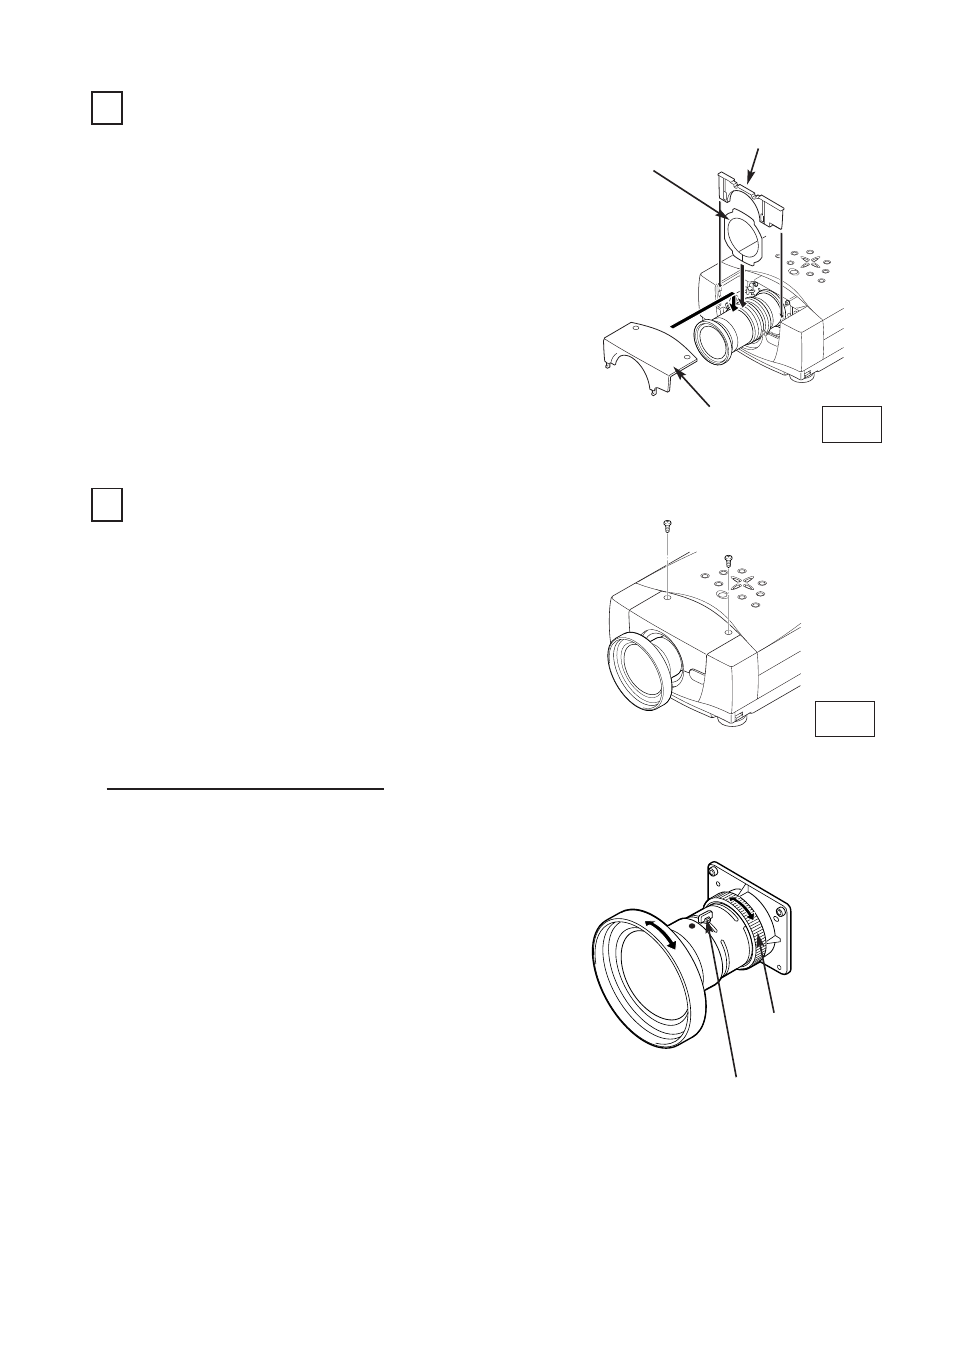
FOCUS ADJUSTMENT
Set up the projector and project image on the screen.
1. Loosen the Focus Lock Screw on the lens.
2. Rotate the lens to obtain proper focus on center
area of the screen.
3. Tighten the Focus Lock Screw.
When proper focus is not observed at outer area of
the screen, proceed to following adjustments.
4. Loosen the Focus Lock Ring of the lens. (Turn the
Lock Ring to counter-clockwise.)
5. Rotate the lens to obtain proper focus on outer
area of the screen.
6. Lock the Focus Lock Ring securely. (Turn the Lock
Ring to clockwise.)
If proper focus is not observed entire screen, repeat
above adjustment 1~ 6.
Focus Lock Screw
Focus Lock Ring
Lens cover is not used.
-7-
5
MOUNT THE LIGHT-BLOCK SHEET AND
LIGHT-BLOCK SHEET BASE (See Figure-6)
6
MOUNT THE FRONT CABINET AND LENS
COVER (See Figure-7)
Mount the light-block sheet on the lens. (In the same
position as the removed sheet has been placed). Use
the sheet included with the lens.
Make sure the mark (TOP and BACK) on Light-Block
Sheet and set them properly.
Mount the light-block sheet base included with the
lens.
1
.
2.
Mount the front cabinet with 2 screws.
1
.
Fig-7
Type PC1
(Part No. 610 310 7967)
LIGHT-BLOCK
SHEET BASE
LIGHT-BLOCK
SHEET
Fig-6
FRONT
CABINET