Lens lock latches, Fig-3, Fig-4 – Sanyo LNS-W32 User Manual
Page 6: Fig-5
4
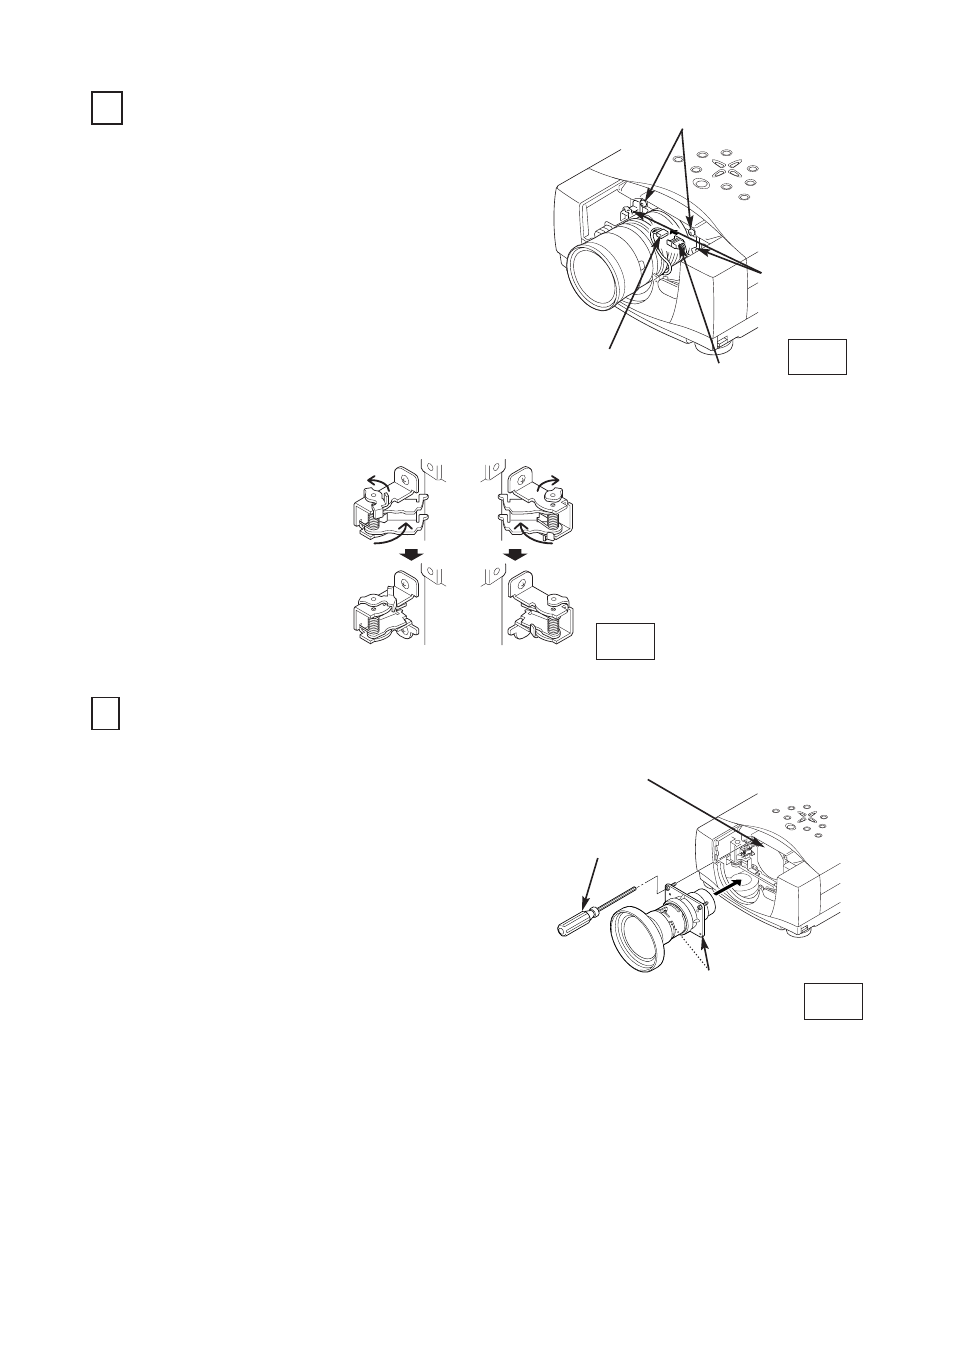
MOUNT THE LENS (See Figure-5)
Remove protective caps (front and back) on the
lens.
Mount the lens on lens mounting bracket with
Upper 2 screws.
Use the driver (4 mm, Yellow) included with the
lens to fasten the screws.
Remove the lower 2 screws on the Lens. (Lower 2
screws are not used.)
Slide the lens lock latches to "LOCK" position and
lock the lens. (See Figure-4)
1
.
2.
3
.
Fig-3
SCREW "B"
LENS LOCK
LATCHES
CONNECTOR
3
REMOVE THE LENS (See Figure-3 and 4)
Remove the lens motor connector from terminal.
Loosen the screws-B (2 screws) which fastens
the lens. {Use the driver (4 mm, Yellow) included
with the lens to loosen the screws.}
Slide the lens lock latches to "UNLOCK" position
and remove the lens.
1
.
2.
Be careful not to drop the lens when removing the
screws. After using, save the driver for latter use.
3.
TERMINAL
LENS LOCK LATCHES
LOCK
POSITION
UNLOCK
POSITION
Fig-4
-6-
DRIVER
IN THE LENS
LENS MOUNTING
BRACKET
Fig-5
LOWER SCREWS
CONFIRM THE FOCUS
Project picture on screen and confirm the focus. If
proper focus is not observed at screen, adjust focus
following Focus Adjustment on next page.