Assembly – Smooth Fitness V390 User Manual
Page 21
www.smoothfitness.com
21
ASSEMBLY
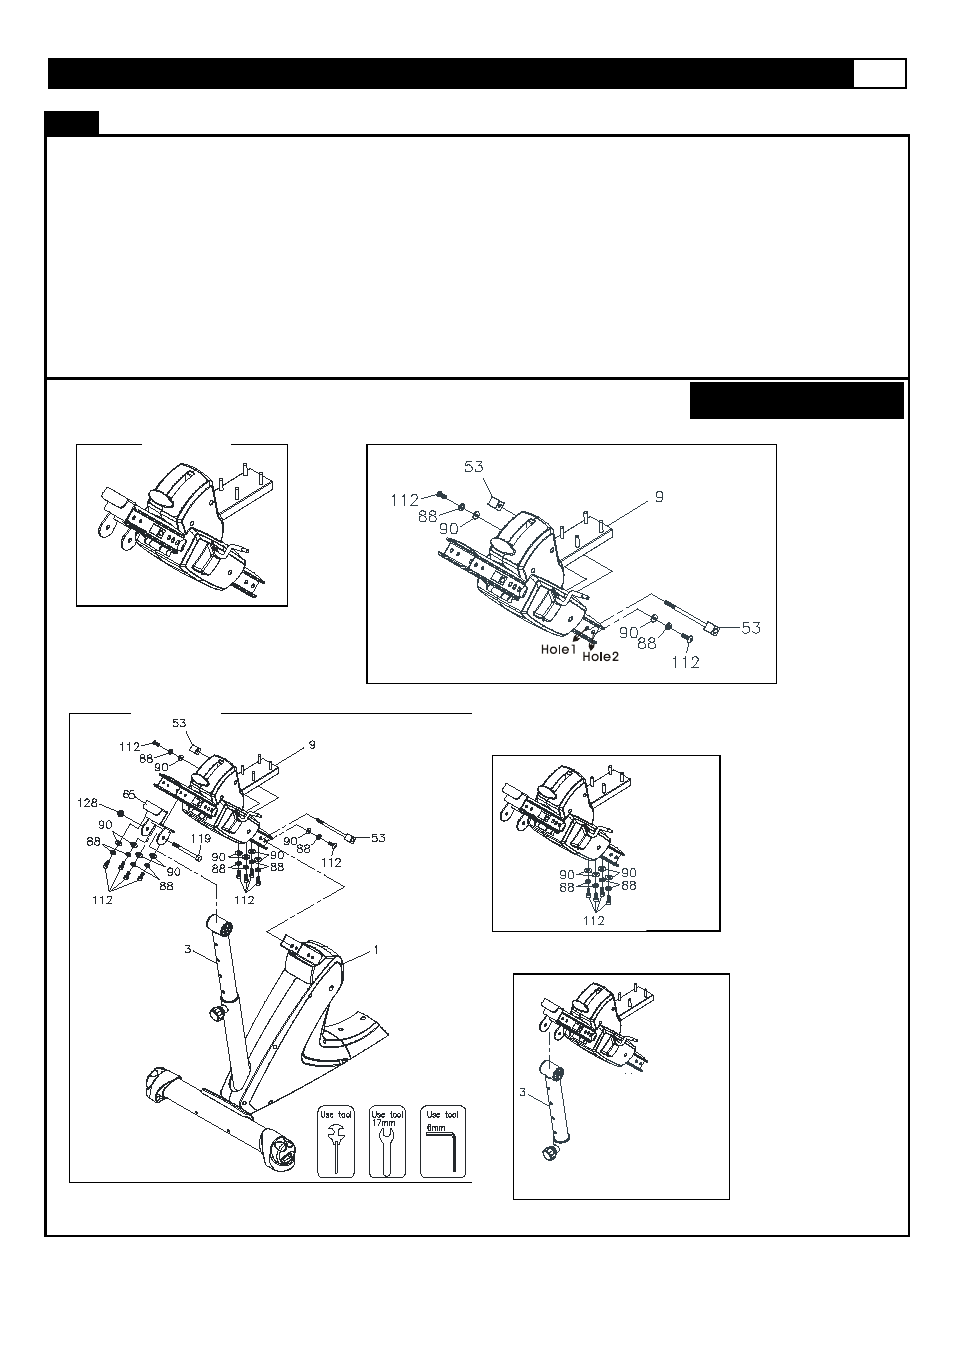
STEP 7: Attach the Seat Rail and the Seat Carriage Assembly
A). Attach the fixed bracket (65) to the rear side of the seat carriage (9) and secure using 4 x M8xp1.25x16mm socket
head bolts (112), 4 x M8 (88) lock washers, and 4 x 8x16x2.0t washers (90).
B). Slide the seat carriage on to the main frame an insert the stopper bolt into hole one pictured below Fig. 3 (note the
stopper is preassembled to the bolt and nut)
C). Insert 2 x
M8xp1.25x16mm socket head bolts (112), Lock Washers (M8)(88), and
2 x
8x16x2.0t washers (90)
through the left and right side of hole 2 pictured below Fig 2.
D) Secure the bottom of the front seat carriage to the main frame using 4 x
M8xp1.25x16mm socket head bolts (112),
4 x M8 lock washers (88), and 4 x 8x16x2.0t washers (90) Fig. 3 & 4. Do not fully tighten until step 7 is completed.
E) Attach the rear of the seat carriage the inner seat carriage slider and secure using 1 x
M10xp1.5x90mm hex head
bolt (119) and 1 x M10xp1.5 thin nylon lock nut (128) See fig. 5.
F) Tighten all bolts now
USE HARDWARE KIT
C
Fig. 2
Fig. 1
Fig. 3
Fig. 4
Fig. 5