Setting a custom white balance – SIGMA SD10 User Manual
Page 51
51
SETTING THE WHITE BALANCE
SETTING A CUSTOM WHITE BALANCE
For more precise control of the white balance setting or when photographing under
unusual lighting conditions, the "Set Custom WB" option can be used to capture a
sample of neutral object in a scene to be used for color correction.
1
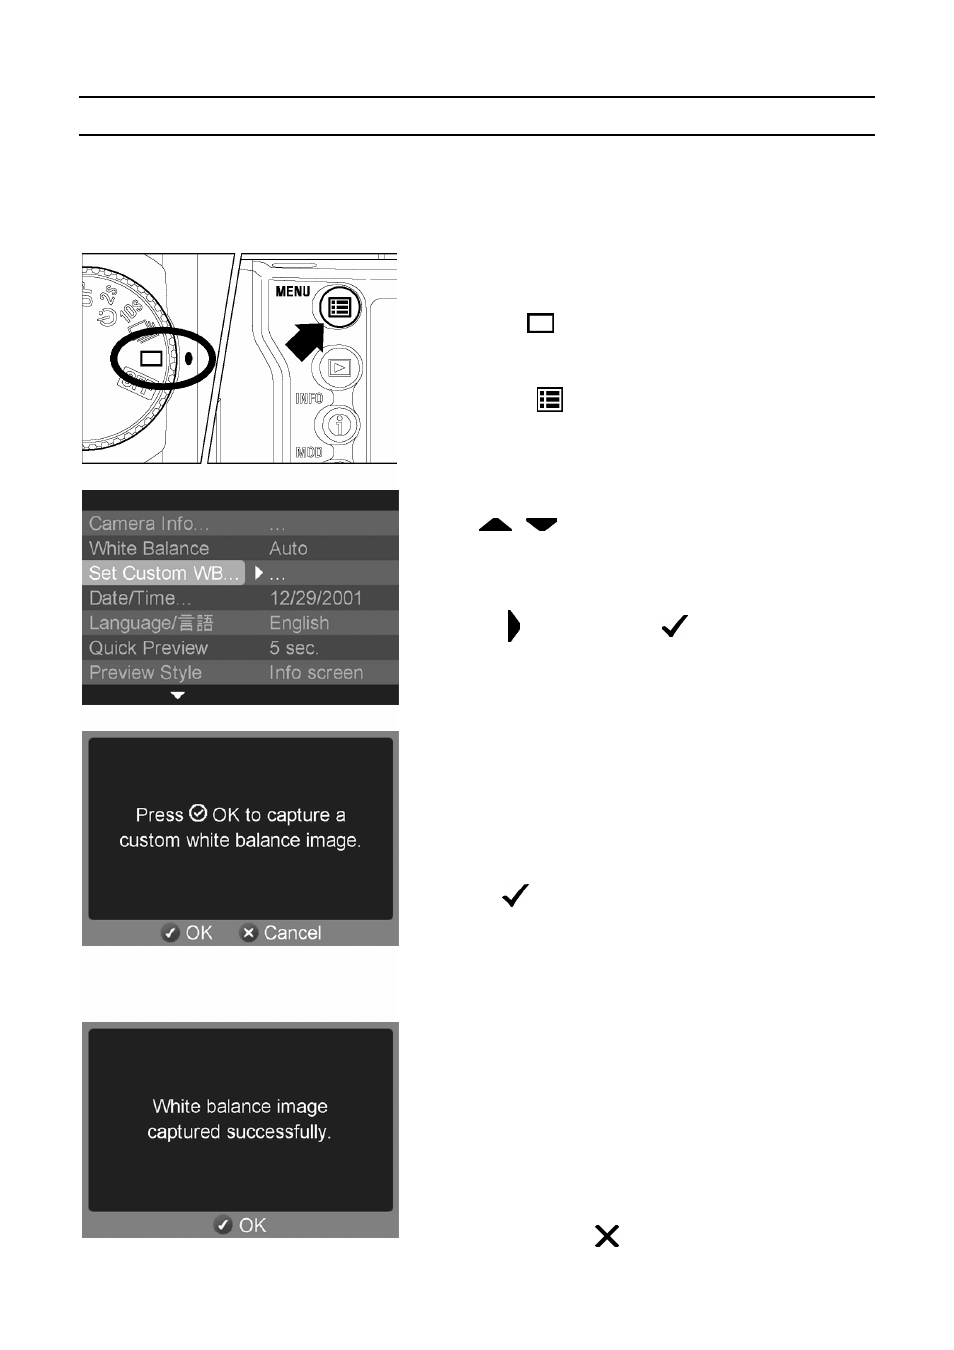
Make sure that "D"-dial is set to Single Frame
Shooting
<
>
.
2
Press the
<
MENU>
button on the back of
the camera to display the Camera Set-up Menu.
(See P.96)
3
Use
<
/
>
arrows on the 4-way controller
to select “Set Custom WB”.
4
Press
< >
arrow or
<
OK>
to open the
custom white balance dialog screen.
5
Under the lighting conditions that will be used for
the final photograph, frame a white or neutral
color object, such as a sheet of white paper or a
white wall, so that it fills the Center Area
Metering circle inside the viewfinder.
6
Press
<
OK >
to release the shutter and
capture a custom white balance setting.
•
If you press the shutter button instead, the
custom white balance dialog will be dismissed
and a regular image will be captured and
stored on the CF card.
7
If a valid white balance setting was captured, a
message will appear indicating that the white
balance image was captured successfully. If the
capture was not successful, "Failed!" will be
displayed on the color LCD monitor. Repeat
steps
5 and 6 to capture a valid white balance
setting or press <
CANCEL> to dismiss the
dialog.