Installing truetype fonts – Star Micronics LC-8211+ User Manual
Page 59
52 Using the printer with Windows 95
Installing TrueType fonts
To install the TrueType fonts that are on the floppy disk accompanying this
printer, follow the procedure below.
❏
Insert the disk in your computer’s floppy disk drive.
❏
Click on the
Start
button in the bottom lefthand corner of the screen.
❏
Select
Settings
.
❏
Release the mouse button on
Control Panel
.
❏
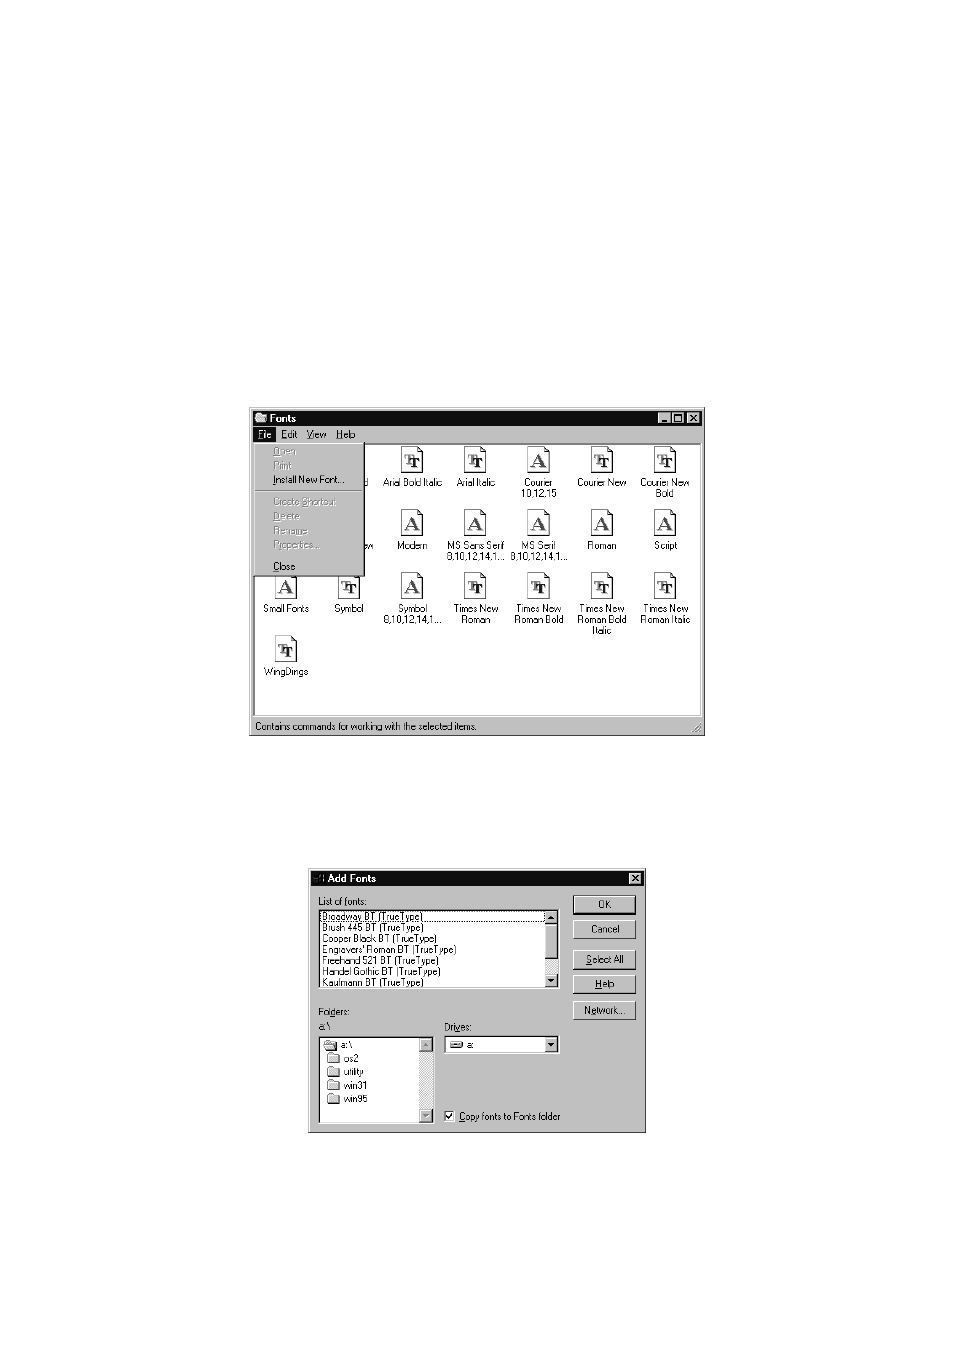
Double-click on the
Fonts
folder. The currently-installed font files are
displayed.
❏
Click on the
Files
menu.
❏
Click on the
Install New Font...
command.
❏
Display the drive’s name (“A:” or “B:”) in the Drives field. To select a drive
name, click on the arrow by the side of the field and select the drive from
the list that appears. The names of the fonts stored on the disk are displayed
in the List of fonts window.
❏
Select the fonts you wish to install by clicking on them. If you want to
install all of them, click on the
Select All
button.
❏
Click on the
OK
button.
The new fonts can now be seen in the
Fonts
folder window. This concludes the
font installation.