Sub-Zero 424/O User Manual
Page 14
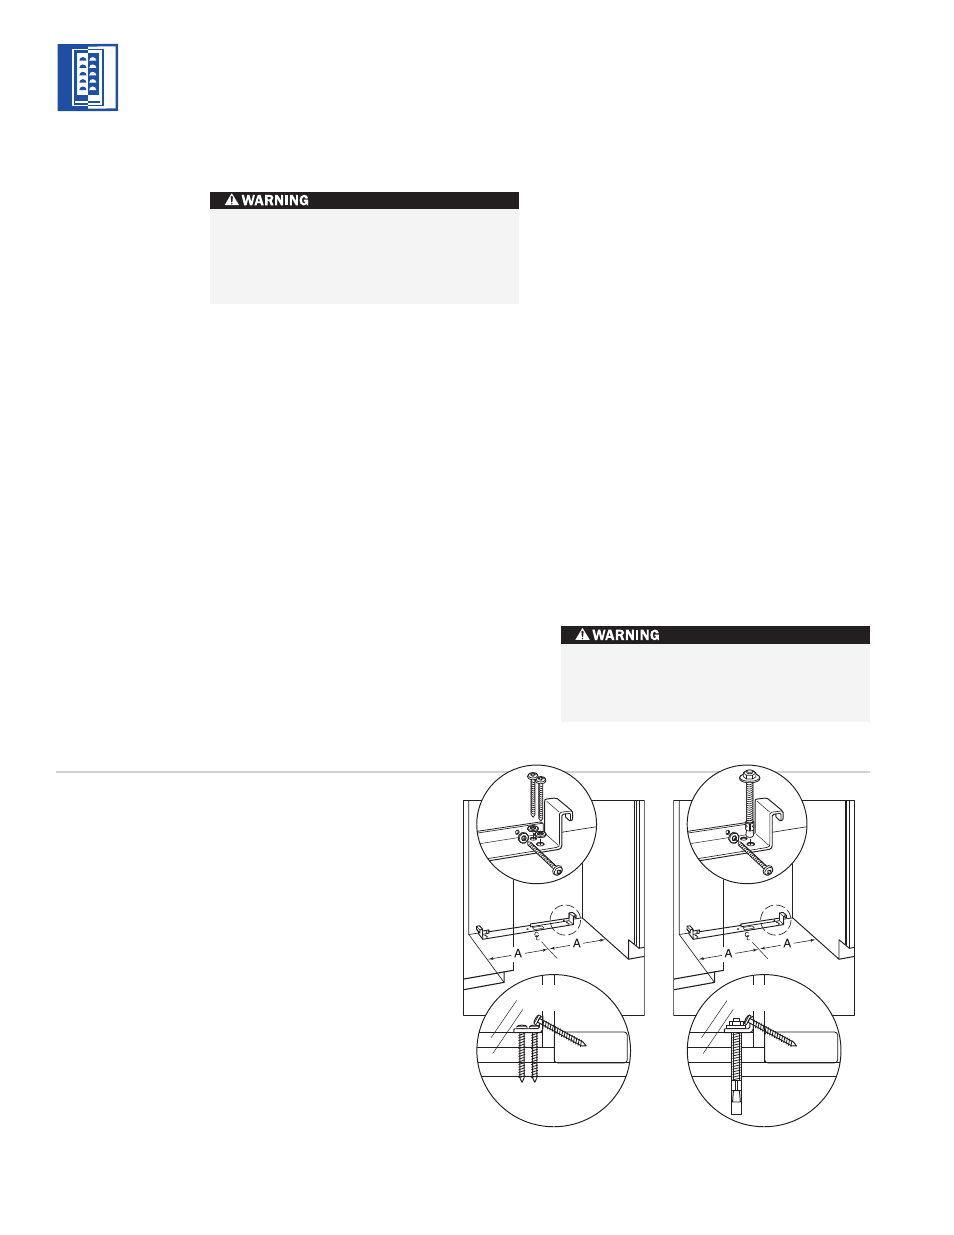
W O O D F L O O R A P P L I C A T I O N S
Use the six #12 x 2
1
/
2
" wood screws and the
six
1
/
4
" flat washers provided. Drill pilot holes
3
/
16
" (5) diameter maximum, and be sure that
the screws penetrate through the flooring
material and into the wall plate a minimum of
3
/
4
" (19). Be sure that the screws hold tight.
Refer to illustration 1 below.
C O N C R E T E F L O O R A P P L I C A T I O N S
Use the two
3
/
8
" x 3
3
/
4
" concrete wedge
anchors, two # 12 x 2
1
/
2
" wood screws and two
1
/
4
" flat washers provided. Be sure that the
anchors and screws hold tight. Refer to illus-
tration 2 below.
IMPORTANT NOTE: In some installations the
subflooring or finished floor may require
angling the wood screws used to fasten the
anti-tip bracket to the back wall. Refer to illus-
trations 1 and 2 below.
14
M O D E L S 4 2 7
A N D
4 2 7 R
I N S T A L L A T I O N
A N T I - T I P B R A C K E T
I N S T A L L A T I O N
An anti-tip bracket and hardware is provided
with the Wine Storage unit. The anti-tip
bracket must be installed on a solid base to
prevent tipover in case several loaded wine
shelves are extended at the same time.
If you are installing the Model 427 or 427R in a
space deeper than 24" (610), the anti-tip
bracket must be installed no more than 24"
(610) deep, so it engages the unit properly. It is
important that this measurement be made
from the front of the unit without panels, to
the back of the anti-tip bracket.
To prevent the unit from tipping forward
and provide a stable installation, install
the anti-tip bracket and extend the front
leveling legs to the floor.
Make sure that there are no electrical
wires in the area which the screws could
penetrate.
M O D E L S
4 2 7 | 4 2 7 R
WOOD FLOOR
Finished Flooring
Underlayment
Subflooring
Wall Plate
Finished Flooring
Underlayment
Subflooring
Wall Plate
CONCRETE
FLOOR
1
1
/
2
"
min
(38)
Illus. 1
Illus. 2
S P E C I F I C A T I O N S
Dimension A
13
1
/
2
" (343)