Installing an optional module into the switch, Figure 3-5, Installing an optional module – SMC Networks TIGERSTACK II SMC8950EM User Manual
Page 39
3-5
Installing an Optional Module into the Switch
3
3.
If installing a single switch only, go to "Connecting to a Power Source" at the
end of this chapter.
4.
If installing multiple switches, attach four adhesive feet to each one. Place each
device squarely on top of the one below, in any order.
5.
If also installing an RPS, place it close to the stack.
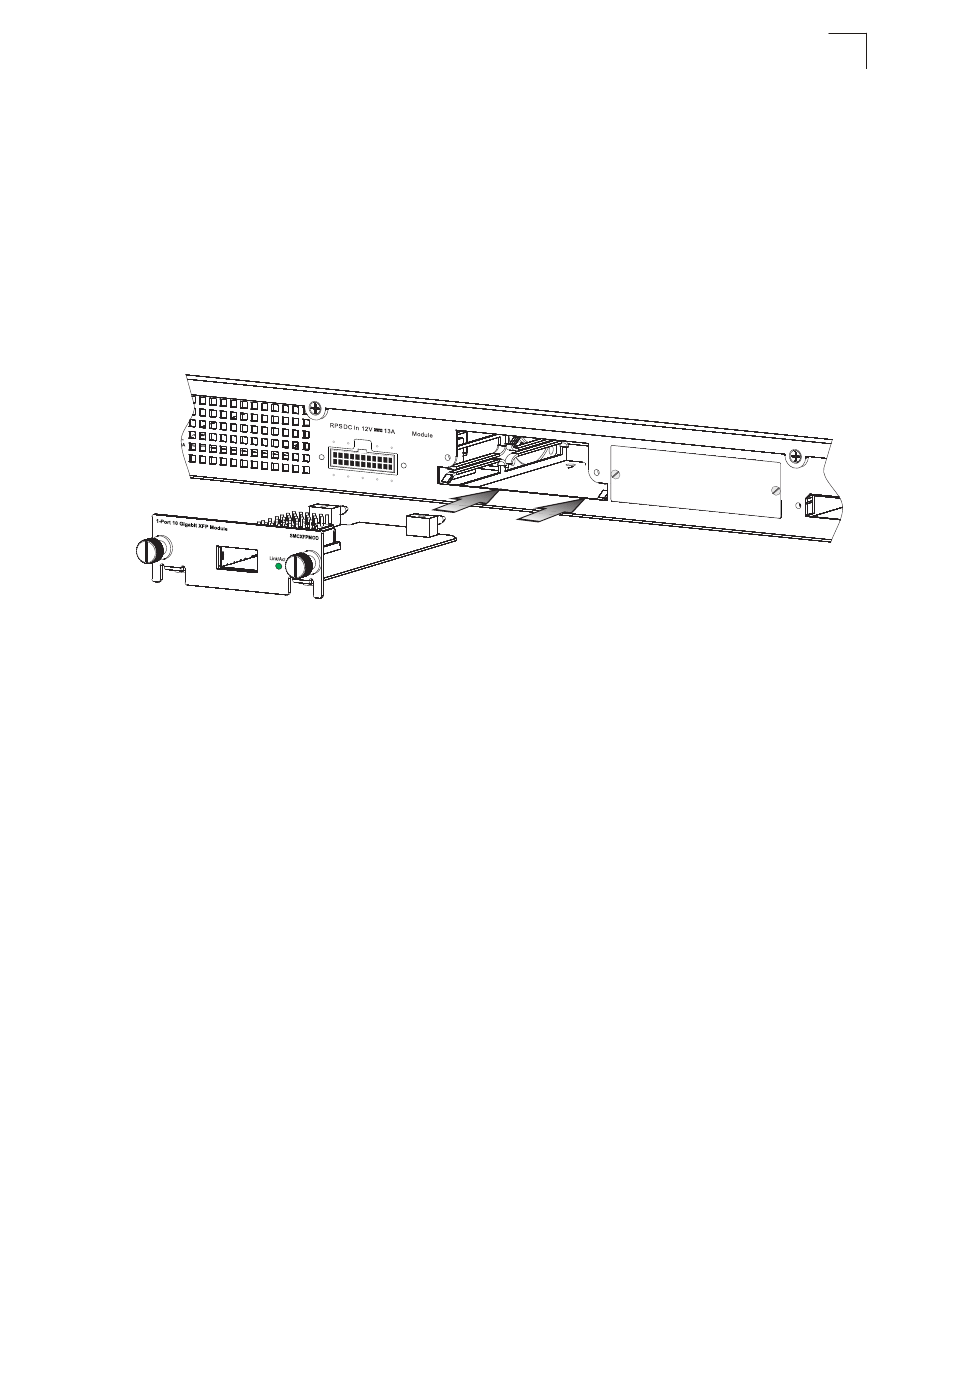
Installing an Optional Module into the Switch
Figure 3-5 Installing an Optional Module
Note: The slide-in modules are hot-swappable, you do not need to power off the switch
before installing or removing a module.
To install an optional module into the switch, do the following:
1.
Remove the blank metal plate (or a previously installed module) from the
appropriate slot by removing the two screws with a flat-head screwdriver.
2.
Before opening the package that contains the module, touch the bag to the
switch casing to discharge any potential static electricity. Also, it is
recommended to use an ESD wrist strap during installation.
3.
Remove the module from the anti-static shielded bag.
4.
Holding the module level, guide it into the carrier rails on each side and gently
push it all the way into the slot, ensuring that it firmly engages with the
connector.
5.
If you are sure the module is properly mated with the connector, tighten the
retainer screws to secure the module in the slot.
6.
The Module LED on the switch’s front panel should turn green to confirm that
the module is correctly installed and ready to use.