SATO MB400I User Manual
Page 23
Reference
14
45
Reference
14
44
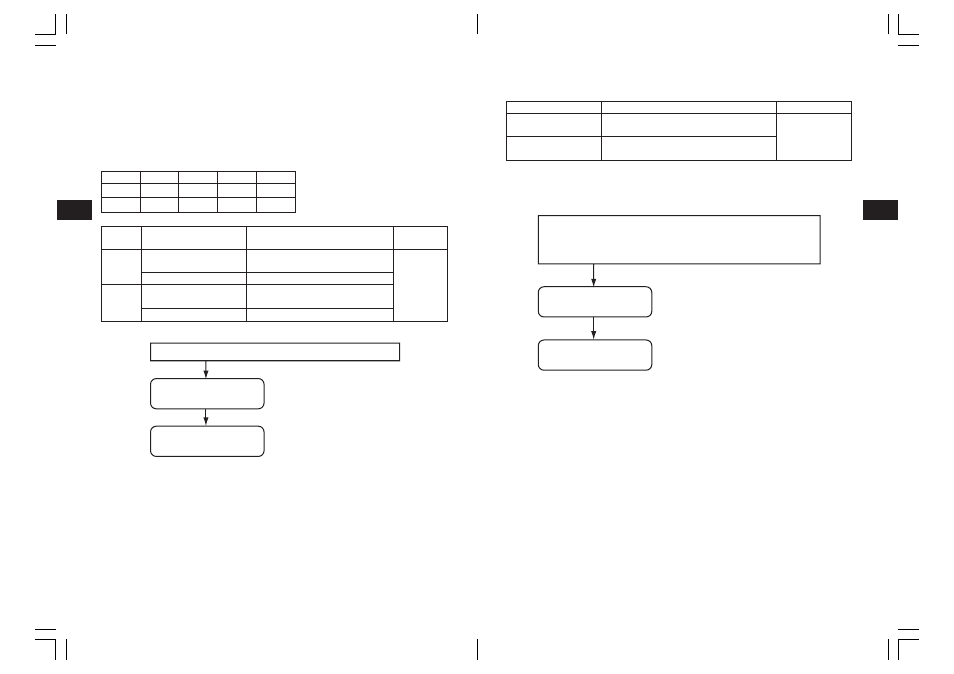
Online command setting mode
Online command setting details
Change online command setting
The online command setting is changed by the DIP switch (DSW) settings when the power
is turned on, and by button settings. The settings are enabled upon turning the power off.
Note:
When the buzzer sound mode is enabled, the buzzer sounds upon startup.
Release the PRINT/FEED button to stop the buzzer. To check the settings for the
online command setting mode, see the test print output (See P. 23).
To end online command setting, confirm that the STATUS LED is on in green, then
turn the power off. After changing the online command setting mode, be sure to
restore the DSW to their original settings.
1
MB400 compatibility command setting
DSW-1,2,3,4=(ON,ON,ON,ON) + cover open + PRINT button + POWER
2
SBPL command setting
DSW-1,2,3,4=(ON,ON,ON,ON) + cover open + FEED button + POWER
Processing setting
(STATUS LED flashes green)
Settings complete
(STATUS LED lights green)
Type
MB400 compatibility
command setting
SBPL command setting
Operation
Sets the online command as standard
legacy command (of the MB200/400 series).
Sets the online command as an SBPL
command.
Default
SBPL command
setting
Head check setting mode
In the head check setting mode, a check can be performed in two checking areas: the
printing area and the barcode printing area.
The presence of the head check function and the head check range settings are set by the
DIP switch (DSW) settings when the power is turned on, by button pressing status, and by
the cover status.
DIP switch settings
Setting head check function
(STATUS LED flashes green)
DSW settings (A/B) + cover open + PRINT/FEED button + POWER
Setting completes
(STATUS LED lights green)
Note:
When the buzzer sound mode is enabled, the buzzer sounds upon startup.
Release the PRINT/FEED button to stop the buzzer. To check the settings for head
check setting mode, see the test print output (See P. 23).
To end head check setting, confirm that the STATUS LED is on in green, then turn
power off. After changing the head check setting mode, be sure to restore the DSW
to their original settings.
(A)
(B)
DSW-1
OFF
ON
DSW-2
ON
OFF
DSW-3
OFF
OFF
DSW-4
ON
ON
DSW
settings
(A)
(B)
Button and cover status
PRINT button + cover open
FEED button + cover open
PRINT button + cover open
FEED button + cover open
Function
Head check range set as printing
area
Head check function set as disabled
Head check range set as barcode
printing area only
Head check function set as disabled
Default
Head check
range set as
printing area