JVC GC-A55 User Manual
Page 18
[Back] [Next]
Customized Shooting
(CAMERA MODE)
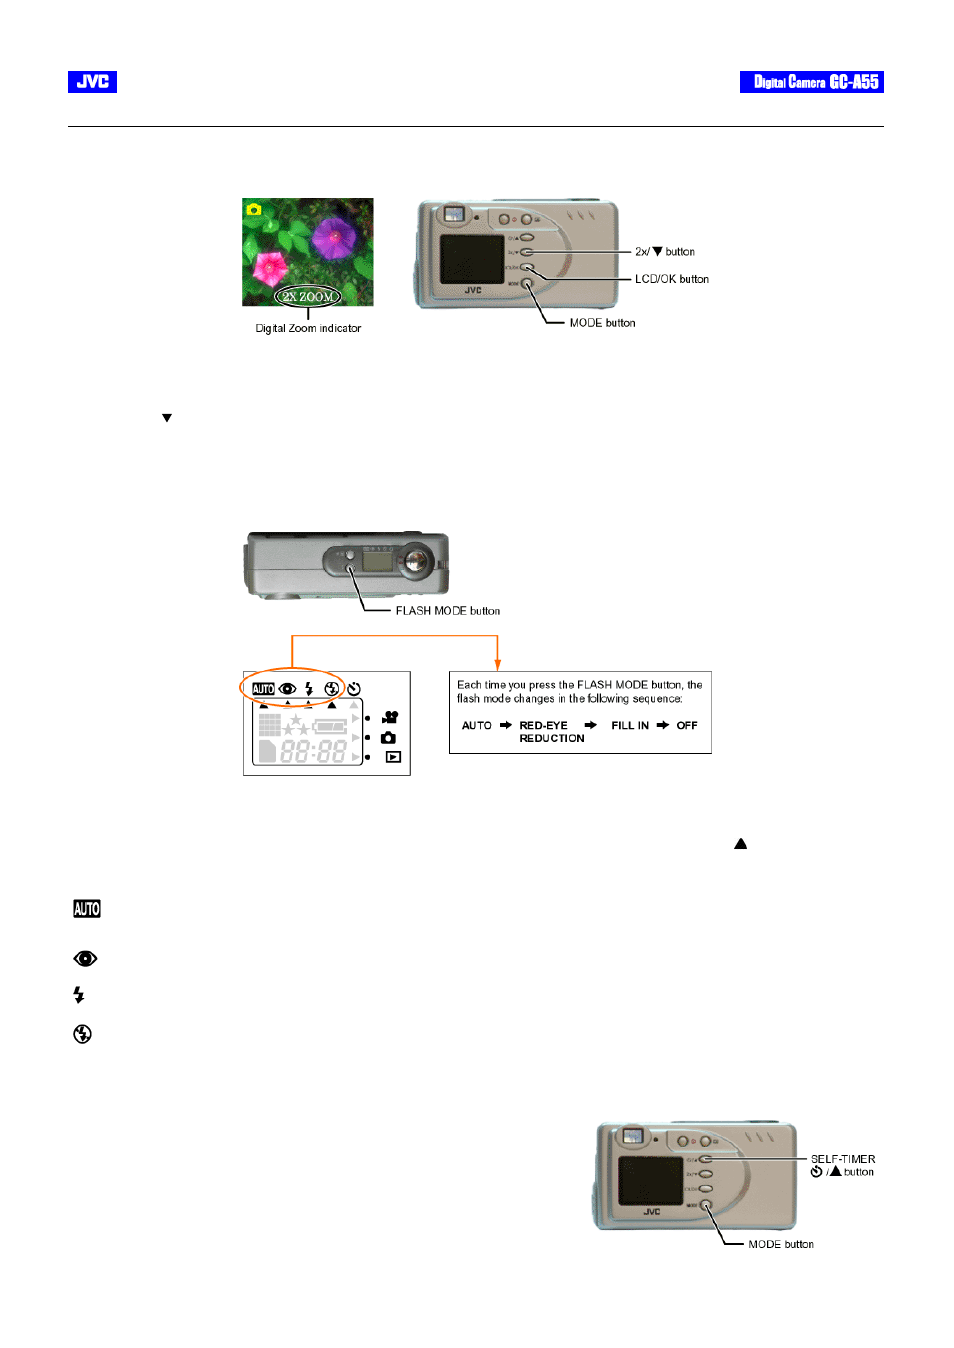
(1) Zooming
This mode allows you to zoom up on your subject, making it appear larger (maximum 2X) and closer. Note that the digital zoom function is only
available when the LCD monitor is ON. The
resolution
is automatically set at VGA (640 x 480 pixels) upon activating the zoom function.
Procedures:
1. Ensure that the camera is turned on.
2. Select the Camera mode with the MODE button.
3. Ensure that the LCD monitor is activated. (Toggle the LCD/OK button to activate/deactivate it).
4. Press the 2x/ button to activate the digital zoom function. The image on the LCD monitor will be enlarged.
5. To deactivate the digital zoom function, press the same button again.
6. Frame your subject. Then, press the shutter button fully down. (For details, see ‘
Shooting Basics
’)
(2) Using Flash
The flash is designed to fire automatically when required. (Default setting : AUTO). To suit the different conditions, however, you can change the
flash mode. Press the flash button until the desired flash mode (AUTO, RED-EYE REDUCTION, FILL-IN, OFF) is indicated by the cursor.
Procedures
1. Ensure that the camera is turned on.
2. Select the Camera mode with the MODE button.
3. Press the flash button until the desired flash mode (AUTO, RED-EYE REDUCTION, FILL-IN, OFF) is indicated by the cursor.
4. Frame your subject. Then press the shutter button fully down. (For details, see ‘
Shooting Basics
’)
Note:
The red-eye reduction function may have little effect if the subject is not directly facing the pre flash or main flash, or when the distance between
the camera and the subject is too far.
AUTO Flash
The flash fires automatically according to the photography conditions. It is suitable for general photography.
Red-Eye
Reduction (RER)
Use this mode to avoid the red-eye effect when photographing people or animals in low light conditions.
Fill-In Flash
The flash fires regardless of the surrounding brightness. It is suitable for photographing in artificial light (backlighting,
fluorescent lighting, etc.).
Flash Off
Used where the use of flash is prohibited or when utilizing the night view/indoor lighting for shooting. The flash can also be
turned off when the distance to the subject is too far away for the flash to have any effect.
(3) Using Self-Timer
With the Self Timer (10 seconds delayed shutter) function, the photographer too, can get
into the frame when taking group pictures.