JVC GC-A55 User Manual
Page 15
This camera can be used with either an SD card or a Multimedia card (MMC).
When traveling and capturing a lot of images, it is convenient to make use of an SD or a Multimedia card. When a card is inserted into the
camera, still images/video clips captured will be stored in the card’s memory. When the card is removed, the camera’s internal memory
will be used as the storage media.
Notes :
SD and Multimedia cards are purchased separately.
Pay attention to the card direction when inserting. Wrong direction and forced insert can break it.
When the memory card is inserted, access to the camera's internal memory is not possible.
Cards available in the market, and those already formatted for PC and other devices may not be identified by this camera. Therefore,
before using them, it is necessary to
format
them first with this camera.
While the power of the camera is on, do not open the battery cover to replace the memory card or batteries as this may cause
irrecoverable corruption of card data.
The memory card is a sensitive device so it should not be subject to any shock. Do not touch the metal part of the card with your
hand.
When the memory card is write-protected, it cannot be used. You have to disable the write-protection first.
Switching the Power ON / OFF
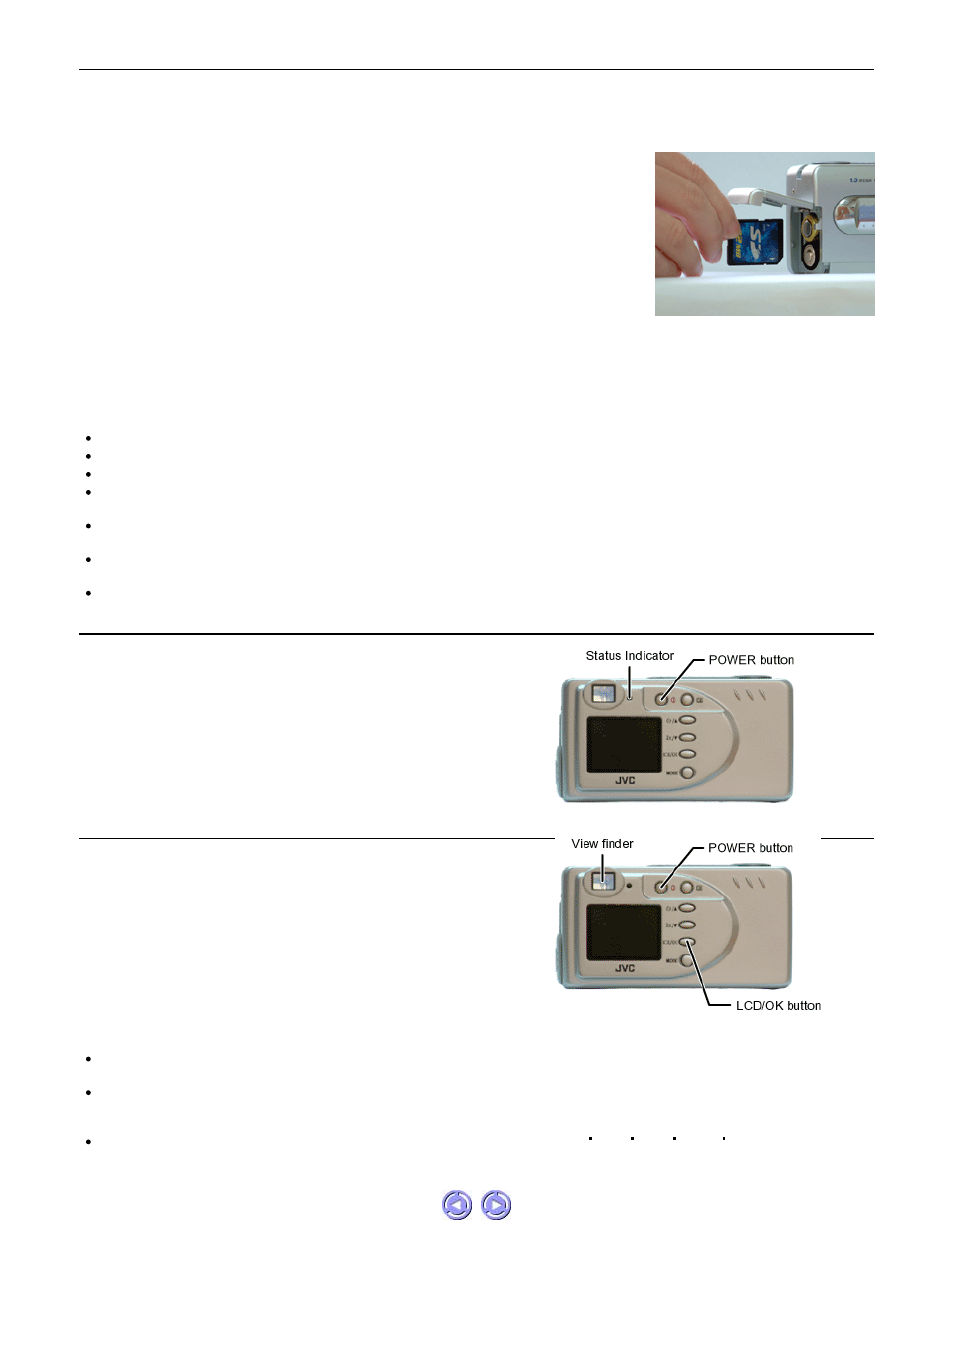
Inserting the Memory Card
1. Turn off the camera's power by pressing the POWER button.
2. Open the Battery/Memory card compartment door.
3. Firmly insert the memory card into the memory card slot as far as it can go, with the
memory card electrodes (metal contacts) end facing the camera.
4. Close back the door firmly.
Removing the Memory Card
1. Turn off the camera's power by pressing the POWER button.
2. Open the Battery/Memory card compartment door.
3. Push the memory card in as far as it can go and release. The card will spring back and
protrude slightly. Pull it out with your fingers.
4. Close back the door firmly
Switching the LCD Monitor ON / OFF
Press the POWER button to toggle ON / OFF.
The Status Indicator will lit up immediately upon power on. The light will go off
after a while (the length of time varies with the capacity of the memory card that
is inserted in the camera) and the camera will then be ready for use.
Notes :
The
DATE/TIME setting screen
will appear on the LCD monitor upon its activation in the case of a newly purchased camera or if the
camera has not been used for a long time.
When the camera is in the Play/Delete mode, the LCD monitor cannot be turned off. The still image/ video clip taken most recently will
be shown on the LCD monitor. Further, in the case that no image/video clip exists in the memory, the message "NO IMAGE" will be
shown on the LCD monitor.
When no operation is performed within a certain time interval (user set value : [1min] [3min] [5min] [10min] [CANCEL]); Default
value : [3min]), the camera will automatically turn off.
The LCD monitor is automatically activated when the power is switched on.
However, since the LCD monitor consumes battery power fast, we recommend
that you turn off the LCD monitor and use the optical viewfinder as far as
possible when capturing still images. To switch the LCD monitor ON or OFF,
toggle the LCD/OK button.