Installing the ferrite core, Connections on the back, Connection/installation – JVC TK-C1430 User Manual
Page 16: E-16, Power supply
E-16
DC12V
AC24V
CLASS 2 ONL
Y(U
TYPE)
ISOLA
TED PO
WER ONL
Y
(E
TYPE)
TX
+
TX
-
RX
+
RX
-
AUX
Y/C OUT
SYNC IN
POWER
VIDEO OUT
GND
A
B
C
D
SEE INST-
RUCTION
MANUAL
1
+
-
2
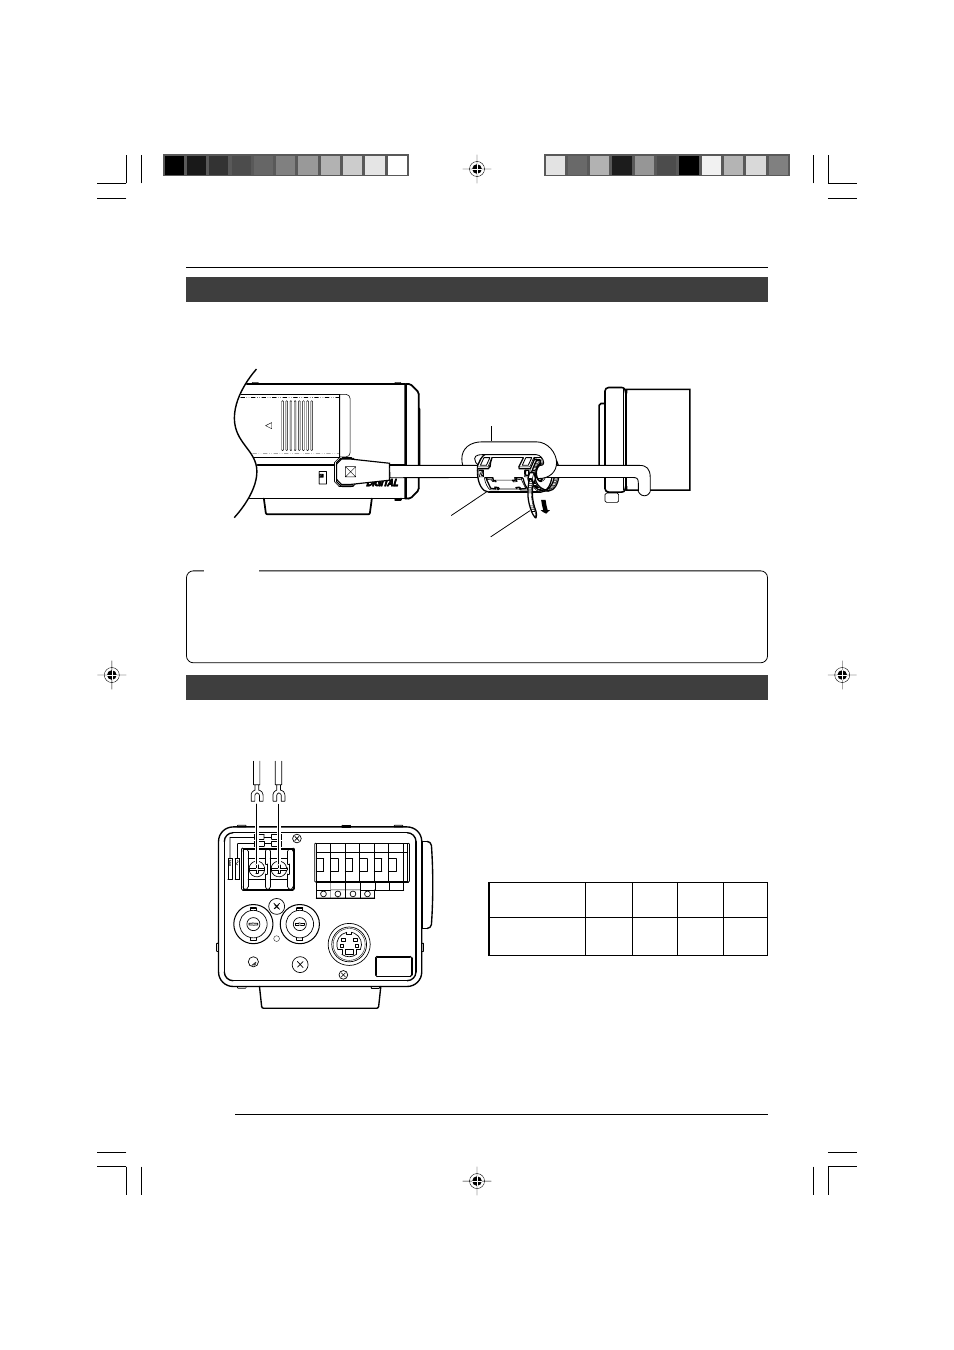
Connect the DC 12 V or the AC 24 V power
supply to the DC 12V/AC 24V terminals. To
prevent connection errors or a cable
disconnection, we recommend the use of lug
plates for the connections.
The following table shows the connection
distances and connection cables provided
that 2-conductor VVF cables (vinyl-insulated
vinyl sheath cables) are used.
Maximum extension
(reference)
Conductor
diameter
100 m 260 m 410 m 500 m
1.0∅mm 1.6∅mm 2.0∅mm 2.6∅mm
and more and more and more and more
Connections on the back
CONNECTION/INSTALLATION
Ⅲ Power supply
TK-C1430E (DC 12 V or AC 24V)
Installing the ferrite core
To retain electromagnetic compatibility, use the ferrite cores provided when connecting to
the lens.
Ferrite core
Video-iris lens
(or galvanometnc-iris lens)
VIDEO
DC
IRIS
Wire clamp
Wind once
Notes:
• Install the ferrite cores within 50 mm of the camera-side connectors. (Fasten the ferrite
core with the wire clamp provided.)
• If the LENS cable is short, please connect the cable to the camera without winding the
cable around the ferrite core.
TK-C1430_06-22_E
05.6.21, 11:10 AM
16