Jet Tools DC-1200CK User Manual
Page 10
10
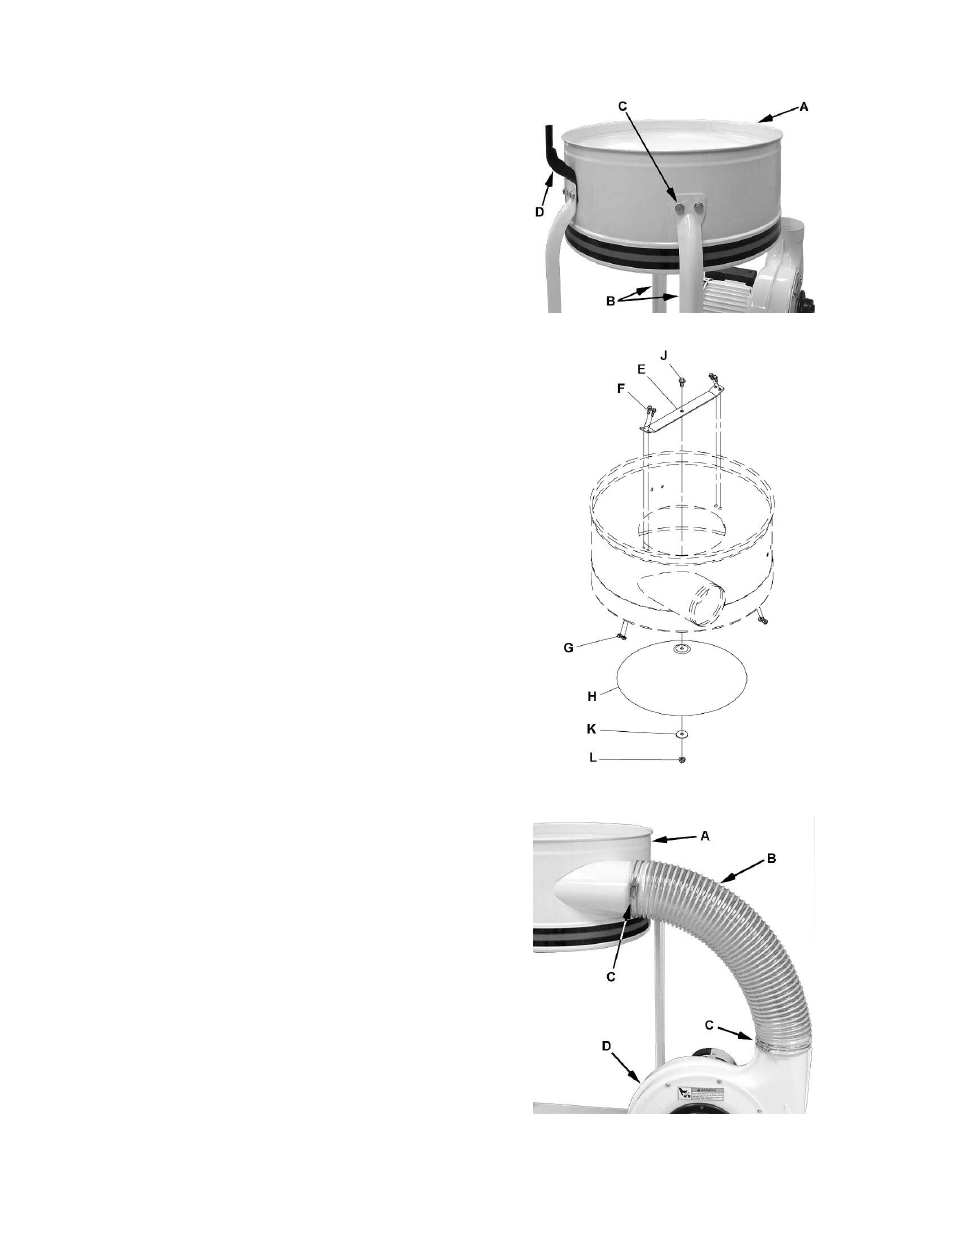
6. Install the housing (A, Fig. 5) to two support
legs
(B, Fig. 5) using four M8 x 16 hex cap bolts,
eight M8 flat washers, and four M8 hex nuts (C,
Fig. 5). Be sure hose opening faces fan housing.
Note:
For models DC-1200BK or DC-1200-3BK
only – Before attaching third support bracket place
the hanger bracket (D, Fig.5) between the support
bracket and the housing.
7. Tighten all nuts and bolts at this time with a 13mm
wrench.
Cone Assembly
Referring to Figure 6:
8. Mount the cone support bracket (E) to the housing
with four M6x12 hex cap screws (F), and tighten
from beneath with four M6 hex nuts (G).
9. Install
the cone (H) from beneath using the M8x16
hex cap screw (J), M8 flat washer (K), and M8 hex
nut (L), and tighten.
Hose
Referring to Figure 7:
10. Attach the hose (B) between the fan housing (A)
and the impeller housing (D) with two clamps (C).
Tighten the clamps to secure the hose.
This completes the Base Unit assembly. If you
purchased the DC-1200BK or DC-1200BK-3 Dust
Collector
(filter bag version), continue on the following
page. If you purchased the DC-1200CK or DC-
1200CK-3 Dust Collector
(canister filter version),
proceed to Canister Kit Assembly section on page 12.
Figure 5
Figure 6
Figure 7