Replacing a microprocessor, Front, Bezel – IBM 8306 User Manual
Page 78: Types, Replacing, Microprocessor
1.
Turn
off
the
computer
and
peripheral
devices
and
disconnect
all
external
cables
and
power
cords;
then,
remove
the
cover.
See
2.
Remove
the
2
screws
holding
the
CD
cage
in
place
and
pull
the
cage
out.
Front
bezel
Types
8307,
8308,
8310,
8311,
8314,
and
8315
To
remove
the
front
bezel,
do
the
following:
1.
Turn
off
the
server
and
peripheral
devices
and
disconnect
all
external
cables
and
power
cords.
2.
Push
in
on
the
bezel
release
arm
(the
blue
arm
sticking
out
of
the
back
of
the
chassis)
to
detach
the
bezel
from
the
chassis.
3.
Pull
the
bezel
off
the
front
of
the
computer.
Replacing
a
microprocessor
To
replace
a
microprocessor
on
any
of
the
machine
types,
do
the
following:
1.
Turn
off
the
computer
and
peripheral
devices
and
disconnect
all
external
cables
and
power
cords;
then,
remove
the
cover.
See
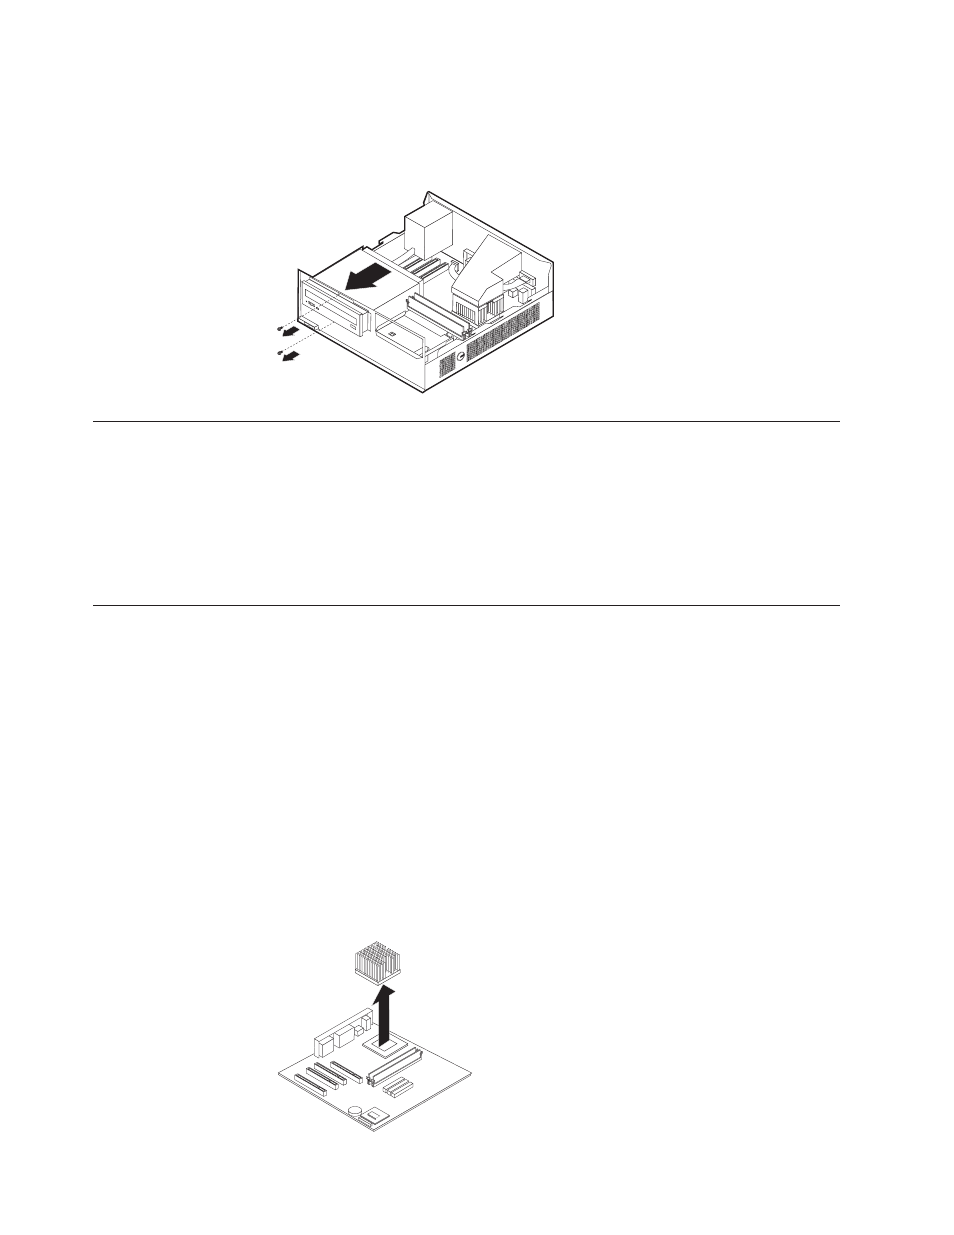
2.
Remove
the
CD
drive
cage.
3.
Remove
the
rear
section
of
the
power
source.
See
4.
Loosen
the
two
captured
screws
that
hold
the
fansink
in
place,
and
pivot
them
off
of
the
fansink
notches.
5.
To
remove
the
fansink
from
the
processor,
twist
the
fansink
to
break
the
seal
formed
by
the
thermal
grease
and
remove.
Note:
If
the
thermal
grease
seal
cannot
be
broken,
you
may
want
to
start
up
the
system
to
heat
the
processor
and
loosen
the
thermal
grease.
72
Hardware
Maintenance
Manual