3 d video, Initial setup, Watching 3d video – Mitsumi electronic C10 SERIES User Manual
Page 13: Setup and operation
1. Setup and Operation
13
For assistance call 1(800) 332-2119
3 D Video
Notice Concerning Format Compatibility
In order to display 3D images. Mitsubishi 3D Ready DLP
Home Cinema TVs require the use of a 3D source device
coupled with the Mitsubishi 3D adapter or other source
devices that support checkerboard display formats for
display of 3D games, 3D broadcasts from terrestrial/cable/
satellite and 3D Blu-Ray disc content. In all cases an emitter
and matching 3D active shutter glasses or DLP Link active
shutter glasses are required in order to view 3D content.
To display 3D gaming or 3D cinema content, your
Mitsubishi TV requires:
A compatible 3D source device outputting a 3D
•
signal in checkerboard format, 1080p, 60-Hz; lower
resolutions may be supported but will not fill the
screen.
Active-shutter 3D glasses, DLP link type or IR
•
emitter type with matching emitter.
Initial Setup
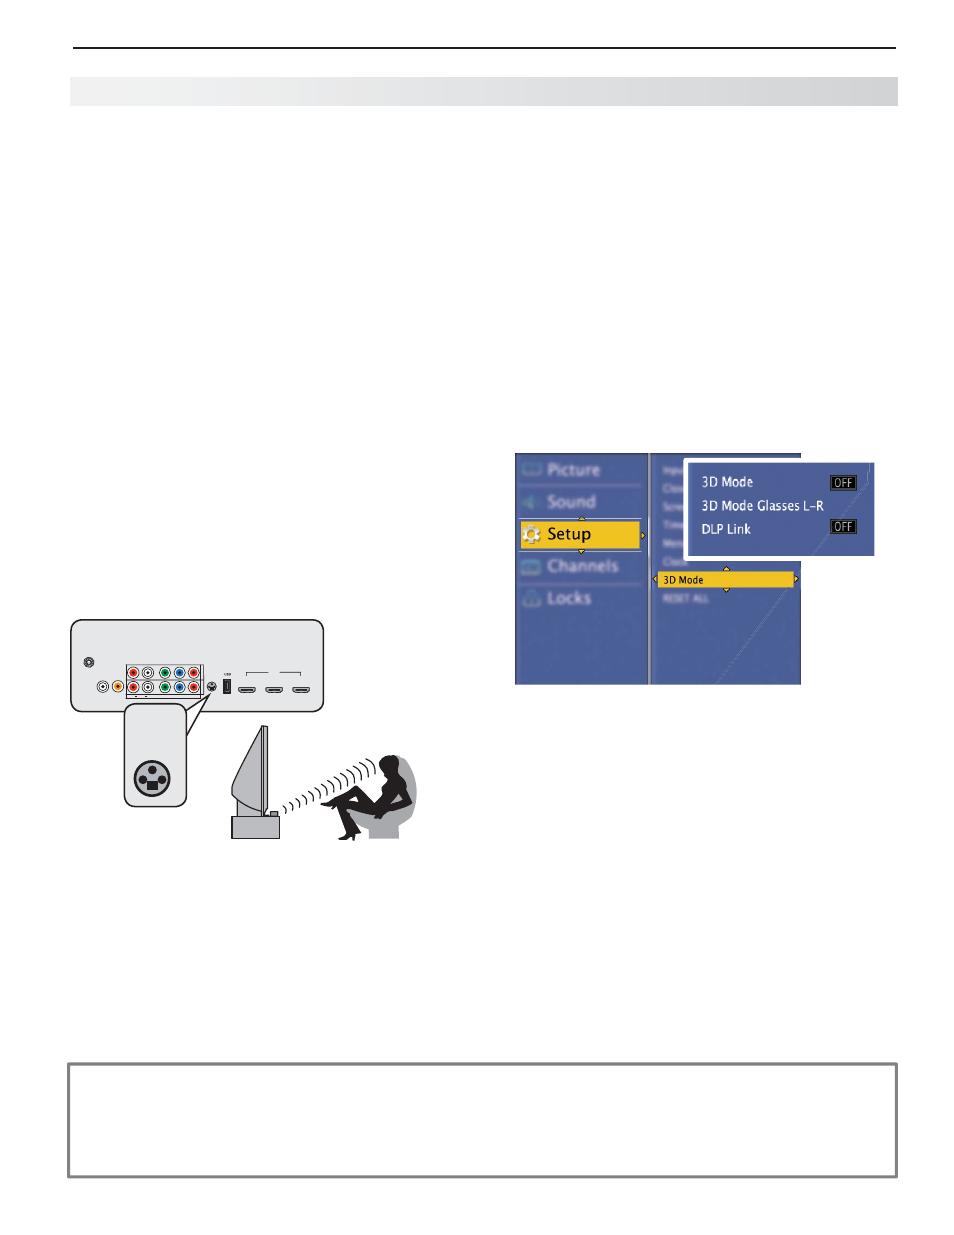
If your 3D glasses came with an emitter, connect
1.
the emitter to the 3D GLASSES EMITTER jack. Place
the box in front of the TV where there is a clear path
to the glasses.
Notes:
•
If you require a Mitsubishi 3D adapter, refer
to the connection instructions provided with
the adapter. Please check our website,
www.mitsubishi-tv.com for updates to 3D
information and safety.
•
If your glasses are marked DLP Link, skip
this step; no emitter is required with DLP
Link technology.
1
2
3
HDMI
HDMI
Pb
Pr
INPUT 2
INPUT 1
(480i / 480p / 720p / 1080i)
Y/ VIDEO
Pb
Pr
Y/ VIDEO
3D
GLASSES
EMITTER
ANT
AUDIO
L
R
DIGITAL
AUDIO
OUTPUT
DVI/PC
AUDIO
INPUT
3D
GLASSES
EMITTER
Connect the 3D video device to the TV’s HDMI
2.
input.
Watching 3D Video
Note: Active 3D glasses are required.
Connect your 3D video device to one of the TV’s
1.
HDMI inputs and power on the device.
Press
2.
INPUT.
Highlight the 3D video input and press
3.
ENTER to
switch to it.
Press
4.
MENU and select the Setup > 3D Mode
menu.
Highlight
5.
3D Mode and press ENTER to select On.
The On setting will be memorized for the current
input when you exit this menu.
If using DLP Link-type glasses, highlight
6.
DLP Link
and press ENTER to select ON.
Use the Setup > 3D Mode menu to enable 3D video.
Press
7.
EXIT to close the menu.
If the image does not appear correct
8.
(e.g., objects
appear to be moving in instead of out), open the Setup
> 3D Mode menu and highlight 3D Mode Glasses
L-R. Press ENTER to change to Reverse.
To Watch Regular (non-3D) Video
The 3D Mode setting is memorized for each input.
When you want to watch non-3D video on the input
selected above, open the Setup > 3D Mode menu and
set 3D Mode to Off.