Metra Electronics CK-612MI User Manual
Page 4
Disconnect the negative battery terminal to
prevent an accidental short circuit. Remove
(2) Phillips screws from each side of the gear
shifter console. Remove (2) Phillips screws
from the top of the console (under the
ashtray). Lift the console out and remove
(2) Phillips screws exposed at the base of
the dash trim bezel. Pull out on the bottom
of the dash trim bezel, disconnect the wiring
and remove the bezel. Remove (4) screws
securing the factory head unit and
disconnect the wiring.
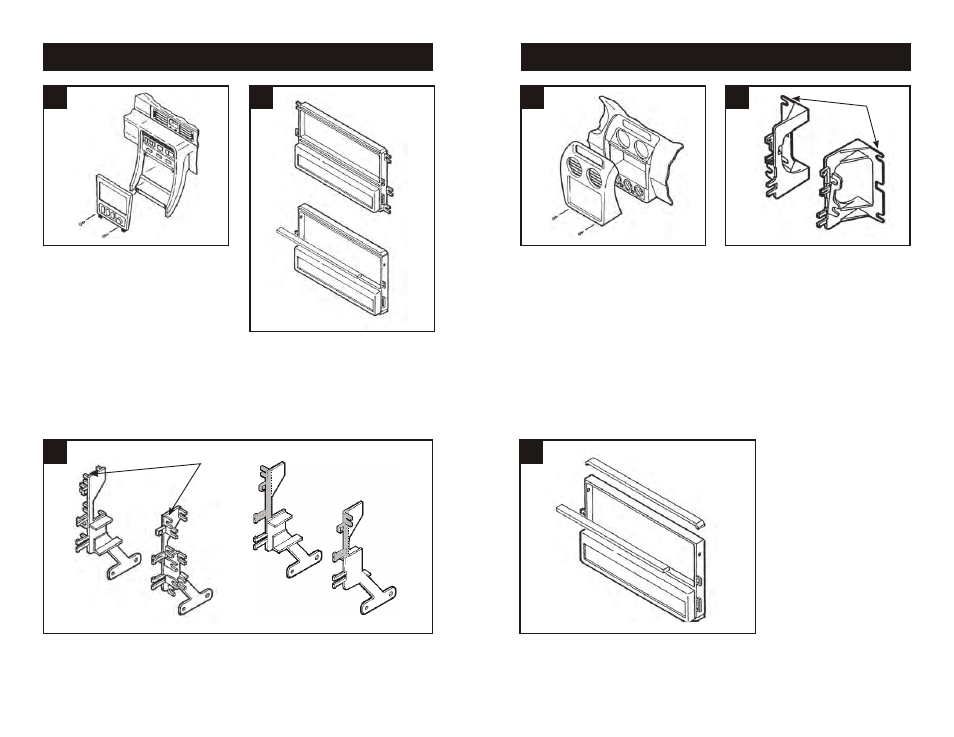
Disconnect the negative battery terminal to
prevent an accidental short circuit. Remove
(2) Phillips screws under the climate controls.
Unclip the radio/climate control trim bezel
and remove the bezel. Remove (4) Phillips
screws securing the factory head unit and
disconnect the wiring.
Cut and remove mounting tabs “A” and “B”
on the Radio Housing. Locate mounting
tabs “A” on Bracket Set #3. The mounting
tabs can be identified by the stamped letter
on the back of each tab.
Cut and remove the lower rib from the radio opening and
the top portion of the Radio Housing. Skip to step #5 on
Page #13.
Cut and remove all mounting tabs on the
Radio Housing EXCEPT tabs “A”. The
mounting tabs can be identified by the
stamped letter on the back of each tab.
(Fig.
A). Cut and remove the lower rib from the
radio opening.
(Fig. B)
Cut and remove all mounting tabs on Bracket Set #1 EXCEPT tabs “A”. The mounting
tabs can be identified by the stamped letter on the back of each tab.
(see Fig. A). Once the
mounting tabs are removed, cut the SHADED portions from the Brackets.
(see Fig. B). (The
SHADED portions of the Brackets will be mounted to the Radio Housing in step #4). Skip to
the Installation Instructions for ALL VEHICLES on Page #12.
MITSUBISHI Diamante 1994-96
MITSUBISHI Eclipse 2000-01
1
1
2
2
"A"
3
3
6
7
Fig. A
Fig. B
Fig. B
Fig. B
“A”
“A”
“A”
“A”