Warning, Caution, Warning / caution – McCulloch MCM2013 User Manual
Page 7: 3 - assembly instructions, 4 - operating instructions
12
13
3-8. OILING CHAIN
To oil chain, press oil cap. Oil will feed onto guide bar and
chain. Press oil cap at least once before each cut. Always
check oil level before using pole saw. Do not attempt to
operate the oiler while cutting with the pole saw.
3-9. CUTTING WITH THE POLE SAW
1.
Connect saw to extension cord. Connect extension
cord to power supply.
2.
Use both hands to grip pole saw. Use only designated
grip areas when operating pole saw (See Fig. 3-9A).
Use firm grip. Thumbs and fingers must wrap around
pole saw handle and pole.
3.
Make sure your footing is firm. Keep feet apart. Divide
your weight evenly on both feet.
4.
When ready to make a cut, press in trigger switch
lock-off and squeeze trigger switch (see Fig. 3-9B)
This will turn pole saw on. Releasing trigger switch will
turn pole saw off. Make sure saw is running at full
speed before starting a cut.
5.
When starting a cut, place moving chain against
wood. Hold pole saw firmly in place to avoid possible
bouncing or skating (sideways movement) of saw.
6.
Guide pole saw using light pressure. Do not force pole
saw. The motor will overload and can burn out. It will
do the job better and safer at the rate for which it was
intended.
7.
Remove pole saw from a cut with saw running at full
speed. Stop pole saw by releasing trigger. Make sure
chain has stopped before setting pole saw down.
8.
Never stand directly under the limb you are trimming.
Always position yourself out of the path of falling
debris.
3-10. FILLING OIL TANK
Using a funnel, fill oil tank with McCulloch Chain, Bar and
Sprocket oil. Wipe up any spills. Make sure no dirt gets into
the oil tank.
3-11. SELECTING THE PROPER EXTENSION
CORD FOR YOUR SAW MODEL
1.
When using the chain saw, an extension cord of ade-
quate size must be used for safety and to prevent loss
of power and overheating.
2.
The extension cord must be specifically intended for
outdoor use and marked SW-A, SOW-A, STOW-A,
SJW-A, SJOW-A SJTOW-A, SJTW-A, OR SJTW.
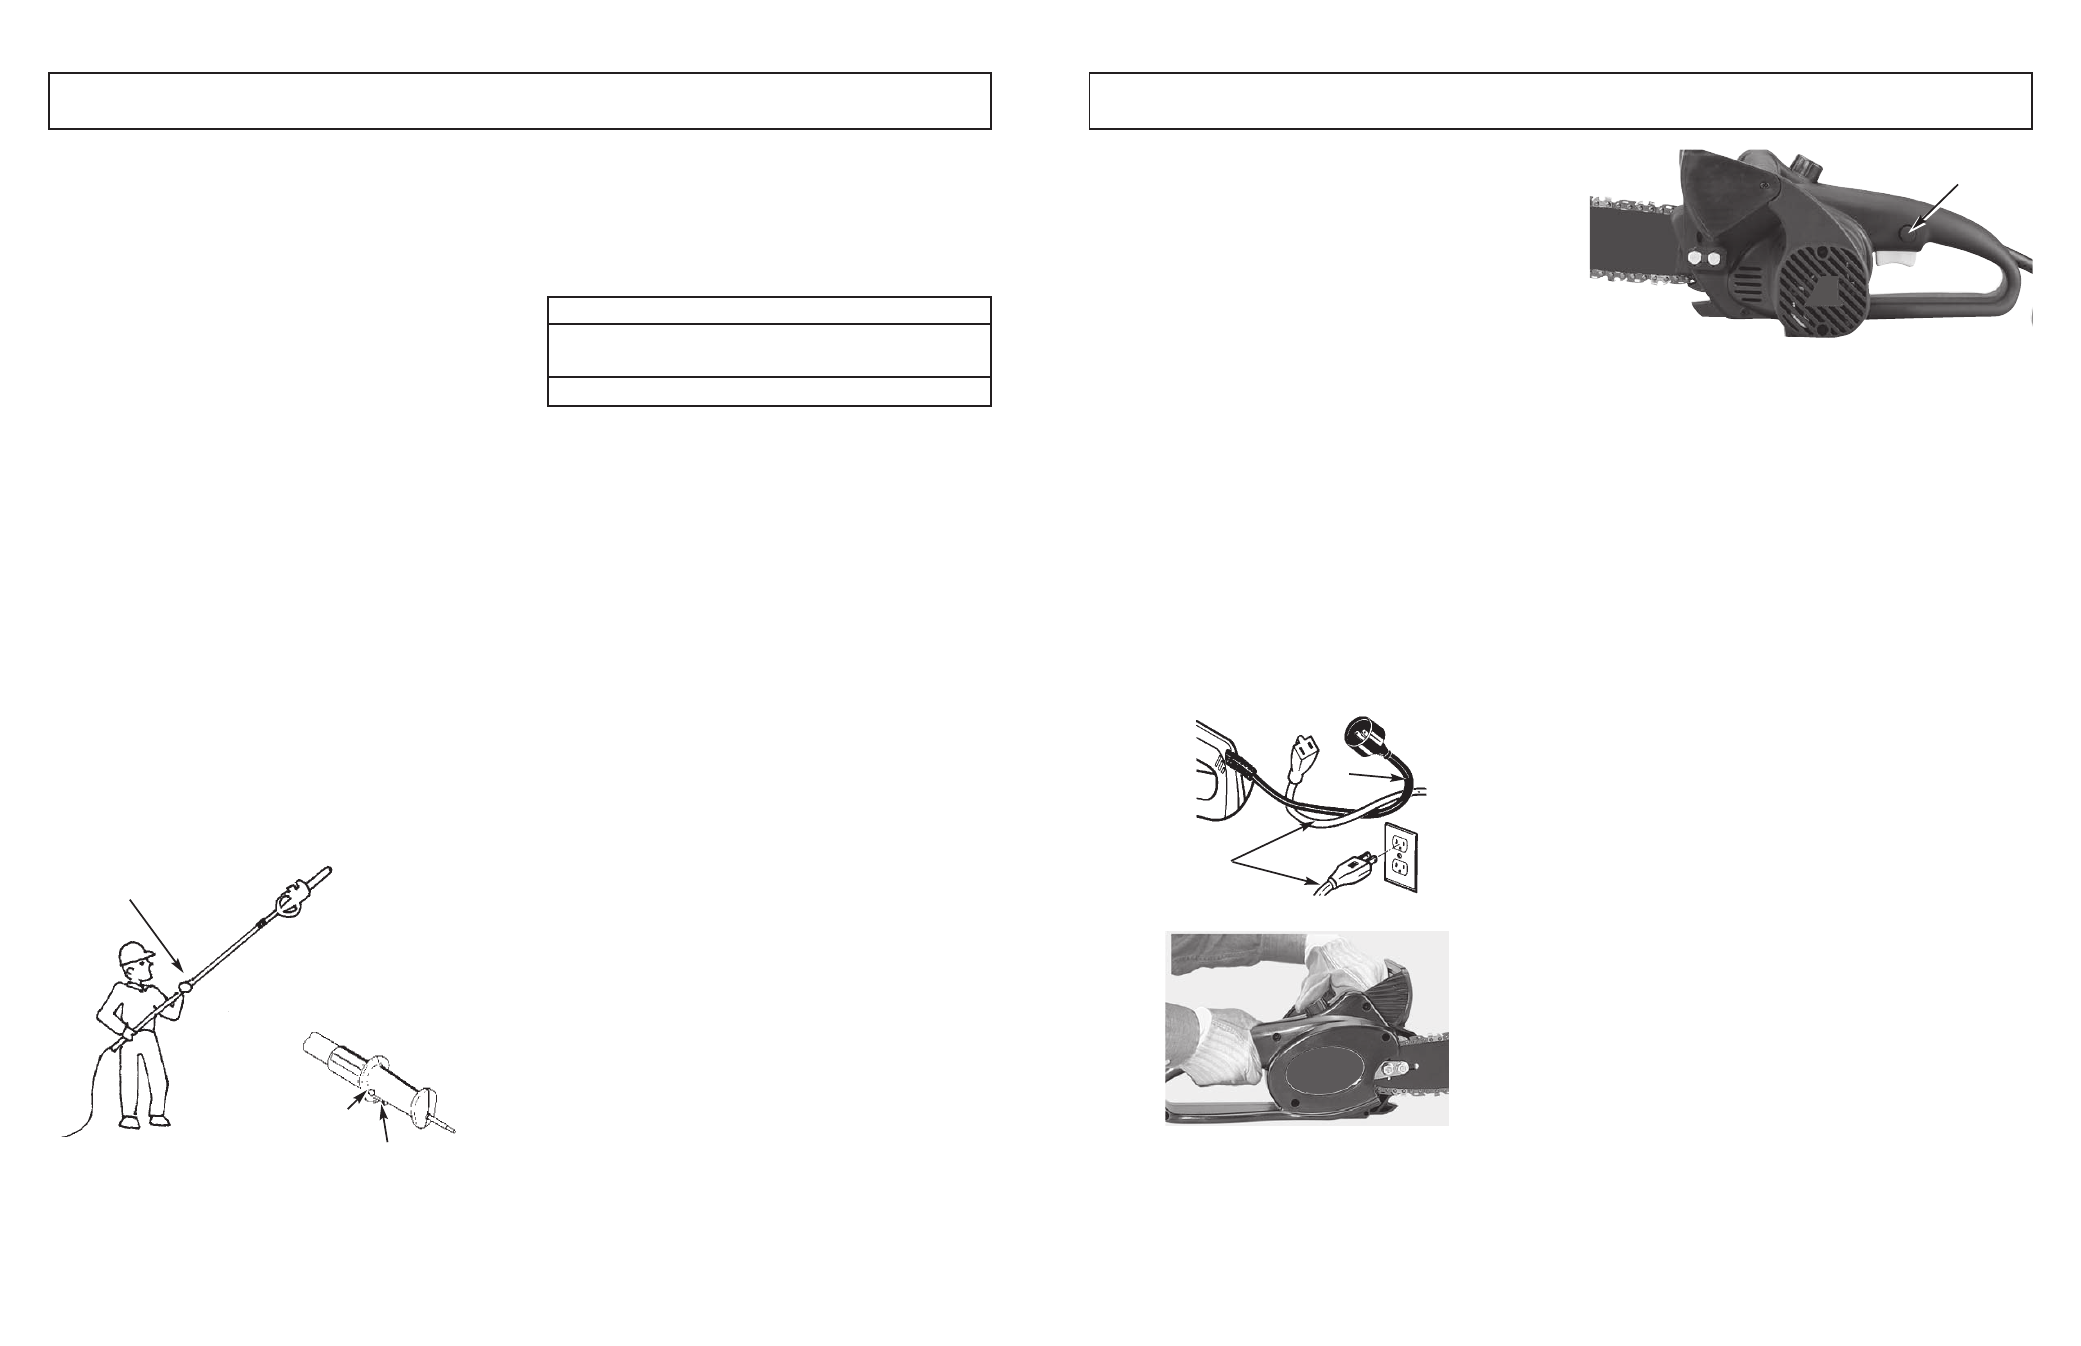
3 - ASSEMBLY INSTRUCTIONS
4-1. TO START SAW
1.
PLEASE READ ALL WARNINGS.
2.
Make sure oil reservoir is full.
WARNING
Ensure the extension cord is of the proper size and type for
your saw.
3.
Plug the cord (A) into the appropriate size extension
cord (B) (see Figure 3-11). Plug the extension cord
into a 110/120 volt AC, 15 AMP receptacle (Figure 4-
1A).
WARNING
Make sure the extension cord does not come in contact
with the guide bar and saw chain.
4.
Grip the saw with both hands, left hand holding the
front handle and the right hand holding the rear han-
dle. Thumbs and fingers should encircle both handles
(Figure 4-1B).
5.
With your RIGHT THUMB, depress the LOCK/OFF
button (C) on the side of the rear handle, and at the
same time squeeze the trigger. To stop the saw,
release the trigger (Figure 4-1C).
NOTE: It is not necessary to maintain pressure on the
LOCK/OFF button once the trigger is squeezed and the
motor is running. The LOCK/OFF button is a safety device
to avoid accidental starting.
4-2. TO STOP MOTOR
The saw motor will automatically stop when the trigger is
released. The LOCK/OFF button will have to be depressed
and the trigger squeezed to restart the motor.
4-3. CHAIN AND BAR LUBRICATION
Always check oil level before using saw. To oil chain, press
oil cap. Do not attempt to operate the oiler while cutting with
the saw. Oil will feed onto guide bar and chain. Press oil cap
at least once before each cut. Check oil level often.
CAUTION
Never starve the bar and chain of lubrication oil. Running
the saw DRY or with TOO LITTLE OIL will decrease cutting
efficiency, shorten chain saw life, and cause rapid dulling of
the chain and excessive wear of the bar from overheating.
Too little is evidenced by smoke or bar discoloration.
NOTE: The saw chain stretches during use, particularly
when it is new, and occasional adjustment will be needed.
A new chain requires more frequent adjustment during the
break-in period. This is normal. See Section 3-5 for Saw
Chain Tension Adjustment instructions.
WARNING / CAUTION
A loose chain can jump off the bar while you are cutting, as
well as wear the bar and chain. A chain that is too tight can
damage the saw. Either situation, chain too loose or too
tight, could cause serious personal injury.
3-9A
Grip Area
3-9B
Lock-Off
Switch
Trigger Switch
Minimum Gauge Wire
Saw
Model
Ampere
Rating
Volts
AC 25 ft. / 7.5m 50 ft. / 15m 100 ft. /30m
Length Power Cord
MCP1510
8
120 18 Gauge 16 Gauge 14 Gauge
4 - OPERATING INSTRUCTIONS
4-1A
B
A
4-1B
4-1C
C