First-time installation and configuration, Powering up the ap, Mounting the ap on a wall – Madge Networks 802.11b User Manual
Page 6: 2 first-time installation and configuration, 2first-time installation and configuration, 1 powering up the ap, 2 mounting the ap on a wall
Hardware Watchdog Timer. If the AP firmware enters an invalid state, the hardware watchdog
timer will detect this situation and restart the advanced AP. Accordingly, the advanced AP can
recover from certain error situations.
2
First-Time Installation and Configuration
2.1
Powering up the AP
To power the AP with the supplied power adapter:
1. Plug the power adapter to an AC socket.
2. Plug the connector of the power adapter to the power jack of the AP.
NOTE:
This product is intended to be powered by a Listed Power Unit, marked “Class 2” or “LPS” and
output rated “5V DC, 1 A minimum” or equivalent statement.
Some advanced APs support Power Over Ethernet (POE). Visit the Madge web-site at
for more details.
2.2
Mounting the AP on a Wall
If required the AP can be mounted on a wall.
CAUTION:
Before drilling into any surface check for hidden services such as electricity cables or water
pipes. If in doubt please consult a qualified engineer.
NOTE:
The fastenings supplied with this product are intended for use in solid walls only.
To fix the AP to a solid wall proceed as follows:
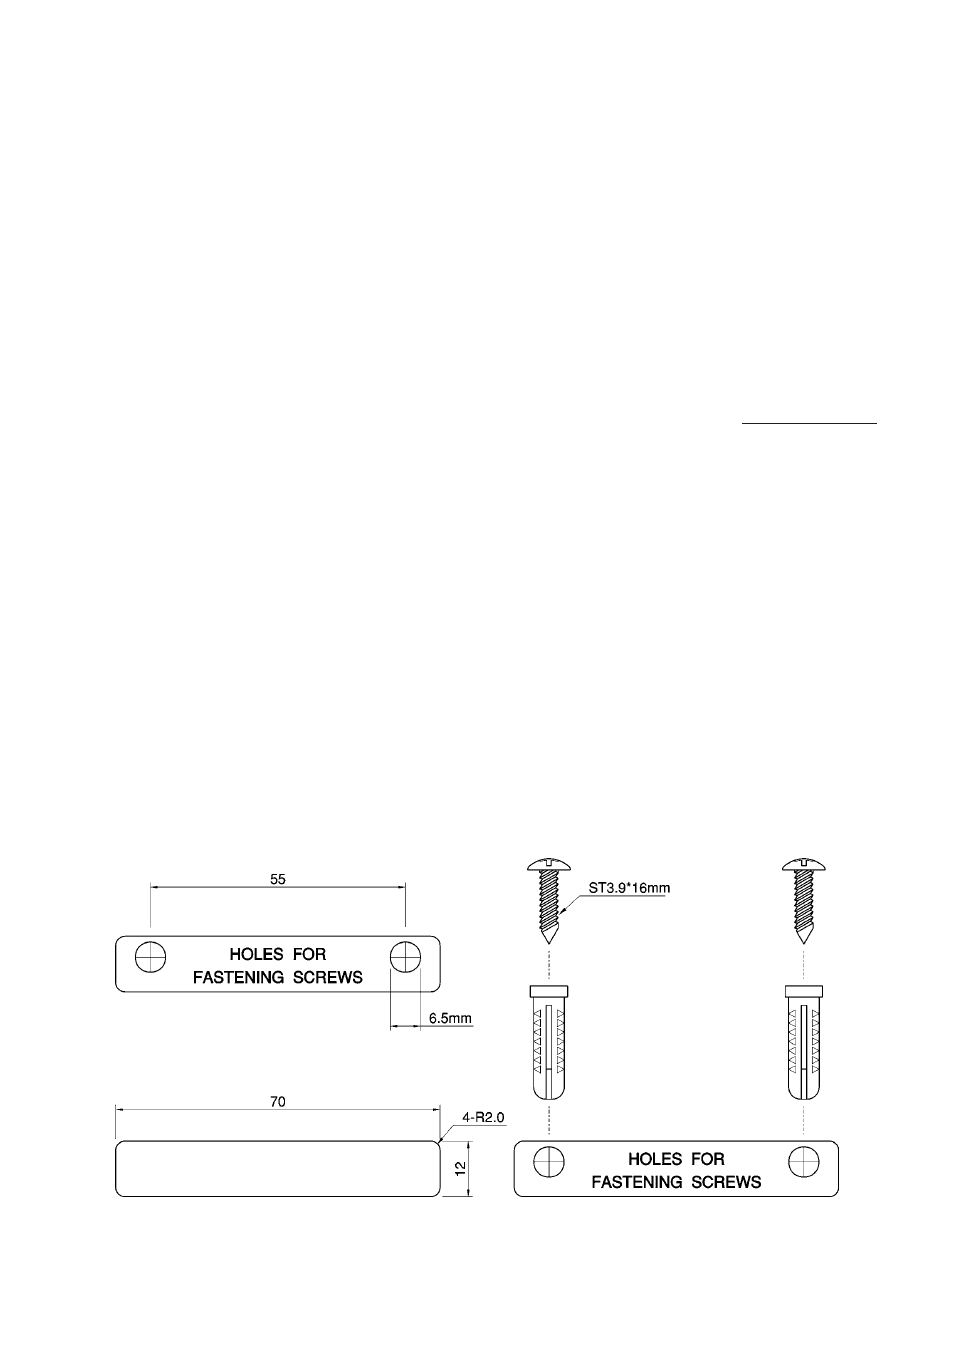
1. Use the supplied template to determine the correct distance between the fastening screws.
2. Use a 6.5mm diameter drill to make a 25mm deep hole at each of the cross marks.
3. Insert the supplied “wall-plugs” into each hole.
4. Insert the supplied screws into the wall-plugs leaving approximately 3mm of thread proud of the
wall surface to allow the AP to be hung on the screws.
5. Hang the wireless AP on the screws.
Fig. 1. Mounting the AP on a wall.
100-408-01
Copyright © 2002 Madge Networks. All rights reserved.
Page
2