Belt, Ge 13, Disassembly – Graco RTX-650 User Manual
Page 13: Reassembly
Belt
311771D
13
Belt
Disassembly
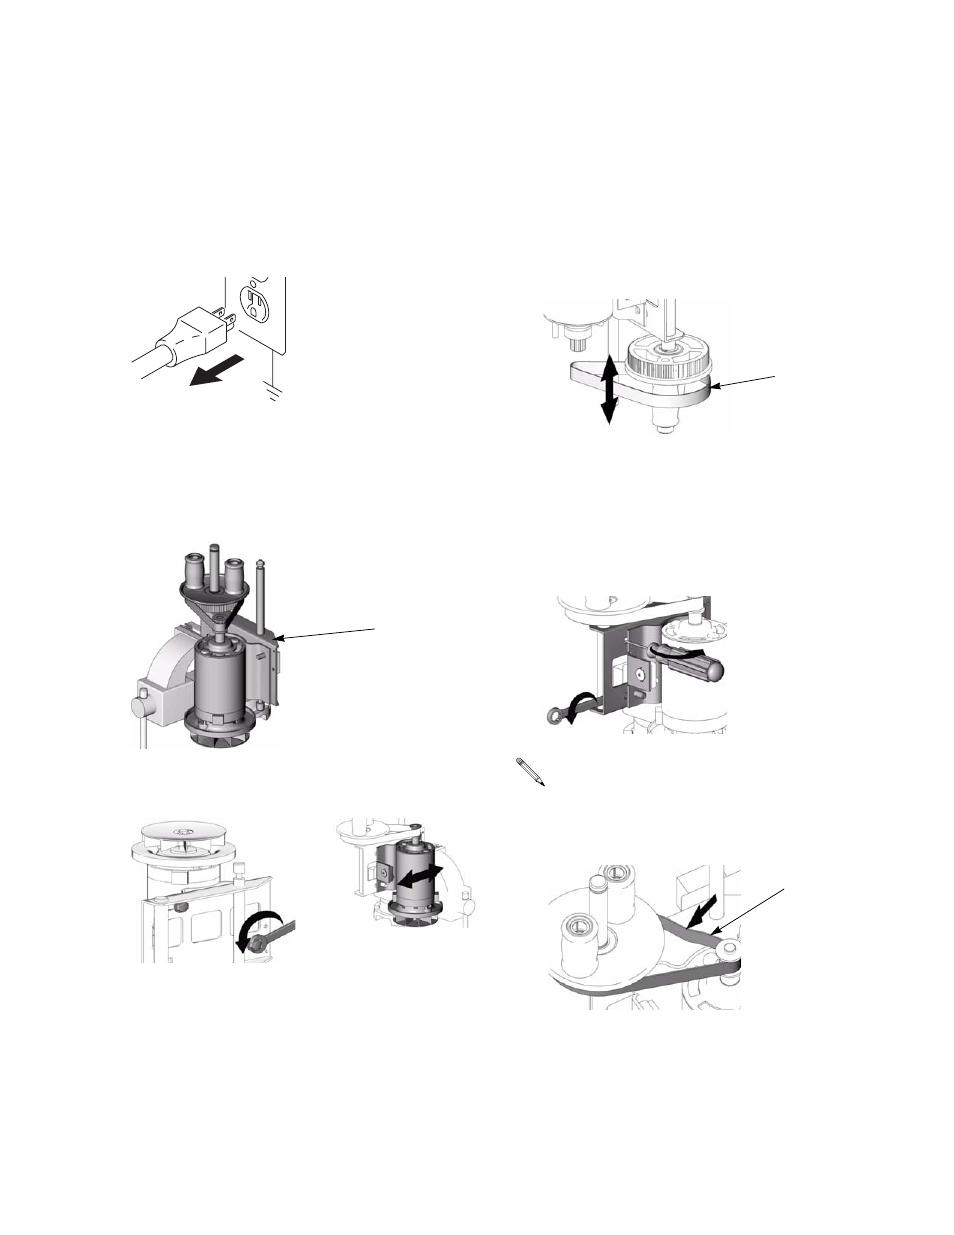
1.
Relieve Pressure, page 6.
2.
Unplug sprayer from outlet.
3.
Remove Shroud, page 7.
4.
Remove Motor, page 10.
5.
Place motor tray (32) into vice and tighten until
snug.
6.
Use 9/16 in. wrench to loosen two mounting screws
(4) on motor tray (32) to allow motor to slide around.
7.
Remove old belt and discard.
Reassembly
1.
Loop one end of belt over extension cable (29) and
pulley (17), then loop other end of belt over motor
shaft (make sure teeth of belt (24) and pulley are
aligned).
2.
Insert flat screwdriver into slot on back of motor tray
(32) and use screwdriver as a lever to pull motor
(31) into position.
3.
Use 9/16 in. wrench to tighten two mounting screws
(4) while keeping motor (31) in position with screw-
driver.
4.
Reassemble Motor, page 10.
5.
Reassemble Shroud, page 7.
ti2810b
ti9063a
32
ti9066a
ti9069a
Once the motor is in place, you can test the belt to
make sure it is properly tightened. When you push
on the belt (24) with one finger it should move no
more than 1/4 in. If it moves more than 1/4 in., go
back to step 8 and re-tighten the belt.
ti8784a
24
ti9073a
ti9071a
24