Mounting to workbench, Feet – Grizzly G0463 User Manual
Page 16
-14-
G0463 Small Mill/Drill
Mounting to
Workbench
The Model G0463 should be bolted to a work-
bench to provide maximum rigidity and safety.
Components and Hardware Needed:
Qty
Hex Bolts M12-1.75 x (length as needed) ...........4
Flat Washers 12mm ...........................................8
Lock Washers 12mm ..........................................4
Hex Nuts M12-1.75 .............................................4
To mount the mill/drill to the workbench:
1. Determine the best position for the mill/drill
on the workbench.
Note: For the best performance, make
sure the cross feed and the longitudinal
handwheels extend out beyond the edge of
the table surface. This will allow unrestricted
handwheel operation.
2. Mark your hole locations using the mounting
holes in the base as a guide.
3. Drill the holes needed in the workbench.
4. Place a precision level on the mill/drill table
and shim the mill/drill until it is level side-to-
side and front-to-back.
5. Bolt the mill/drill to the workbench.
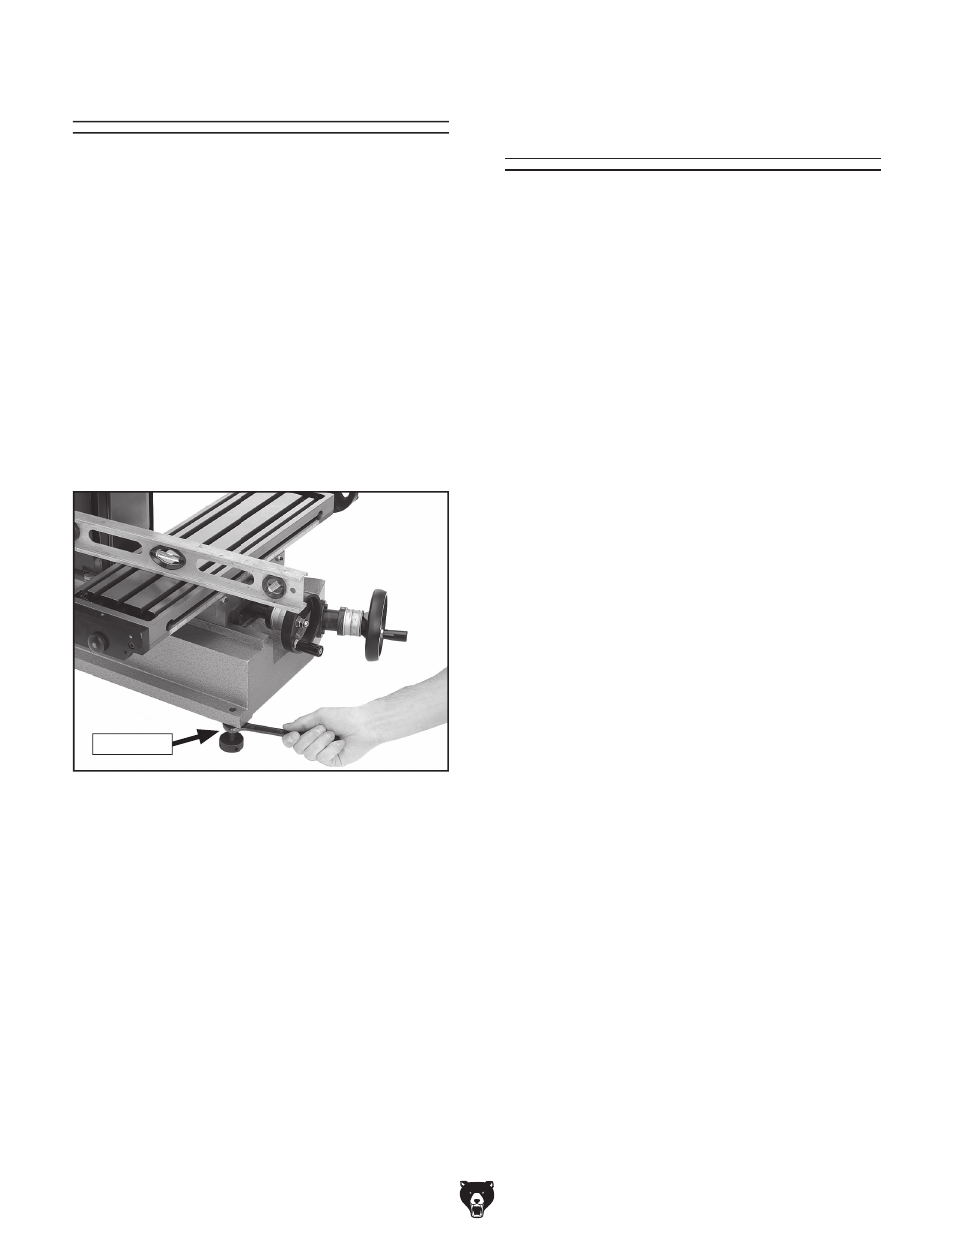
Feet
Hex Nut
Four leveling feet have been included with your
mill/drill. However, for greater safety and bet-
ter performance, we recommend bolting your
machine to a sturdy workbench.
Components and Hardware Needed:
Qty
Foot with Hex Nut M12-1.75 ............................... 4
To adjust the feet on the mill/drill:
1. Place your precision level on the mill/drill
table.
2. Loosen the hex nut(s), as shown in Figure
7, and turn the feet until the mill/drill is level
side-to-side and front-to-back
.
3. Retighten the hex nuts.