Cabinet, wheels & feet – Grizzly G9742 User Manual
Page 15
G9742 Metal Cutting Bandsaw (Mfg. Since 11/06
-13-
Cabinet, Wheels &
feet
This. bandsaw. is. shipped. with. four. rubber. feet.
with.posts.and.two.wheels.with.an.axle..It.is.your.
option. to. install. four. rubber. feet. if. you. do. not.
need. to. move. the. bandsaw,. or. install. the. axle.
and. wheels. if. you. need. to. move. the. bandsaw.
regularly.
Components and Hardware Needed:
Qty
Base .................................................................. 1
Front.Panel......................................................... 1
Rear.Panel.......................................................... 1
Right.Panel......................................................... 1
Left.Panel........................................................... 1
Ramp.................................................................. 1
Feet.................................................................... 4
Wheels............................................................... 2
Axle.................................................................... 1
.
—Flat.Washers.17mm................................. 4
.
—Cotter.Pins............................................... 2
.
—Hex.Nuts.
3
⁄
8
-16......................................... 4
.
—Phillips.Head.Screw.M6-1.x.12.............. 16
—Flat.Washer.
1
⁄
4
....................................... 16
—Hex.Bolt.M8-1.25.x.30............................. 4
—Flat.Washer.8mm.................................... 4
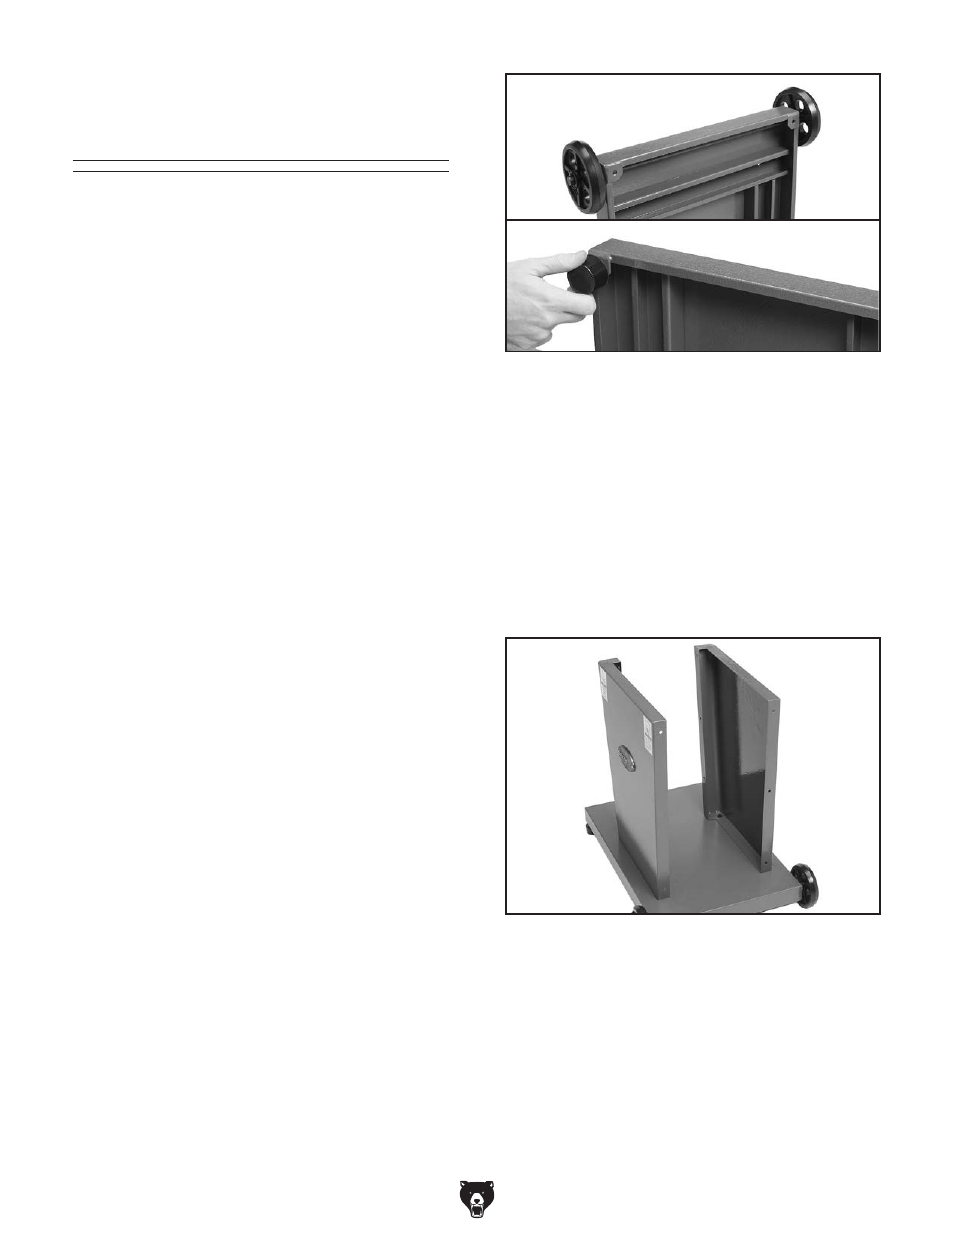
To install the wheels, feet, and the cabinet:
1.. At. the. end. of. the. base. with. the. axle. holes,.
insert.the.axle.into.the.base.(see.
figure 6).
2.. Slide. a. 17mm. flat. washer. and. wheel. onto.
each. end. of. the. axle,. followed. by. another.
washer.and.cotter.pin.
3.. Thread.a.
3
⁄
8
-16.hex.nut.on.both.feet..
4.. Thread.the.two.rubber.feet.into.the.base.(see.
figure 6).
5.. Position.the.base.on.the.floor,.and.adjust.the.
feet.until.the.base.is.level.and.is.stable.
6.. Tighten.the.hex.nuts.against.the.base.to.lock.
the.feet.in.position.
7.. Position. the. front. and. rear. panels. on. the.
base.and.install.the.panels.to.the.base.with.
four.M6-1.x.12.Phillips.head.screws.and.flat.
washers.(see.
figure 7).
figure 6..Installing.wheels.and.feet.
figure 7..Front.and.rear.panels.installed.