Aligning fence – Grizzly 17" Heavy Duty-Bandsaw G0513X2BF User Manual
Page 39
G0513 Series Bandsaws
-37-
— if the distance is not the same at the front
and back of the table, adjust the table until
it is.
6. place a square on the table and against the
back of the blade, as shown in
Figure 52.
the table should be perpendicular to the
back of the blade.
— if the table is not perpendicular to the back
of the blade, shim the table in the desired
direction by placing washers between the
table and the two trunnions.
7. re-tighten the trunnion bolts to secure the
settings.
Figure 52. squaring back of blade and table.
Blade
Square
Table
Aligning Fence
to ensure cutting accuracy when the fence is first
installed, the fence should be aligned with the
miter slot.
Tool Needed
Qty
hex Wrench 5mm .............................................. 1
Aligning Fence (G0513, G0513P,
G0513ANV, G0513X2, & G0513X2F)
1. disCoNNECt BaNdsaW FroM poWEr!
2. Make sure the table is aligned with the blade
(see
Aligning Table on the previous page for
detailed instructions).
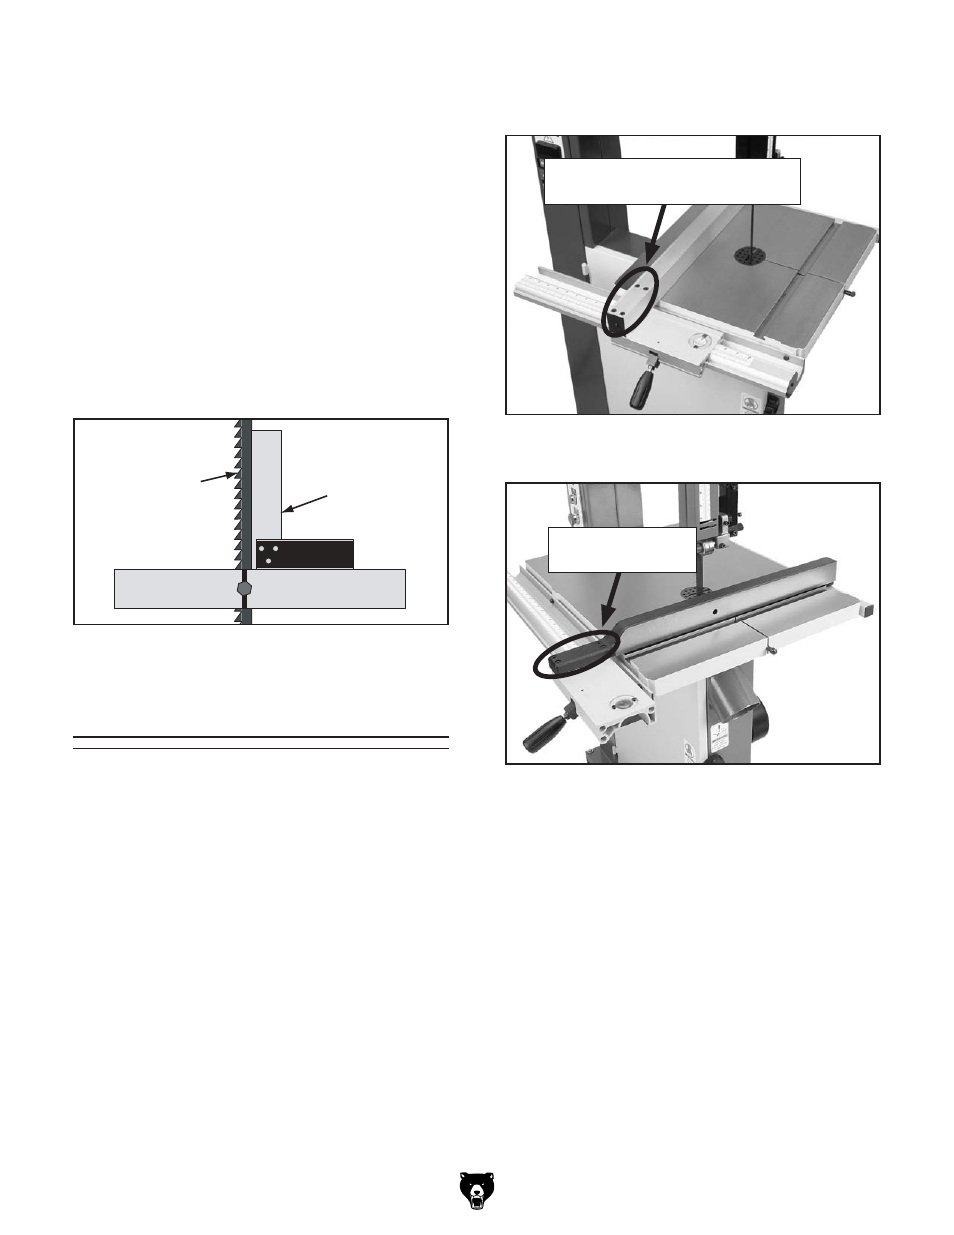
3. install the fence next to the miter slot.
4. loosen the four cap screws located on the
top face of the fence (see
Figures 53–54).
Figure 53. g0513, g0513p, & g0513aNV fence
caps screws.
g0513, g0513p, & g0513aNV
Fence Cap screws
Figure 54. Four fence cap screws.
g0513X2F Fence
Cap screws
5. adjust the fence face parallel with the edge of
the miter slot.
6. tighten the four cap screws, being careful not
to move the fence.