Freescale Semiconductor Windows Embedded CE 6.0/Windows CE 5.0 i.MX31 PDK 1.4 User Manual
Page 22
Build the Platform
Build a Development Platform: Assemble Three Boards
20
i.MX31 PDK 1.4 Quick Start Guide
Connect Development Platform to PC; Run
Preloaded Image
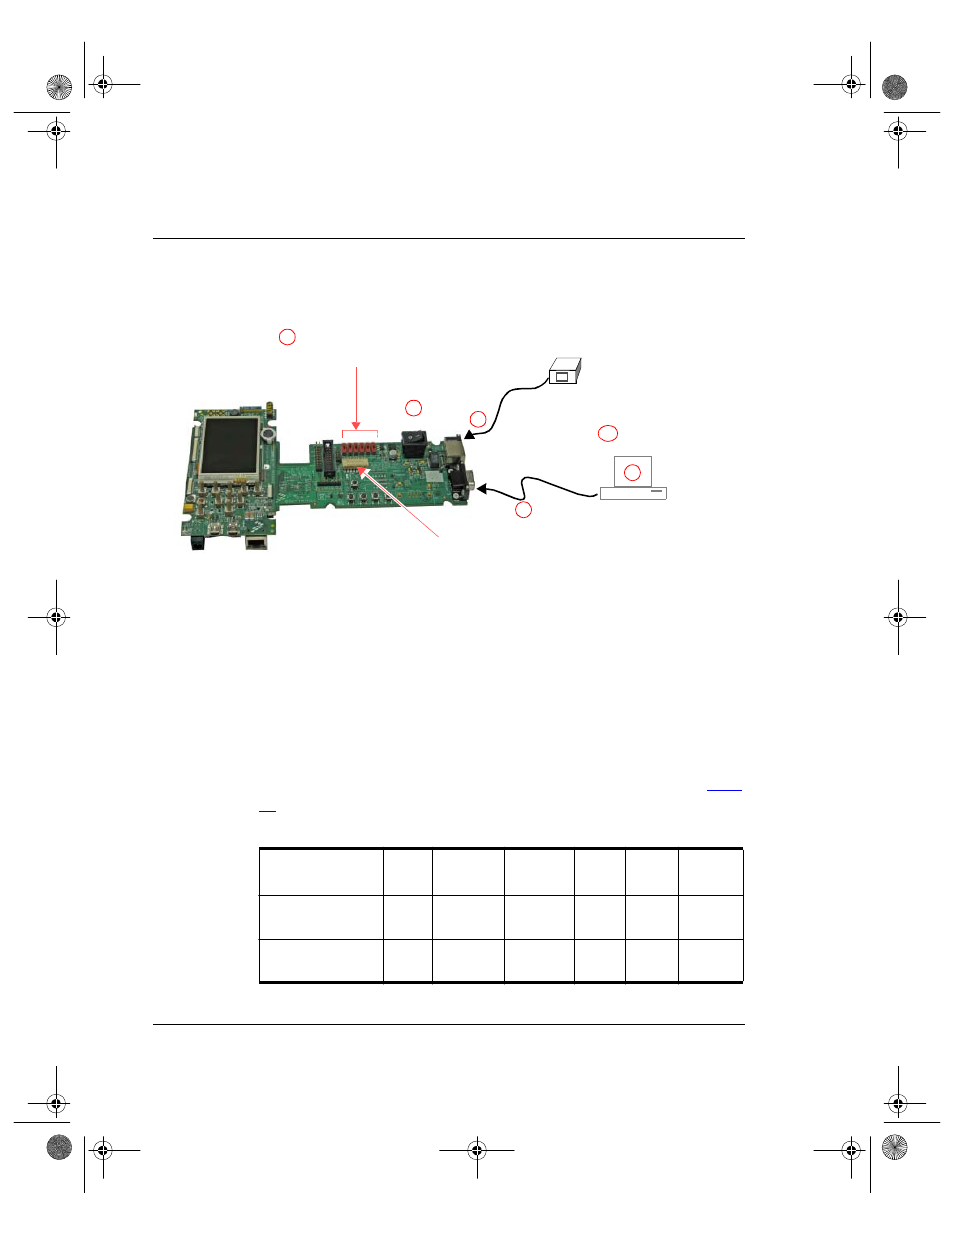
Figure 3.4 Connecting the Platform to your PC
To connect the 3-Stack platform to your host PC:
1. Connect one end of an RS-232 serial cable (included in the kit) to a serial port
connector (CON4) on the Debug board and connect the other end to a COM port on the
host PC.
• Configure SW4-1 to ON.
• Make sure that SW4-8 is ON, to supply power to all three boards.
• Configure SW4-2 to OFF.
2. Confirm that the Bootstrap switches (SW5–SW10) are set for NAND boot. See
.
Table 3.1 Boot Mode Setting (SW5–SW10)
Boot Mode
Device
SW5
SW6
(Boot4)
SW7
(Boot3)
SW8
SW9
SW10
UART/USB
bootloader
X
0
0
0
0
0
8-bit NAND Flash
(2KB page) Ext
X
1
0
0
0
0
RS-232
cable
COM port
Female
1
3
4
5
6
DC
power
Regulated +5V
DC Supply
J2
S4
Configure serial
console application.
Set Bootstrap switches
(SW5–SW10) to NAND boot
2
Set SW4
3StackQS_WinCE.book Page 20 Sunday, September 28, 2008 1:58 PM