Set–up – FujiFilm A310 User Manual
Page 26
51
Settings
50
Power consumption is kept to a minimum to
prevent battery depletion. You should select the
“ON” setting when you are using alkaline batteries.
h Power saving “OFF”
Batteries are more likely to run flat since no power
reduction measures (sleep mode, etc.) are used.
However, this function automatically switches the
camera off if the camera is not used for
approximately 2 minutes.
h Power saving “ON”
1 If the camera is not used for approximately 30
seconds, the LCD monitor switches off
temporarily to reduce power consumption (The
viewfinder lamp (green) flashes at 1-second
intervals).
Pressing the shutter button down halfway at this
point restores the camera to the ready-to-shoot
status.
2 If the camera is left unused for 90 seconds after
the LCD monitor switches off, the camera is
automatically switched off (the viewfinder lamp
switches off).
●
!
The charging time for the flash increases slightly because the
flash charging power is reduced.
●
!
If you press the shutter button down halfway and then release
it, the screen may go dark briefly because the flash is
charging.
POWER SAVE SETTING
◆
When the camera has switched off
◆
You can switch the camera back on by briefly
switching the camera off 1 and then switching it
back on again 2.
If the camera is left unused for about 2 minutes in
Playback mode, during setup or while the LCD
monitor is switched off, the camera is automatically
switched off. However, the LCD monitor does not
switch off if the camera is left unused for 30
seconds.
0
1
0
2
●
!
The POWER SAVE setting is disabled during automatic
playback, during rechargeable battery discharging and when
a USB connection is being used.
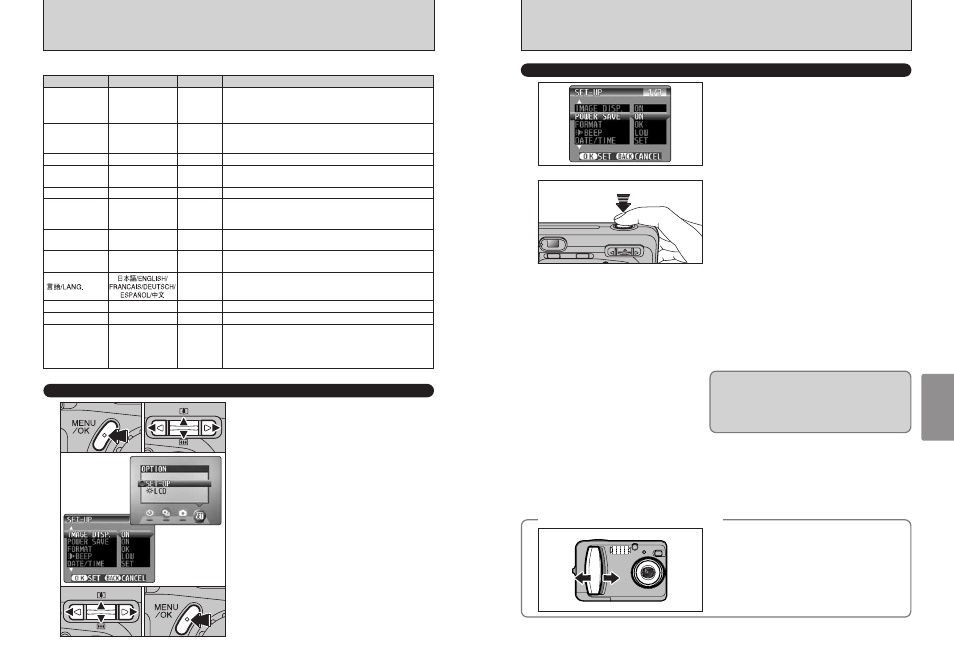
1 Press the “MENU/OK” button to display the
menu screen.
2 Press “d” or “c” to select “F” OPTION and
then press “a” or “b” to select “SET–UP”.
3 Press the “MENU/OK” button to display the
SET–UP screen.
4 Press “a” or “b” to select a menu option and
then press “d” or “c” to change the setting.
Press “c ” for “FORMAT”, “DATE/TIME” or
“qRESET”.
5 After you have modified the settings, press the
“MENU/OK” button to confirm the changes.
SET–UP
F USING THE SET–UP SCREEN
●
!
Always switch the camera off when replacing the batteries. If
you open the battery cover or disconnect the AC power
adapter without switching the camera off, the camera settings
may revert to the factory default values set at shipment.
■ SET–UP Menu Options
0
1
0
2
0
3
0
5
0
4
IMAGE DISP.
ON/OFF
ON
This option specifies whether or not an image checking screen
(photography results) is displayed after you take a shot.
The photographed image is displayed for a few moments and
then automatically recorded.
POWER SAVE
ON/OFF
ON
This option allows you to specify whether the LCD monitor
switches off to conserve power if the camera is not used for 30
seconds. See P.51 for details.
FORMAT
OK
–
Erases all files. See P.52 for details.
§ BEEP
LOW/HIGH/OFF
LOW
Sets the volume of the tone emitted when the camera controls
are used.
DATE/TIME
SET
–
Use this option to correct the date or time. See P.15 for details.
qLCD
ON/OFF
ON
Use this option to specify whether the LCD monitor is
automatically switched ON or OFF when the Mode dial is set to
“
q
”.
FRAME NO.
CONT./RENEW
CONT.
Specifies whether frame numbers are assigned consecutively
from previous numbers or begin again. See P.52 for details.
USB MODE
¶/qPC
¶
Selects the function when the camera is connected to a PC.
See P.62 for details.
ENGLISH
Select English, French or German as the language used for
screen display.
VIDEO SYSTEM
NTSC/PAL
–
Specifies whether video output is set to NTSC or PAL.
qRESET
OK
–
Resets all the camera settings other than the date and time,
frame number, language and video output settings to the factory
default values set at shipment. Pressing “c ” displays a
confirmation screen. To reset the settings, press the “MENU/OK”
button.
DISCHARGE
OK
–
Discharges rechargeable batteries. See P.11 for details.
Settings
Display
Default setting
Explanation