FujiFilm FinePix A340 User Manual
Page 63
62
If a printer that supports PictBridge is available, images can be printed by connecting the camera
directly to the PictBridge-compatible printer without using a computer.
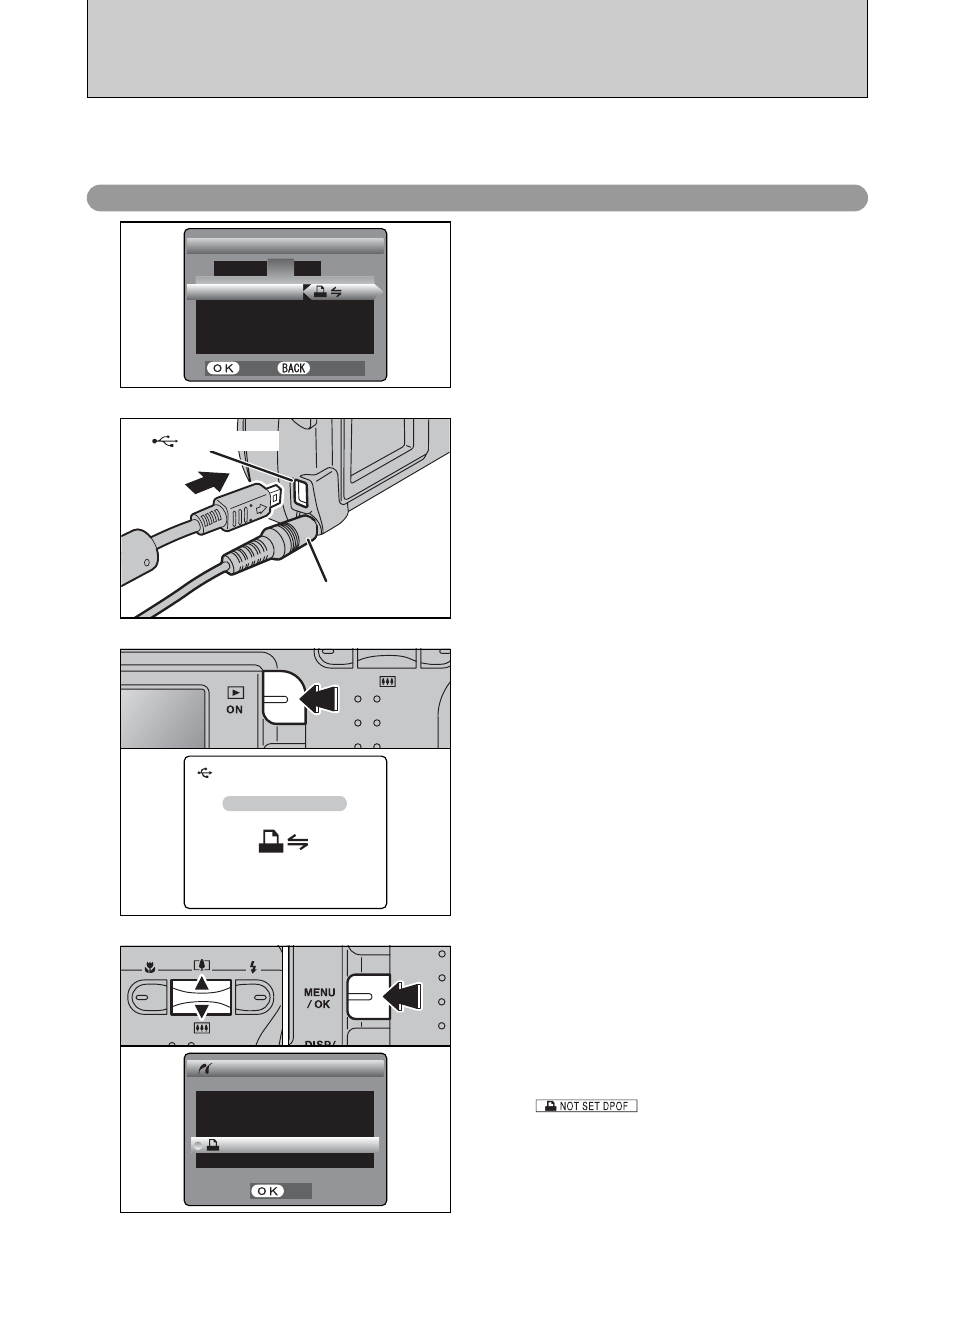
6.2.1 Specifying images for printing on the camera
4
1 Press “a” or “b” to select “
u
PRINT DPOF”.
2 Press the “MENU/OK” button.
●
!
When
“
”
appears, the DPOF settings are
not specified.
●
!
To use DPOF printing, the DPOF settings must be specified
on FinePix A330/FinePix A340 beforehand (
➡P.35).
●
!
Even when “WITH DATE” is specified in the DPOF settings,
the date is not inserted on printers that do not support date
printing.
0
2
AC-3V (sold separately)
(USB)socket
2
Set to “
¢
” in the “USB MODE” setting in the
“SET-UP” menu (
➡P.48).
●
!
Do not connect to a PC when the “USB MODE” setting is set
to “
¢
”. See P.81 if you connect to PC by mistake.
1
1 Connect the camera to the printer using the USB
cable (included).
2 Turn the printer on.
●
!
The camera cannot be used to specify printer settings such
as the paper size and print quality.
●
!
Please connect the AC Power Adapter AC-3V (sold
separately) or AC-3VW (included with optional PictureCradle
CP-FXA10) to your camera.
●
!
Use an xD-Picture Card that was formatted on the camera.
3
Press the “Playback” button to turn the camera on
in Playback mode.
“
ç
” appears and then the menu
screen is displayed.
●
!
If the menu screen does not appear, check whether the USB
mode setting is
“
¢
”.
●
!
Depending on the printer, some functions are disabled.
6.2 CONNECTING THE CAMERA DIRECTLY TO THE PRINTER FOR
PRINTING IMAGES (PictBridge FUNCTION)
0
1