Assembly – Fisher-Price H4433 User Manual
Page 16
16
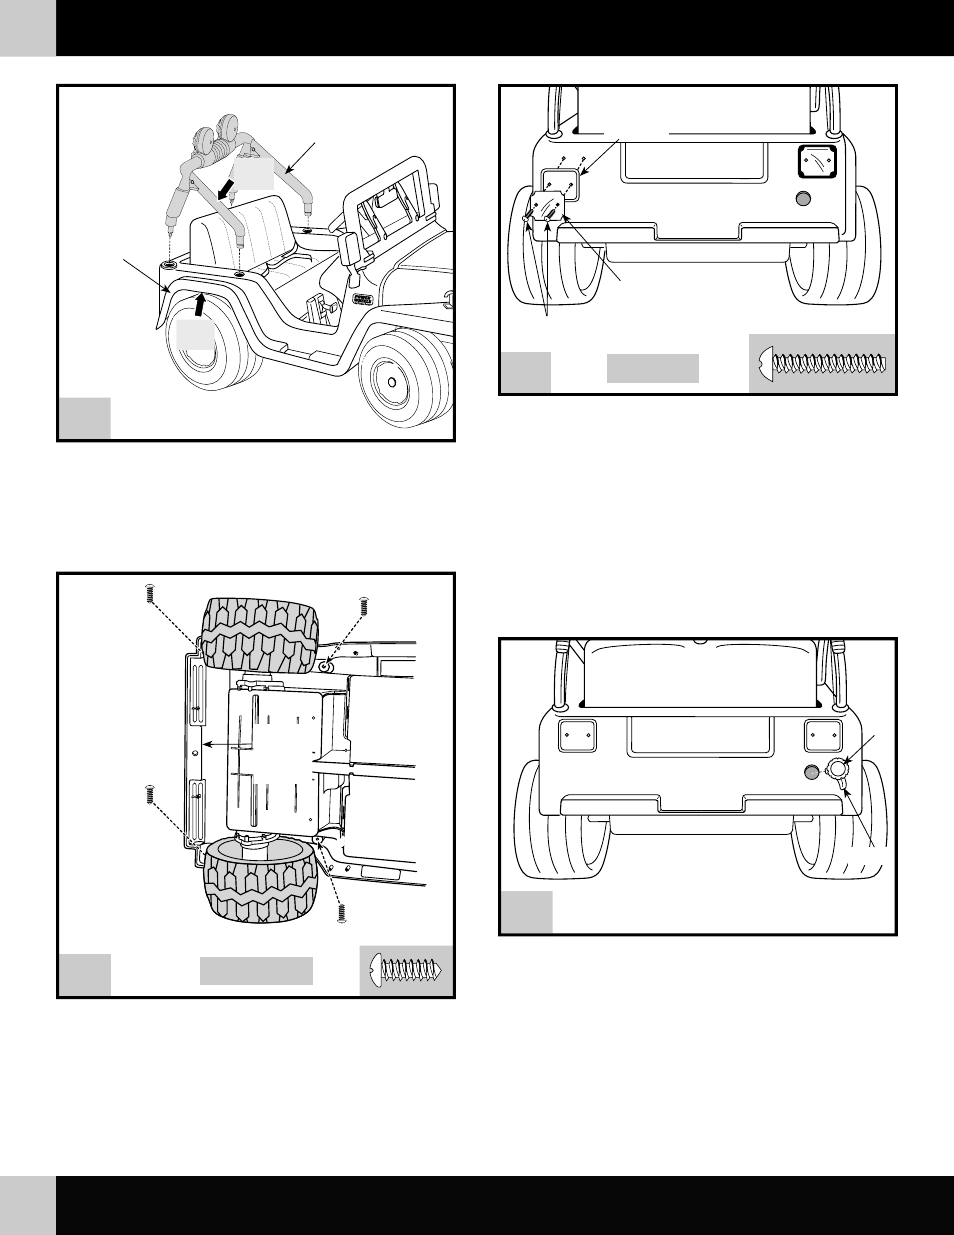
33
Taillight
Housing
Taillight Lens
#8 x 1" Screws
• Turn the vehicle upright.
• Using safety scissors, remove the taillight lenses and the taillight
housings from the plastic connectors. Dispose of the plastic
connectors.
• Face the rear of the vehicle.
• Fit a taillight lens inside a taillight housing.
• Position the taillight housing with lens against the vehicle with the
screw holes aligned, as shown.
• Insert two #8 x 1" screws through the taillight lens, housing and into
the vehicle as shown. Tighten the screws.
• Repeat this procedure to attach the other taillight assembly.
Back View
32
Rear of
Vehicle
• Turn the vehicle on its side.
• Insert two #10 x
1
/
2
" screws into the holes (behind the rear wheels)
in the underside of each rear wheel well, through the vehicle body
and into the ends of the sport bar. Tighten the screws.
• Next, insert two, 10 x
1
/
2
" screws into the holes (in front of the rear
wheels) in the underside of each wheel well, through the vehicle
body and into the end of the sport bar. Tighten the screws.
Bottom View
Sport Bar Support
Side
Fender
PULL
HERE
PUSH
HERE
31
• Fit the sport bar assembly into the holes in the top side of
the vehicle.
• Push down firmly on a sport bar support while pulling up on the side
fender to fit the sport bar into the vehicle.
• Repeat this procedure on the other side of the vehicle.
34
• Position the cap so that the tether is down.
• Snap the cap into the hole under the right taillight.
Cap
Tether
H4433pr-0920
ASSEMBLY
F