Installation – FMI FLAME-MAX FVFM27NR User Manual
Page 14
www.fmiproducts.com
121353-01H
14
INSTALLATION
Continued
3. Place heater base in fireplace.
4. Place logs in their proper position on heater
base. See Installing Logs, page 17.
5. Center heater base and logs front-to-back
and side-to-side in fireplace.
6. Carefully remove logs without moving
heater base.
7. Mark screw locations through one hole on
each side of the mounting bracket (see
Figure 12). If installing in a brick-bottom
fireplace, mark screw locations in mortar
joint of bricks.
8. Remove heater base from fireplace. If
installing optional control accessories,
do so at this time. Follow all directions
provided with accessory.
9. Drill holes at marked locations using 3/16"
drill bit.
10. Attach base assembly to fireplace floor
using two masonry screws (in hardware
package).
Figure 12 - Attaching Base Assembly to
Fireplace Floor
Masonry
Screw
Mounting
Flanges
CONNECTING TO GAS SUppLY
WARNING: A qualified ser-
vice person must connect heater
to gas supply. Follow all local
codes.
WARNING: Never connect
propane/LP heater directly to the
propane/LP supply. This heater
requires an external regulator
(not supplied). Install the exter-
nal regulator between the heater
and propane/LP supply.
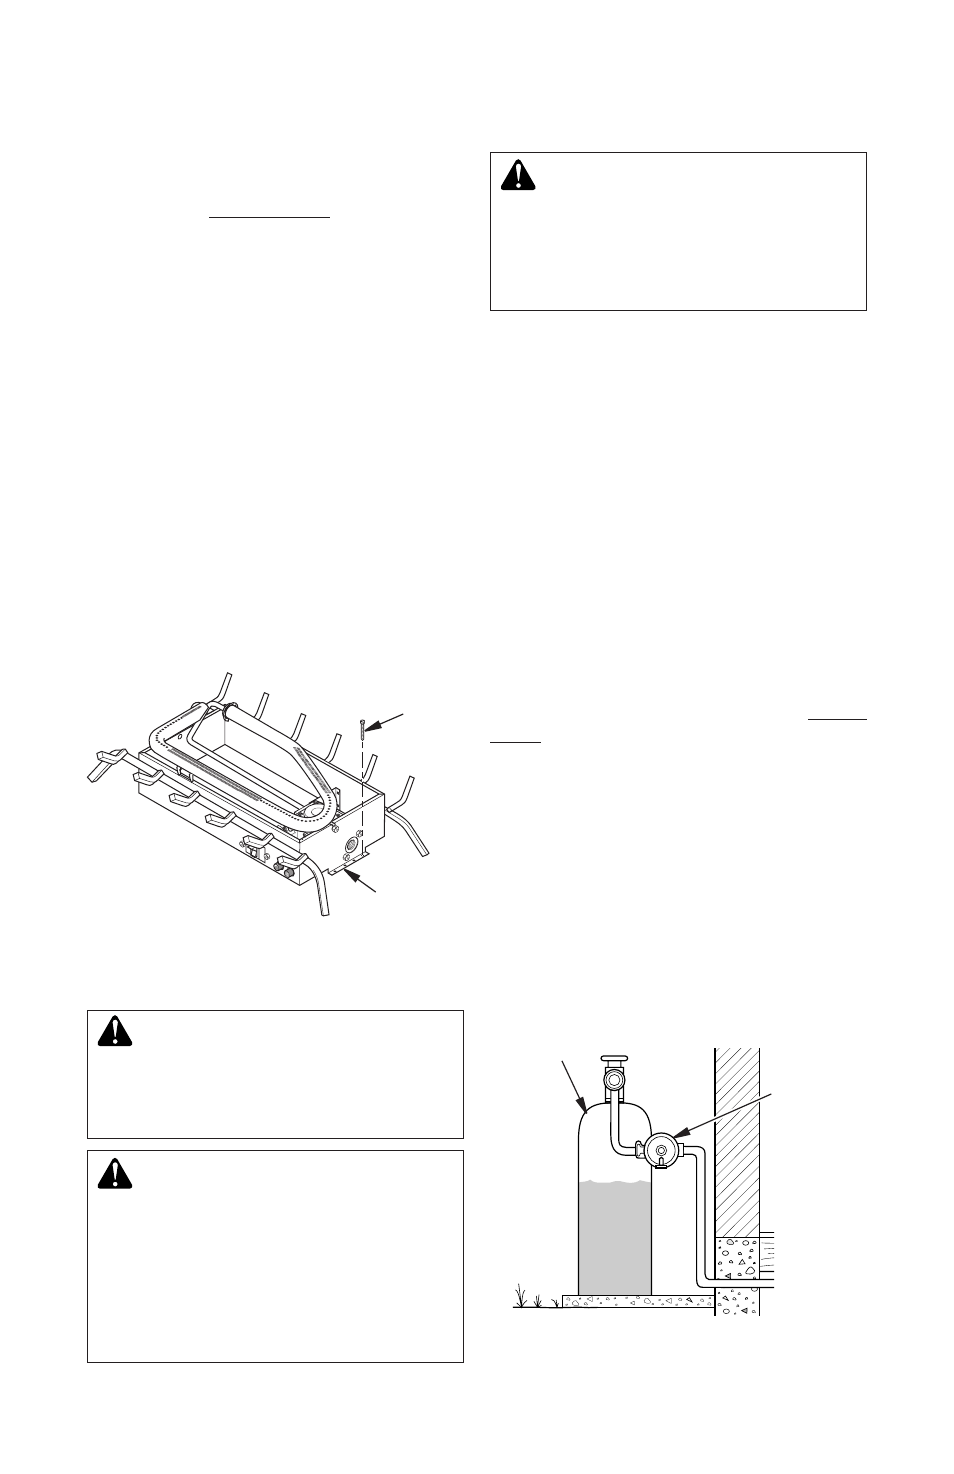
Figure 13 - External Regulator With Vent
Pointing Down (Propane/LP gas only)
Propane/LP
Supply Tank
External
Regulator
with Vent
Pointing
Down
WARNING: Never connect
natural gas heater to private
(non-utility) gas wells. This
gas is commonly known as
wellhead gas.
Installation Items Needed
Before installing heater, make sure you have
the items listed below.
• external regulator (for propane/LP units
only, supplied by installer)
• piping (check local codes)
• sealant (resistant to propane/LP gas)
• equipment shutoff valve *
• test gauge connection *
• sediment trap
• tee joint
• pipe wrench
* A equipment shutoff valve with 1/8" NPT
tap is an acceptable alternative to test gauge
connection. Purchase the optional equipment
shutoff valve from your dealer. See Acces-
sories, page 29.
For propane/LP units, the installer must
supply an external regulator. The external
regulator will reduce incoming gas pressure.
You must reduce incoming gas pressure to
between 11" and 14" of water. If you do not re-
duce incoming gas pressure, heater regulator
damage could occur. Install external regulator
with the vent pointing down as shown in Figure
13. Pointing the vent down protects it from
freezing rain or sleet.