Setting the date and time, 1setting the date and time – FujiFilm 2400 User Manual
Page 10
19
1
18
1
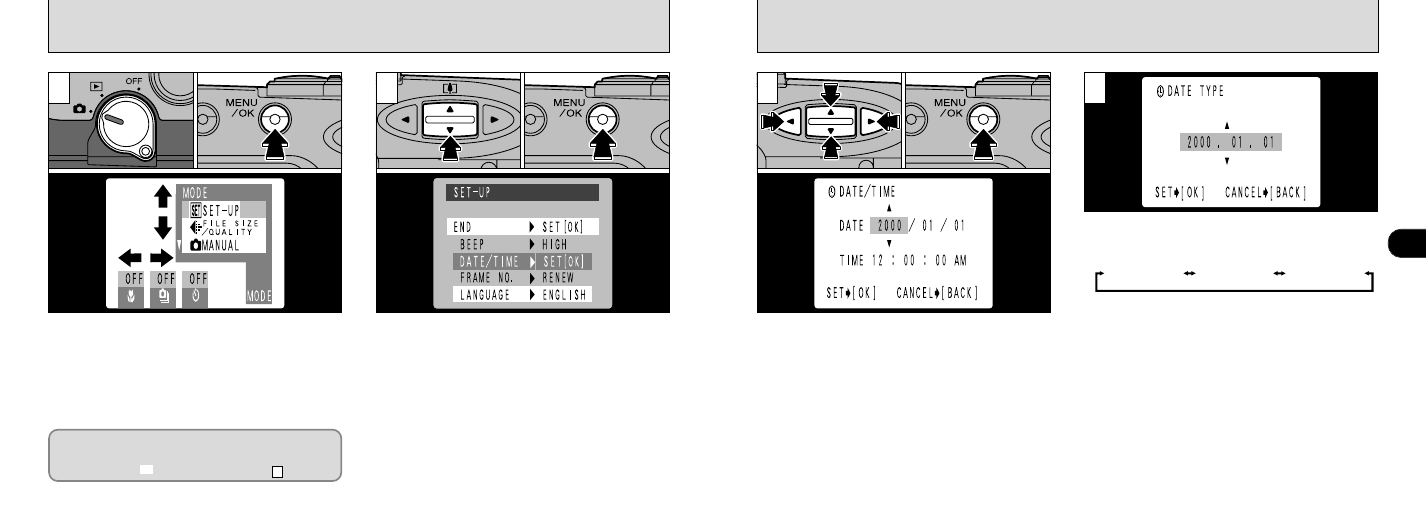
SETTING THE DATE AND TIME
➀
Use the “
ab
” button to select “DATE/ TIME”,
and
➁
press the “MENU/OK” button.
●
!
If you take the batteries out of the camera for 5
minutes or more, or remove the batteries during
setup, the camera settings may all revert to the
factory default values.
●
!
See P.59 for more information on the SET-UP menu.
➀
Check that the lens cover is open and then set
the Mode switch to “
E
”.
➁
Press the “MENU/OK” button to switch to the
menu screen.
➂
Use the “
d
” and “
c
” buttons to select MODE and
then use the “
ab
” button to select “SET-UP”.
➃
Press the “MENU/OK” button.
2
➀
Use the “
d
” or “
c
” button to select the item
you want to set (year, month, day, hour or
minute), and then use the “
ab
” button to
correct the setting.
➁
When you have completed the settings, press
the “MENU/OK” button.
●
!
You cannot set seconds.
●
!
When the time displayed passes “12:00:00”, the
AM/PM setting automatically switches.
➀
You can use the “
ab
” button to select the
order in which the date is displayed on the
LCD monitor.
➁
Select the desired order and then press the
“MENU/OK” button.
➂
When the SET-UP screen appears, use the
“
ab
” button to select “END”.
➃
Press the “MENU/OK” button to exit the SET-
UP screen.
●
!
After the camera has exited the “SET-UP” screen,
the LCD monitor switches off.
●
!
To set the time precisely, press the “MENU/ OK”
button when the time is at zero seconds.
3
If the date is cleared when you switch the
camera on, a confirmation screen appears. If
you selected “F”, proceed from step .
3
●
➀
●
➁
●
➃
●
➂
●
➀
●
➁
●
➀
●
➁
Year.Month.Day
Month/Day/Year
Day.Month.Year
4