Service and adjustments – Husqvarna 917.37408 User Manual
Page 15
34
PARA AJUSTAR EL MANGO
El mango puede ser montado a una posición
alta o baja. Los agujeros de montaje en el
mango inferior están fuera del centro para
levantar y bajar el mango.
1. Remueva el mango superior y conexióne(s)
el asegurar él (los) cable(s) al mango infe-
rior.
2. Remueva las clavijas de horquilla de la
clavija de montaje del puntal del mango.
3. Apreite el mango inferior hacia dentro para
removerlo de las clavijas de montaje.
4. Gire el mango inferior por encima para
levantar o bajar el mango.
5. Vuelva a montar las clavijas de horquilla por
encima de las clavijas de montaje.
6. Vuelva a montar el mango superior y todas
las partes removidas del mango inferior.
Mango inferior
Puntal
del mango
Clavija de horquilla
APRIETE
PARA AJUSTE
Clavija de montaje
GIRAR
Mango
in fe ri or
PARA REMOVER CORREA DE IMPULSIÓN
1. Remueva la cubierta de la impulsión y
fi jador de la correa.
2. Remueva la correa en la polea de la caja de
engranajes.
3. Haga descansar la segadora en su lado
con el fi ltro de aire y el carburador mirando
hacia arriba.
4. Remueva la cuchilla y la polea del motor.
Posición
para segar
Posición
para segar
POSICIÓN ALTA
POSICIÓN BAJA
Puntal
del mango
Clavija
de horquilla
Clavija de
montaje
PARA CAMBIAR CORREA DE IMPULSIÓN
1. Colocar la nueva correa de mando en la
polea del motor, adentro la retención de
correa.
2. Colocar la otra extremidad de la nueva
correa de mando a través del orifi cio en el
bastidor.
3. Reinstale la cuchilla.
4. Vuelva la segadora a la posición vertical.
5. Instale la correa nueva en la polea de la
caja de engranajes.
6. Reinstale la fi jador de la correa y cubierta
de la impulsión.
NOTA: Siempre use la correa aprobada por la
fábrica para asegurarse que calce y dure.
Correa
Cubierta de
la impulsion
Fijador de
la correa
Polea de la caja
de engranajes
Arandela de
seguridad
Borde de salida
Perno
de la
cuchilla
Ranura
Cuchilla
Chavetero del
ciguenal
Adaptador de
la cuchilla
Retención de correa
Arandela
endurecida
15
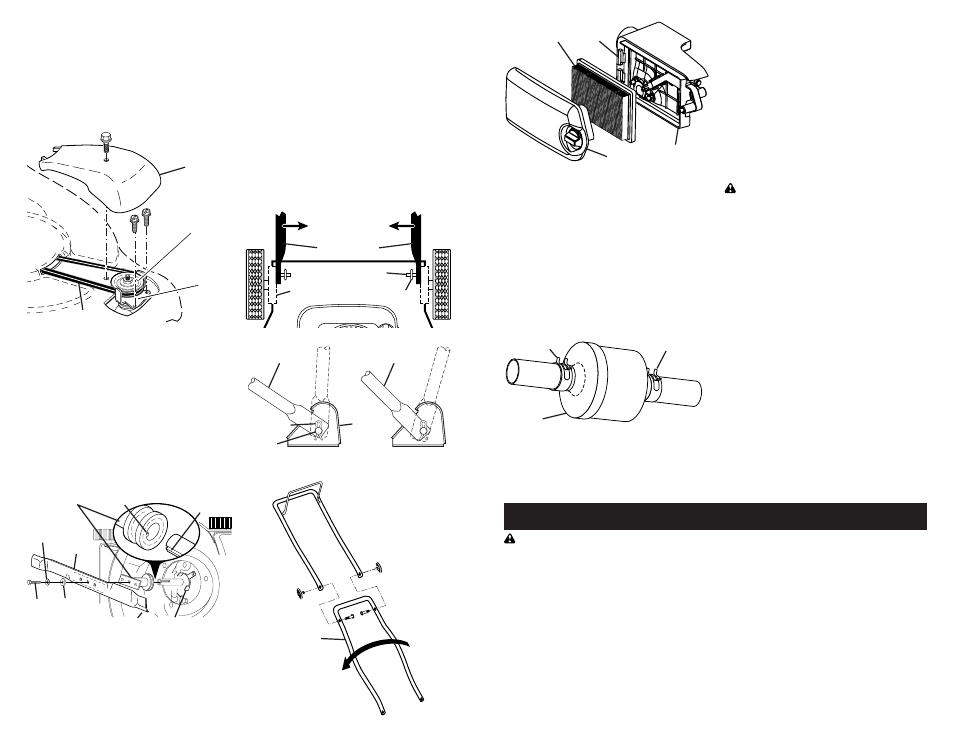
IN-LINE FUEL FILTER
The fuel fi lter should be replaced once
each season. If fuel fi lter becomes
clogged, ob struct ing fuel fl ow to car bu -
re tor, re place ment is re quired.
1. With engine cool, remove fi lter and
plug fuel line sec tions.
2. Place new fuel fi lter in position in fuel
line with arrow pointing towards carbu-
retor.
3. Be sure there are no fuel line leaks and
clamps are properly positioned.
4. Immediately wipe up any spilled gaso-
line.
SPARK PLUG
Replace spark plug at the beginning of
each mowing season or after every 100
hours of operation, whichever occurs
fi rst. Spark plug type and gap setting
are shown in the “PROD UCT SPEC I FI C-
A TIONS” section of this manual.
CLEANING
IMPORTANT: For best performance,
keep mower housing free of built-grass
and trash. Clean the underside of your
mower after each use.
CAUTION: Disconnect spark plug wire
from spark plug and place wire where it
cannot come in contact with plug.
• Clean the underside of your lawn
mower by scraping to remove build-up
of grass and trash.
• Clean engine often to keep trash from
accumulating. A clogged engine runs
hotter and shortens engine life.
• Keep fi nished surfaces and wheels free
of all gasoline, oil, etc.
• We do not recommend using a garden
hose to clean lawn mower unless the
elec tri cal system, muffl er, air fi lter and
carburetor are covered to keep water
out. Water in engine can result in short-
ened engine life.
CLEAN UNDER DRIVE COVER
Clean under drive cover at least twice a sea-
son. Scrape underside of cover with putty
knife or similar tool to remove any build-up
of trash or grass on underside of drive cover.
SERVICE AND ADJUSTMENTS
WARNING: To avoid serious injury, before performing any service and adjustments:
1. Release control bar and stop engine.
2. Make sure the blade and all moving parts have completely stopped.
3. Disconnect spark plug wire from spark plug and place wire where it cannot come in
contact with plug.
LAWN MOWER
TO ADJUST CUTTING HEIGHT
See “TO ADJUST CUTTING HEIGHT” in
the Operation sec tion of this manual.
REAR DEFLECTOR
The rear defl ector, attached between the
rear wheels of your mower, is provided to
minimize the possibility that objects will
be thrown out of the rear of the mower
into the operator mowing position. If the
defl ector becomes dam aged, it should be
replaced.
Back plate
Slot
Cartridge
Cover
Fuel
Filter
Clamp
Clamp
MUFFLER
Inspect and replace corroded muffl er as it
could create a fi re hazard and/or dam age.