Remote battery installation, Operation - fan/remote – Hunter Fan 20091105 User Manual
Page 8
8
©2009 Hunter Fan Co.
44825-01 20091105
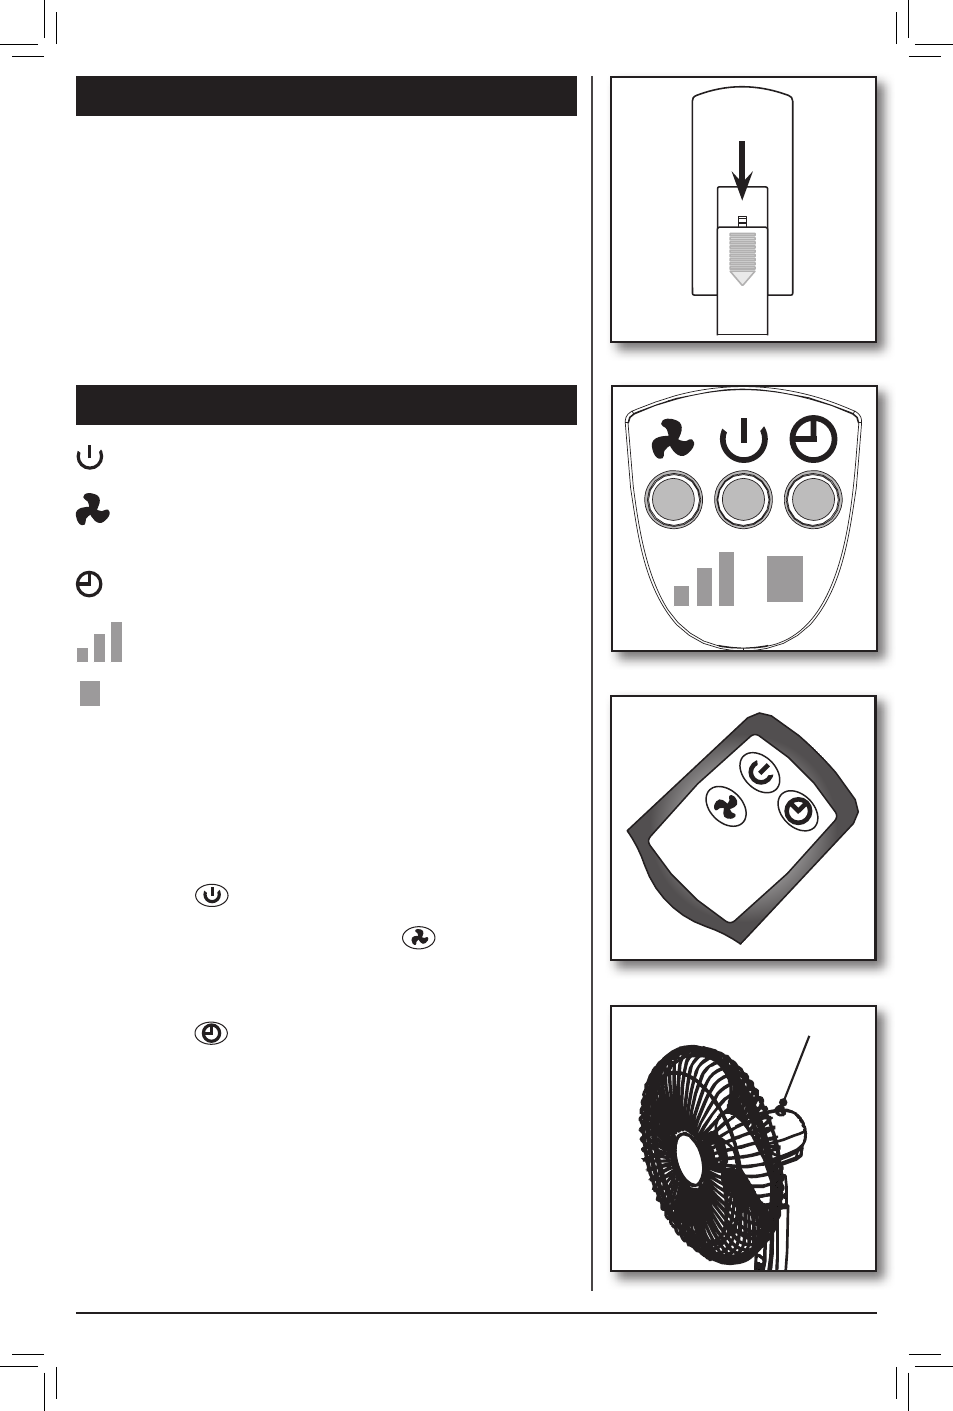
operaTIon - fan/remoTe
figure 15.
- turns the unit on and off.
- Adjust the speed of the unit between High, medium,
and low.
- Used to set the running time to 1, 2, or 4 hours.
- Indicates the current running speed of the fan.
TIMER
1
- Shows the number of hours the timer is set to run.
To operate your unit from the controls on the fan, Figure
15 or from the remote control, Figure 16:
1. Ensure the fan is plugged in.
2. Press the
button to turn the unit on.
3. Adjust the speed by pressing the
button until you
reach the desired speed indicated on the fan base.
4. To set the timer, ensure the unit is on and repeatedly
press the
button until the fan console displays the
number of hours you want the unit to run.
5. To start/stop fan oscillation, push or pull the knob on
the back of the fan assembly, or push the oscillation
button on the remote control. Figure 17.
6. To adjust the angle of the fan, grasp both sides of the
grill, and gently tilt up or down.
TIMER
1
remoTe baTTery InsTallaTIon
figure 14.
1. Turn the Remote Control over and Remove the Battery
Cover from the back by gently pressing down on the
tab and sliding down on the tab. Figure 14.
2. Insert 2 “AAA” Batteries into the battery compartment,
ensuring the positive and negative ends of the
batteries are installed correctly.
3. Slide the Battery Cover back and snap into place.
figure 16.
Oscillation Knob
figure 17.