Table fan, Wall mount, Table fan figure 10. figure 11 – Hunter Fan 20091105 User Manual
Page 7: Figure 12. figure 13. wall mount
7
©2009 Hunter Fan Co.
44825-01 20091105
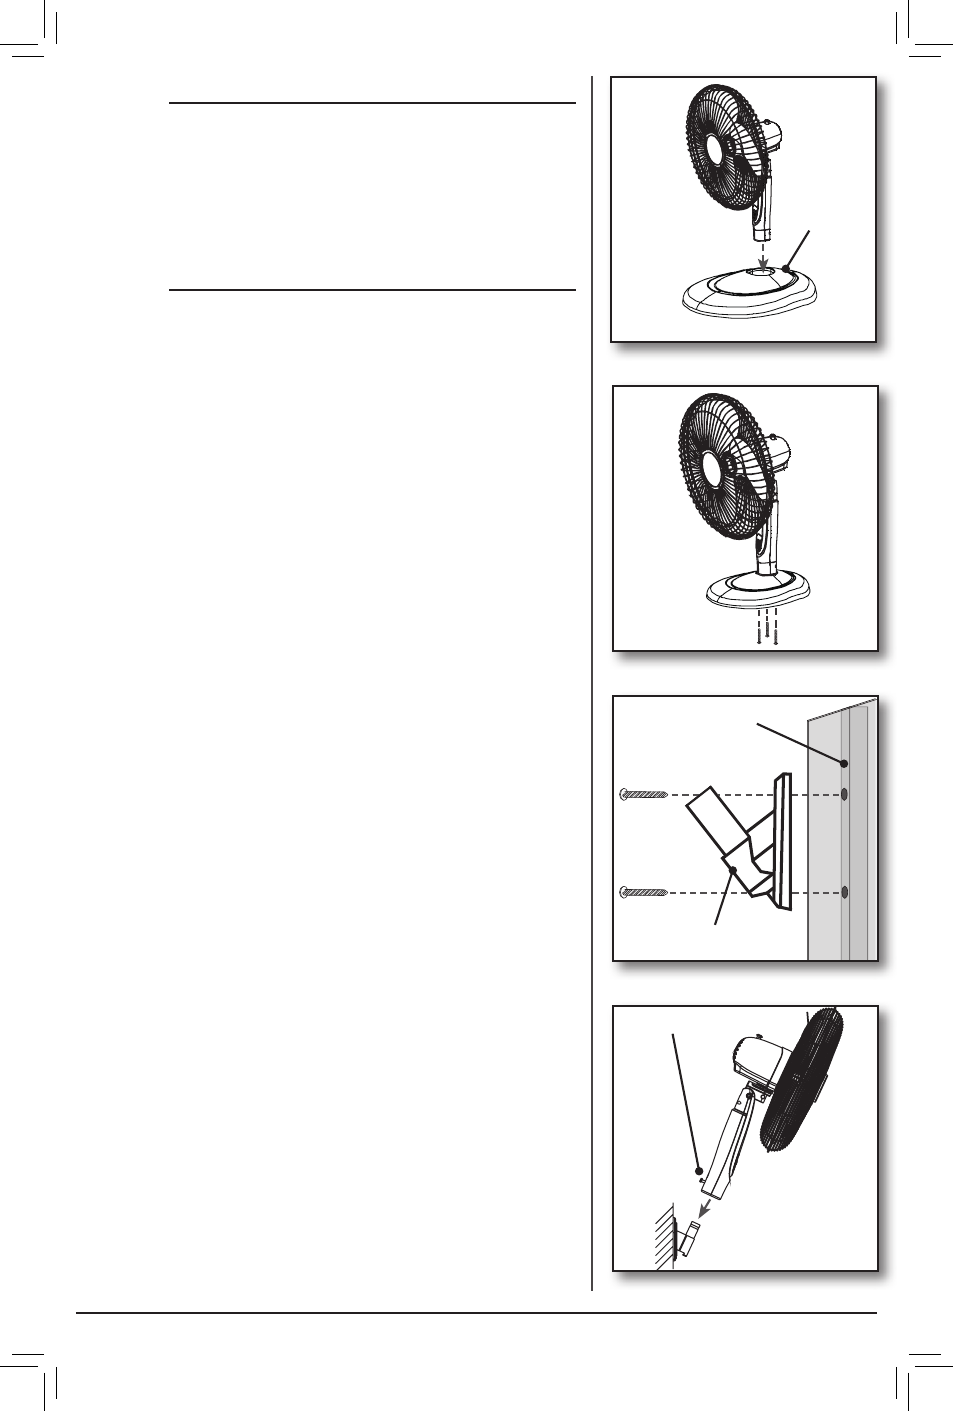
Table fan
figure 10.
figure 11.
1. Align the Fan Assembly over the Table Base (10) and
push together until secure. Figure 10.
2. Turn the Table Fan over and secure the 2 pieces
together using the 3 Table Base Screws. Figure 11.
(10) Table
Base
figure 12.
figure 13.
Wall mount
Before installing the Wall Mount Adapter, ensure the fan
location is close enough to a wall adapter that the fan
can be plugged in.
Caution: due to the weight of this product, it is required
it be mounted into a wall stud. Failure to do so, could
cause the product to fall and/or damage the wall location
it is mounted in.
1. Place the Wall Mount Adapter (11) against the wall
and stud where you want to mount the fan.
2. level the Wall Mount Adapter (11) for Asthetics.
3. Mark the hole locations on the wall with a pencil.
4. Using a 1/8 drill bit, drill the 2 holes for mounting.
5. line the holes on the Wall Mount Adapter (11) to the
Wall holes and insert the 2 Wall Mount Screws and
tighten Securely. Figure 12.
6. Remove the phillips head screw from the base of the
Fan Assembly and insert the thumb screw.
7. Insert the Wall Mount Adapter (11) shaft into the Fan
assembly. Figure 13.
8. Tighten the Thumb screw in the back of the Fan
Assembly to secure fan.
(11) Wall Mount Adapter
Thumbscrew
Wall Stud