Features, Top panel – M-AUDIO AIR 192|14 Desktop 8x4 USB Type-C Audio/MIDI Interface User Manual
Page 6
6
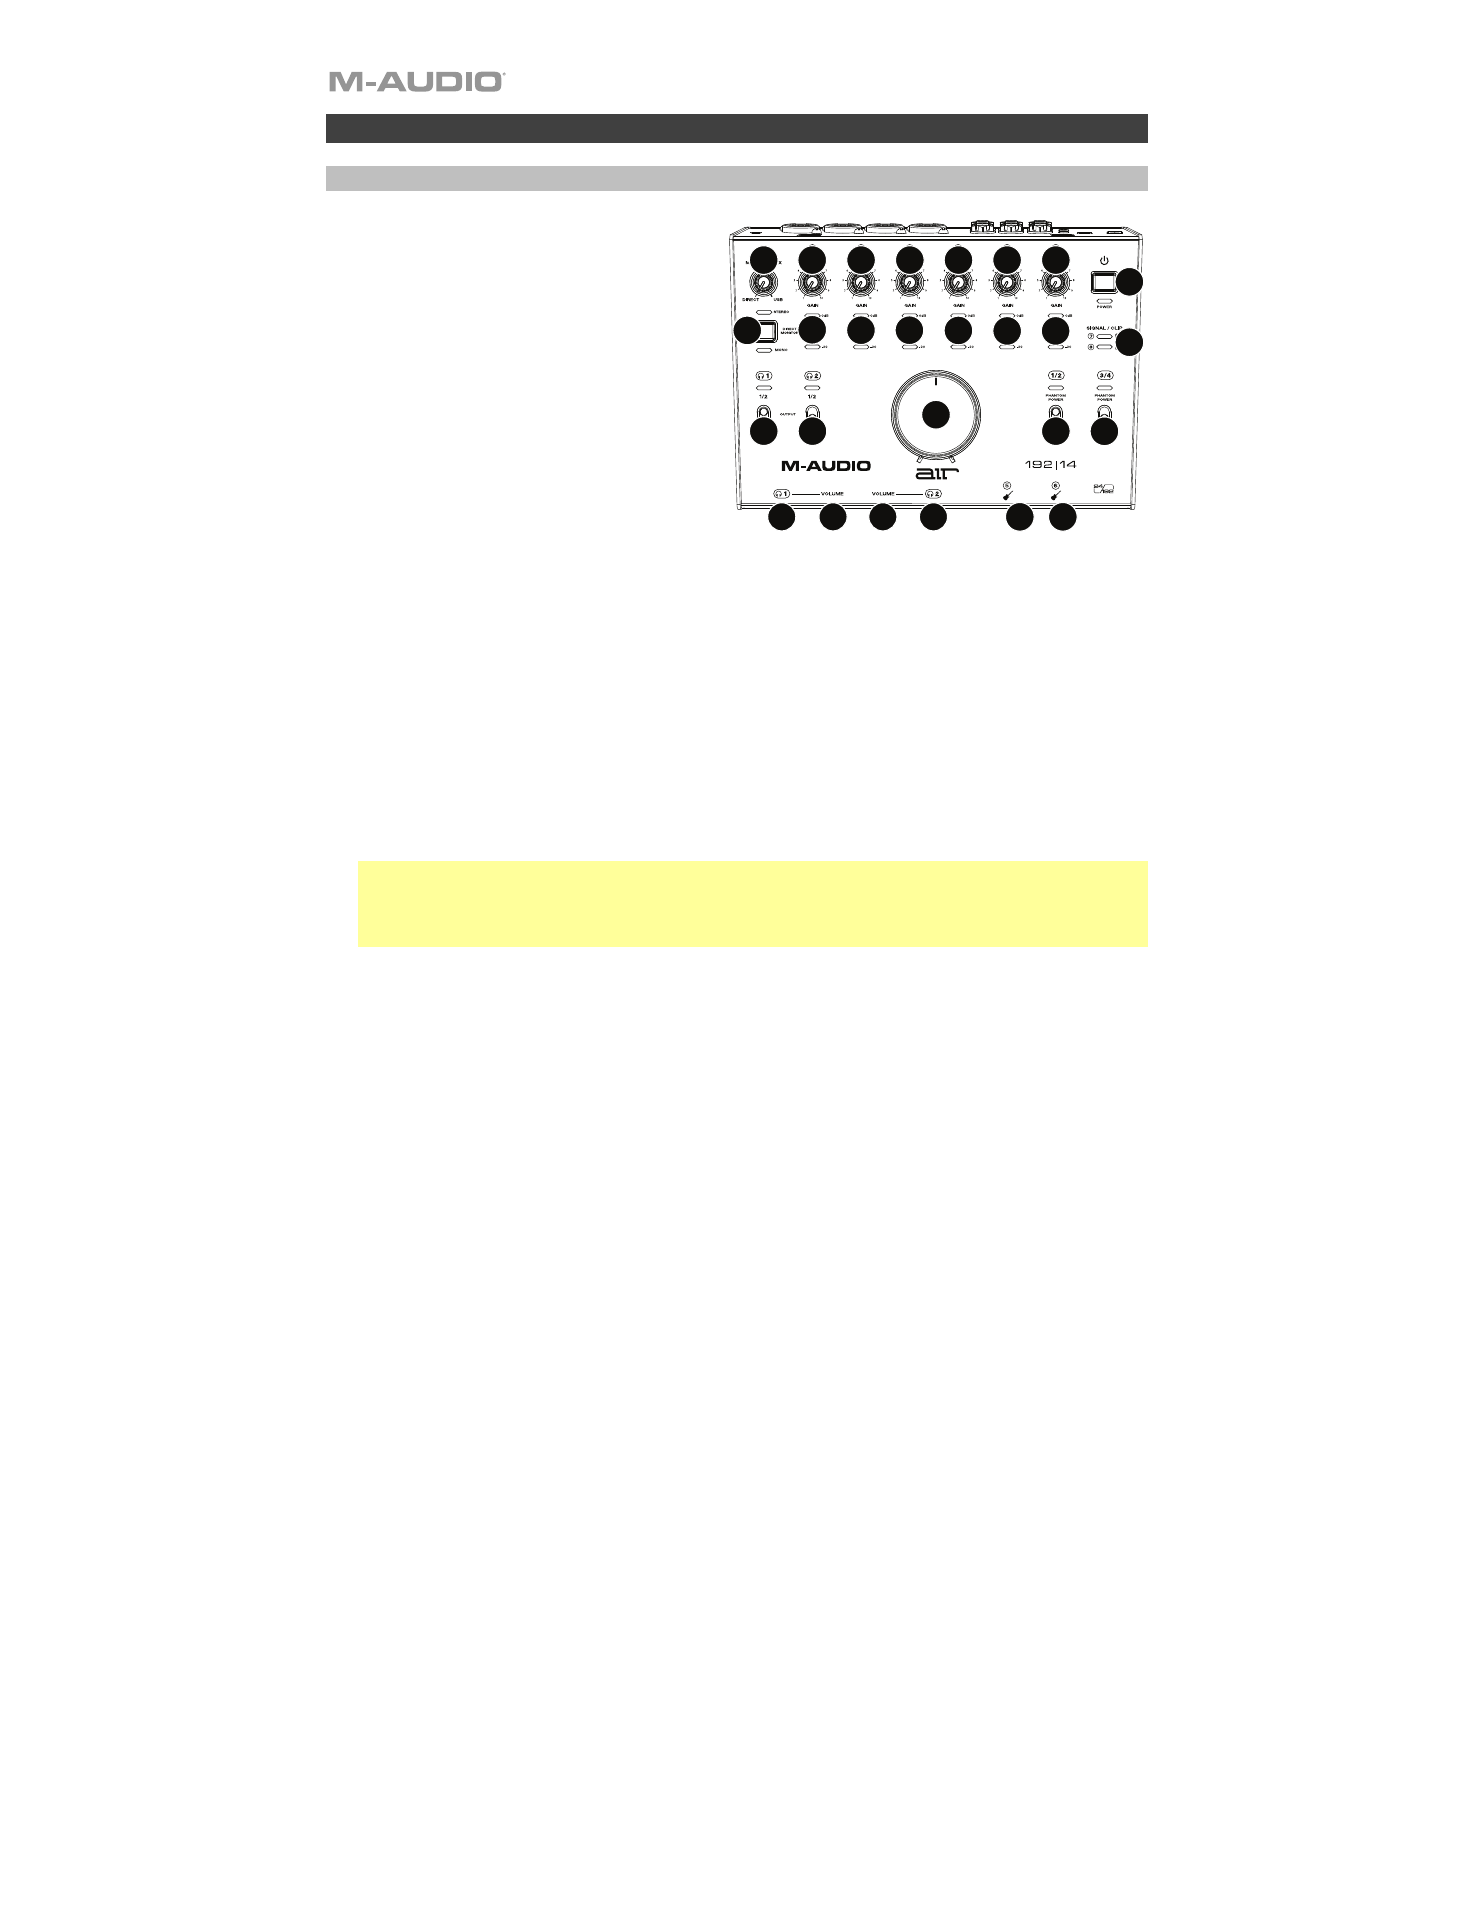
Features
Top Panel
1.
Power Button:
Press this button to power
the AIR 192|14 on or off. The Power LED
below this button lights up when the unit
is powered on.
2.
Input Gain:
Adjusts the input's gain level.
Set this knob so the corresponding
LED
Meter
(located below the knob) displays a
"healthy" level (yellow LED is lit) during
performance—but not so high that the
meter frequently "clips" or peaks (red LED
is lit), causing distortion in the audio.
3.
LED Meters (Inputs 1–6):
Indicates the
input signal level from the
Combo Inputs
and
Instrument Inputs
.
4.
LED Meters (Inputs 7–8):
Indicates the
input signal level from the
Line Inputs
.
These LEDs are green when a signal
above -20 dBFS is present, and turn red
when the signal "clips" or peaks.
5.
+48 V (Phantom Power) Switches:
These switches activate and deactivate phantom power for
Combo Inputs
1–2
or
3–4
. When activated, phantom power supplies +48 volts to the selected
inputs. Please note that most dynamic microphones and ribbon microphones do not require
phantom power, while most condenser microphones do. Consult your microphone's
documentation to find out whether it needs phantom power.
6.
Monitor Level:
Adjusts the output volume of
Main Outputs
, which should be connected to your
powered monitors or amplifier system.
7.
Monitor Mix:
Adjusts the mix of the audio signal from your inputs (
Direct
) and the audio output
of your computer (
USB
) that will be sent to the
Main Outputs
and
Headphone Outputs
.
Note:
When set to
Direct
, the left channel will be a sum of
Inputs 1
,
3
,
5
, and
7
and the right
channel will be a sum of
Inputs
2
,
4
,
6
, and
8
. You can sum these left and right channels (to hear
all inputs as a single summed mono signal) by putting the
Direct Monitor
button in its
depressed position.
This knob is useful for dealing with "latency" when you are recording in your DAW. Latency is a
delay in sound that may occur between the incoming sound (playing your instrument, singing,
etc.) and outgoing sound (when you hear it in the DAW).
Latency is often the result of the "buffer size" setting, which is usually located in your DAW’s
Preferences, Options, or Device Setup menu. Higher buffer sizes generally result in higher
latency. In some cases, lower buffer size settings can consume a lot of your computer’s CPU
and cause audio glitches. To prevent these audio glitches, you will need to use a higher buffer
setting, and this may result in latency.
If you are experiencing latency when recording, adjust the knob towards the
Direct
position to
increase the blend of unprocessed audio from your inputs directly to your
Main Outputs
and
Headphone Outputs
. This will let you hear the incoming audio from your inputs without latency
while still being able to hear the audio from your DAW. When listening to the playback, adjust the
knob all the way to the
USB
position.
If your computer is powerful enough, you may be able to set the buffer size setting in your DAW
low enough such that you may never need to listen to the direct audio signal from your inputs. In
this case, set the
Monitor Mix
knob all the way to the
USB
position to monitor only the audio
output of your DAW.
1
2
3
2
2
2
2
2
3
3
3
3
3
4
5
5
10
11
10
11
12 12
6
7
8
9
9