LEICA SBP PRO 1 Lithium-Ion Battery for S Typ 007 (7.3V, 2300mAh) User Manual
Page 51
EN
47
Re
vie
w mode
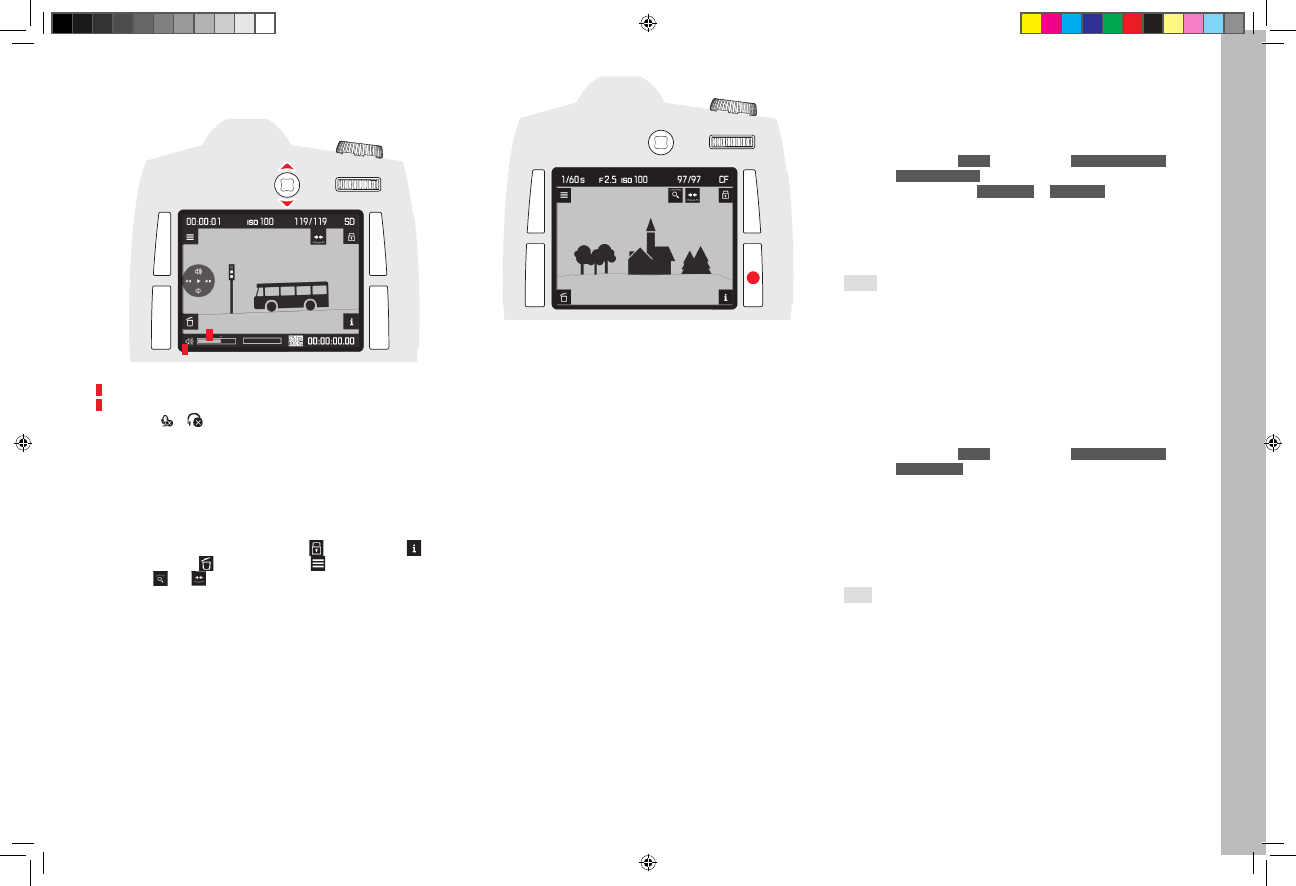
Setting the volume
Press the Joystick down (= reduce volume) or up (= increase volume)
1
2
1
Symbol for camera loudspeaker/connected headphones
2
Volume bar; at the far left-hand end of the bar the audio playback is
deactivated ( / ).
Displays in Review mode
For undisturbed viewing of the recordings, only the following are displayed
during review for unlimited time:
– In the header some fundamental information
– The functions of the adjacent buttons for 3 seconds in the four corners
of the monitor picture when switched on: = Protect menu, =
Change of display, = Delete menu and = Menu
– Top right and for the functions of the two thumbwheels
If the memory card or the selected fi le cannot be read, a corresponding
symbol appears in the right-hand margin of the black picture.
During both the unlimited review and the video payback, various addi-
tional displays and information can be called up in turn, in addition to the
displays described above, by repeatedly pressing the button bottom right
next to the monitor as in Live View mode:
– Histogram and clipping indicators
– Grid lines and horizon
– Extended picture data
– Back to the normal view
The settings for grid lines, histogram and marking of clearly focused
subjects are made in exactly the same was as described for Live View
mode on pages 27-28.
Review with histogram and clipping indicators
• Also displayed are:
– The histogram at top left
– Areas that are too bright are marked in red, areas that are too dark
in blue, fl ashing in each case, and at bottom right the clipping sym-
bol (
[
]
)
The clipping displays
You can use the menu to set the clipping thresholds for displaying both
the light and dark areas.
Setting the function
1. In the menu, under
SETUP
, select the item
Capture Assistants
and
2. select
Exposure Clipping
in the sub-menu.
3. In the sub-menu select
Lower Limit
or
Upper Limit
, and
4. set the desired threshold values on the scale by turning the thumb-
wheel or by pressing the Joystick to the left or right.
• The scale shows the clipping areas relative to the overall exposure
range.
Notes:
• The histogram and the clipping indicators are available both during
review of the whole picture and during review of a detail, but not
• during the simultaneous review of 4 or 9 reduced pictures.
• The histogram and clipping indicators always relate to the detail of the
part of the picture currently being displayed.
Marking of clearly focused subjects
• All clearly focused subjects are marked by highlighted contours.
The four available colors permit adaptation to any background.
1. In the menu, under
SETUP
, select the item
Capture Assistants
and
2. select
Focus Peaking
in the sub-menu
3. Call up the sub-menu, and
4. select the desired color there
Extended picture data
• A wide variety of additional picture data is displayed.
Note:
This review option only allows you to view the entire picture, even if only a
section was previously selected
Inhalt_EN.indd 47
12.10.2015 09:34:20