FloAire Canopy Hood User Manual
Page 18
18
Bolt-Together Standoff Installation
1. Unpack the standoff panels from the shipping container, being very careful not to dent or scratch
the panels. NOTE: Report any damage to the delivering freight carrier and file a claim if
appropriate.
2. Mount the end caps for the back standoff to the hood securely with self-tapping sheet metal
screws. Clamp the back standoff and the hood together before screwing so they do not shift. See
Figure 9.
3. Place the back standoff filler piece into place flush with the rear bottom edge of the hood and
secure with self-tapping sheet metal screws.
4. Continue with hood installation instructions.
5. After the hood installation is complete, secure the bolt-together standoff to the wall or other hoods
as applicable in a manner acceptable to the authority having jurisdiction.
Bolt Together Standoff Installation
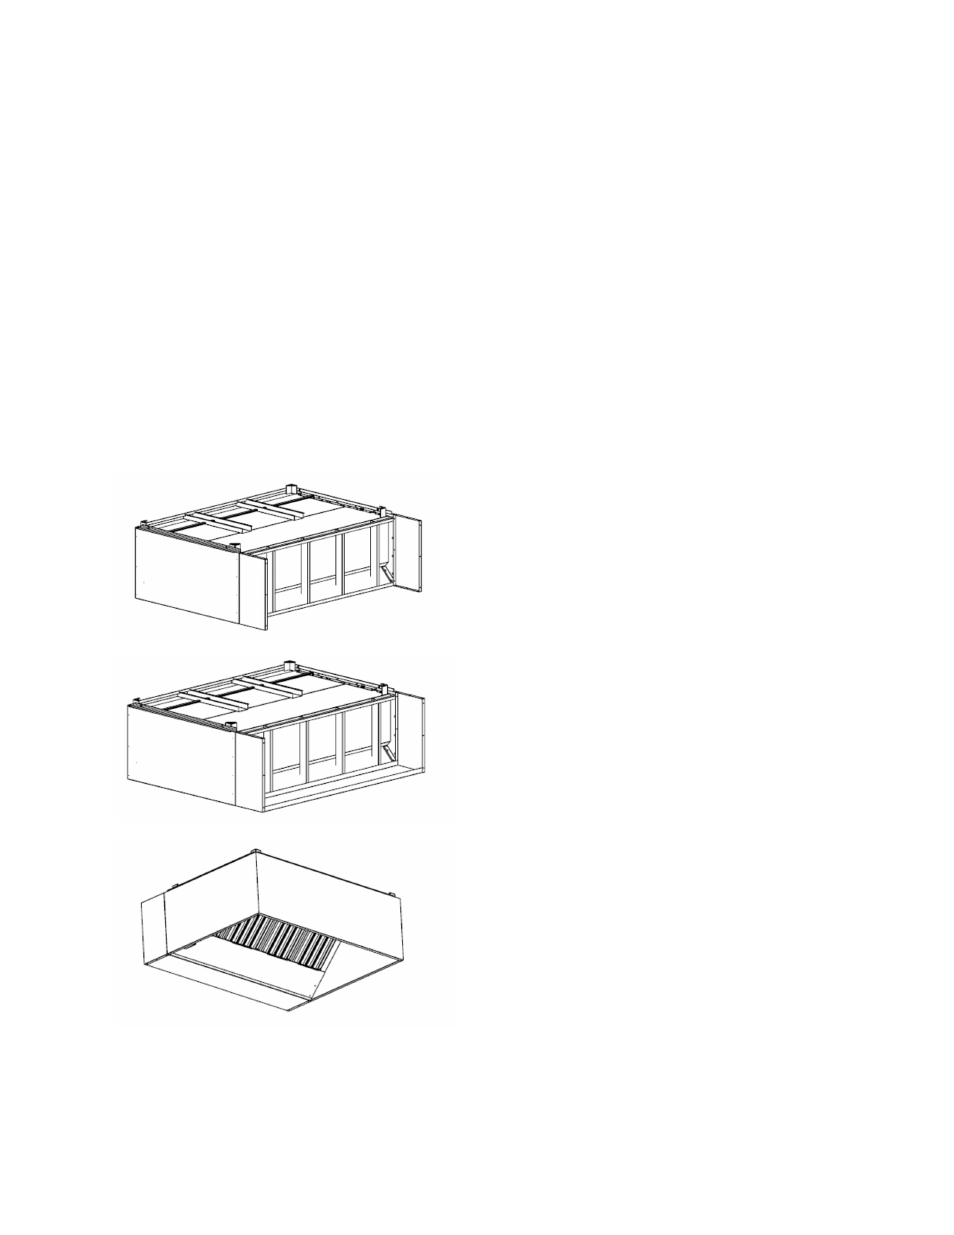
Figure 9
Mount the end caps for the back standoff to
the hood using self-tapping sheet metal
screws provided. Screw through the end cap
flanges into the flanges on the hood.
Place the back standoff horizontal filler
piece into place. Mount the filler piece
using self-tapping sheet metal screws
provided. Screw through the filler piece
flanges into the studs on the back side of the
hood. Do not penetrate into the capture
area. Once complete, no screws should be
visible from the outside of the hood.
Attach the back standoffs to the wall using
screws appropriate for the wall. Screw
through the flanges of the standoff into the
wall. If standoff mounts against another
hood, use the procedure from steps 1 and 2
for the second hood.