Back-to-back hoods – FloAire Canopy Hood User Manual
Page 14
14
Back-to-Back Hoods
The following is a step-by-step procedure for installation of back-to-back ventilation hoods. Refer to
Figures 5 and 6.
1. Follow steps 1 through 10 of the Installation of a Single Hood section for each hood.
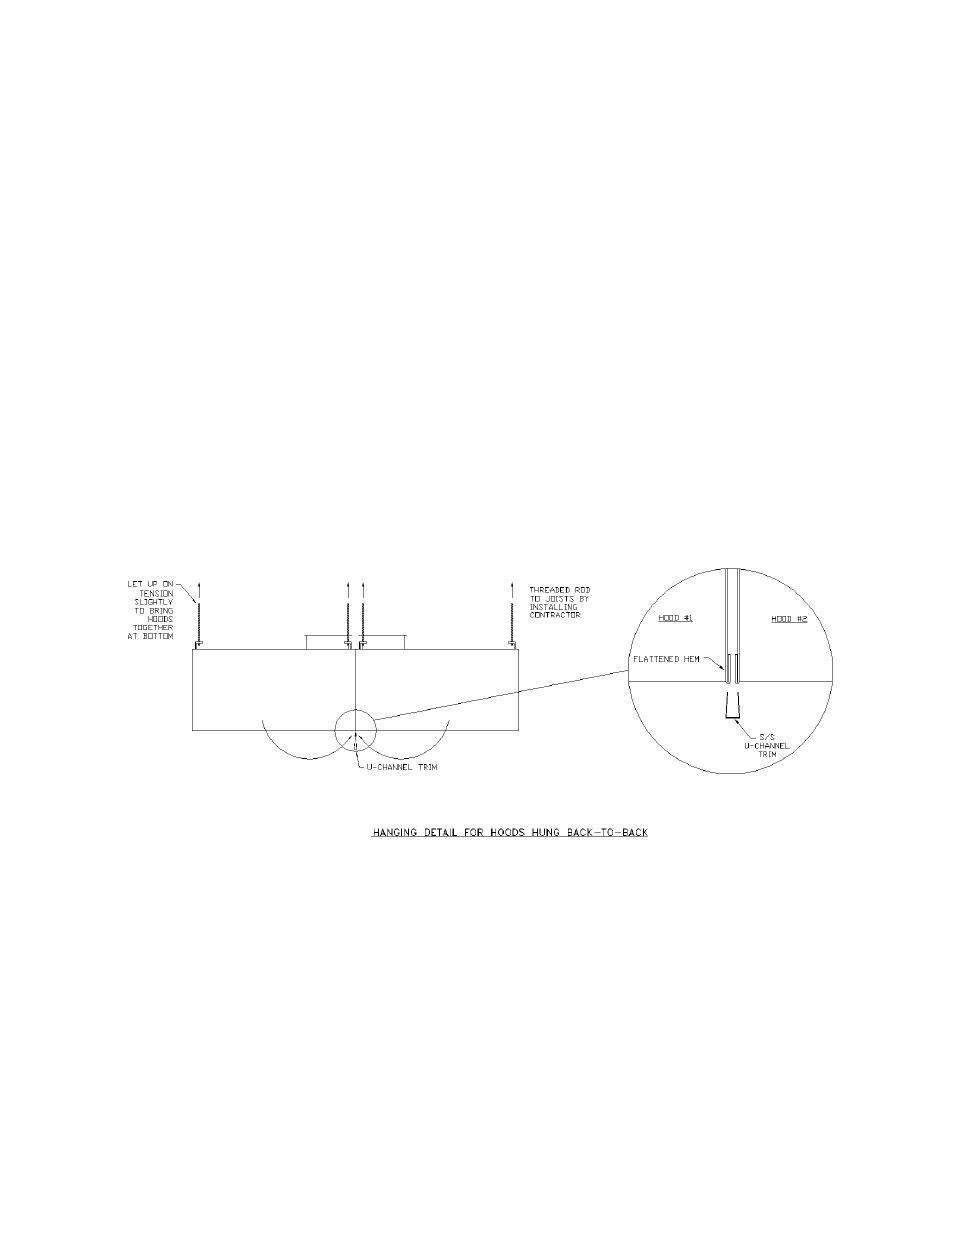
2. Adjust tension on hanging rods to position hoods so they fit flush with each other as shown in
Figure 6.
3. Bolt the top of the hoods together by sliding a threaded rod through the connection bracket slots
and fastening it into position by using heavy duty nuts and washers. See Figure 5.
4. Once all of the hoods are hung, follow steps 11 through 19 of the Installation of a Single Hood
section.
5. Run a bead >=1/8” of silicone sealant on the lower horizontal seam between the two hoods. Slip
the U-channel over the seam as shown in Figure 6. Tape can be used to hold the U-channel in
place until the silicone cures.
6. Run a bead of the same silicone sealant along the side vertical seam between the two hoods.
Slip the T-strip trim between the hoods. See Figure 5. T Strip is not required on hoods with
flanged ends and fully welded, ground, and polished corners.
7. Proceed with steps 20 through 23 of the Installation of a Single Hood section.
Hanging Detail for Hoods Hung Back-to-Back
Figure 6