Preparations, Operations, Notes – Panasonic G-CODE NV-FJ620 User Manual
Page 18: Recording from an external source
Attention! The text in this document has been recognized automatically. To view the original document, you can use the "Original mode".
Recording from an external source
This function can be used to make up an edited tape from
other recordings or video sources.
A new scene can be added to the end of previous one.
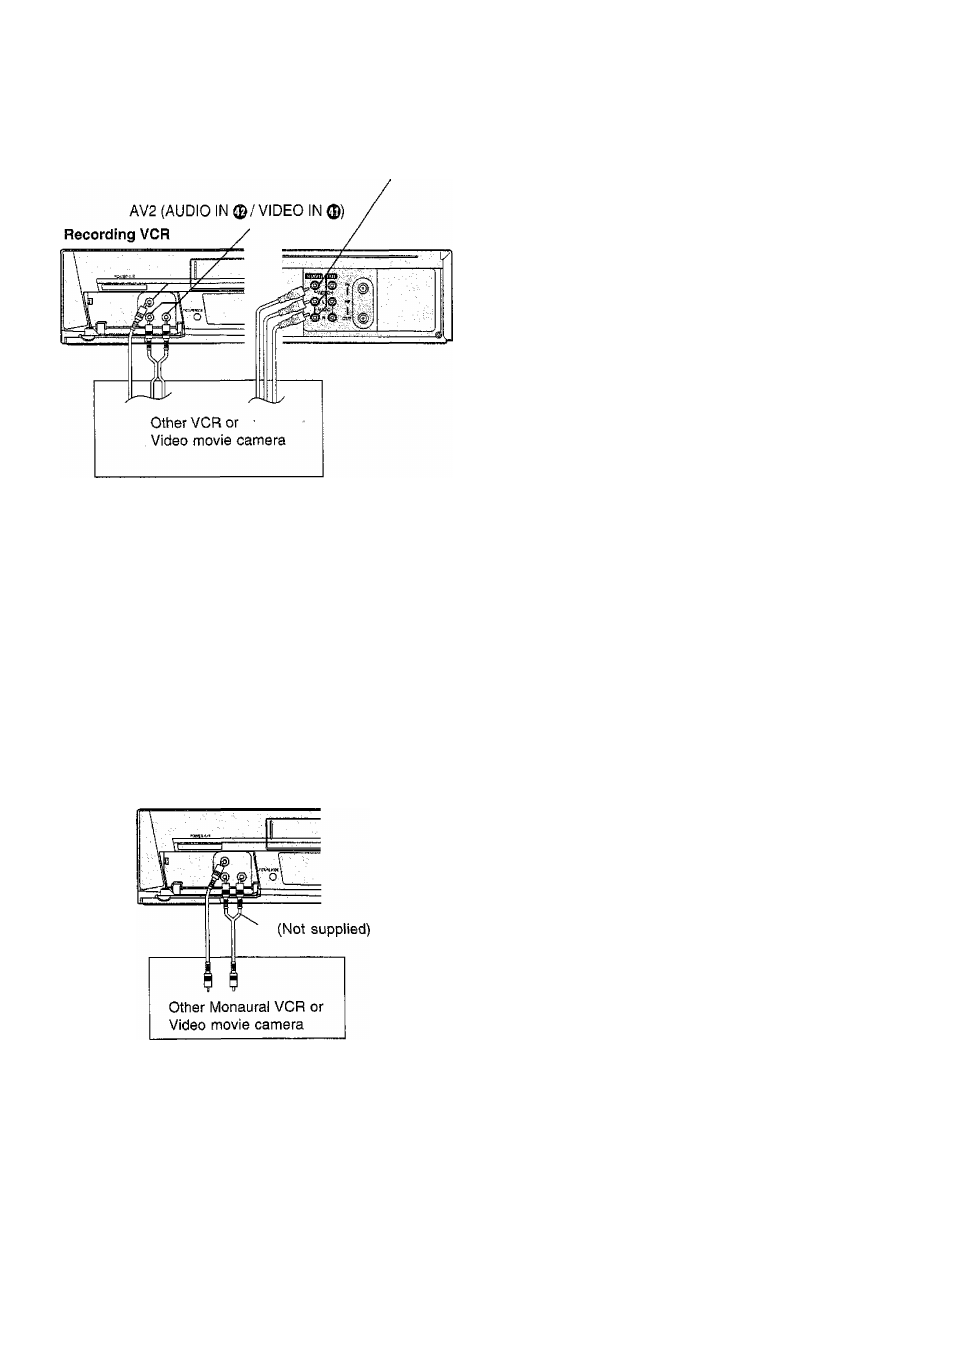
AVI (AUDIO IN © / V i D E O I N ® )
Preparations
- Connect a video movie camera or another VCR to this
VCR as shown.
- Display the VCR picture on the TV.
- Insert the cassette on which the copying is to be
performed, and make sure that its erasure prevention tab is
not broken out.
- Select the audio source required by pressing the INPUT
SELECT button ® to set A1 or A2.
A1; Through the AV1 (AUDIO IN/VIDEO IN)
sockets.
A2:
Through the AV2 (AUDIO IN/VIDEO IN) sockets
on front panel.
- Use the L and R connectors for operations in the
normal (monaural) mode.
Operations
1 Press the Play button
Q
to start playback.
2 At the point where you want to join a new scene, press
the Pause/Slow button © to put it in the still playback
mode.
3 Press the REC button © to put it in the recording pause
mode.
4 Start playback on the source unit and search for the point
from which you want to record (copy) onto this VCR.
5 When that point is reached, press the Pause/Slow button
© again to start recording the new picture and sound
from the playback unit.
6 To record (copy) additional scenes, press the Pause/
Slow button 0 to put this VCR in the recording pause
mode and then perform above steps 4 and 5 again.
7 At the point where you want to stop recording, press the
Stop button 0 to finish recording.
Hint:
- The new sound Is recorded on both the Hi-Fi audio tracks
and the normal audio track. The sound recorded on the
normal audio track is always in mono.
Notes:
- If you leave the VCR in the recording pause mode for more
than 5 minutes in step 3 or 6, the VCR automatically
switches over to the stop mode to protect the video heads.
- If [DIRECT REC] is set to [ON], connect with AV2 sockets
and select A2.
18