Audio dubbing, Preparation – Panasonic NV-FS1 User Manual
Page 34
Attention! The text in this document has been recognized automatically. To view the original document, you can use the "Original mode".
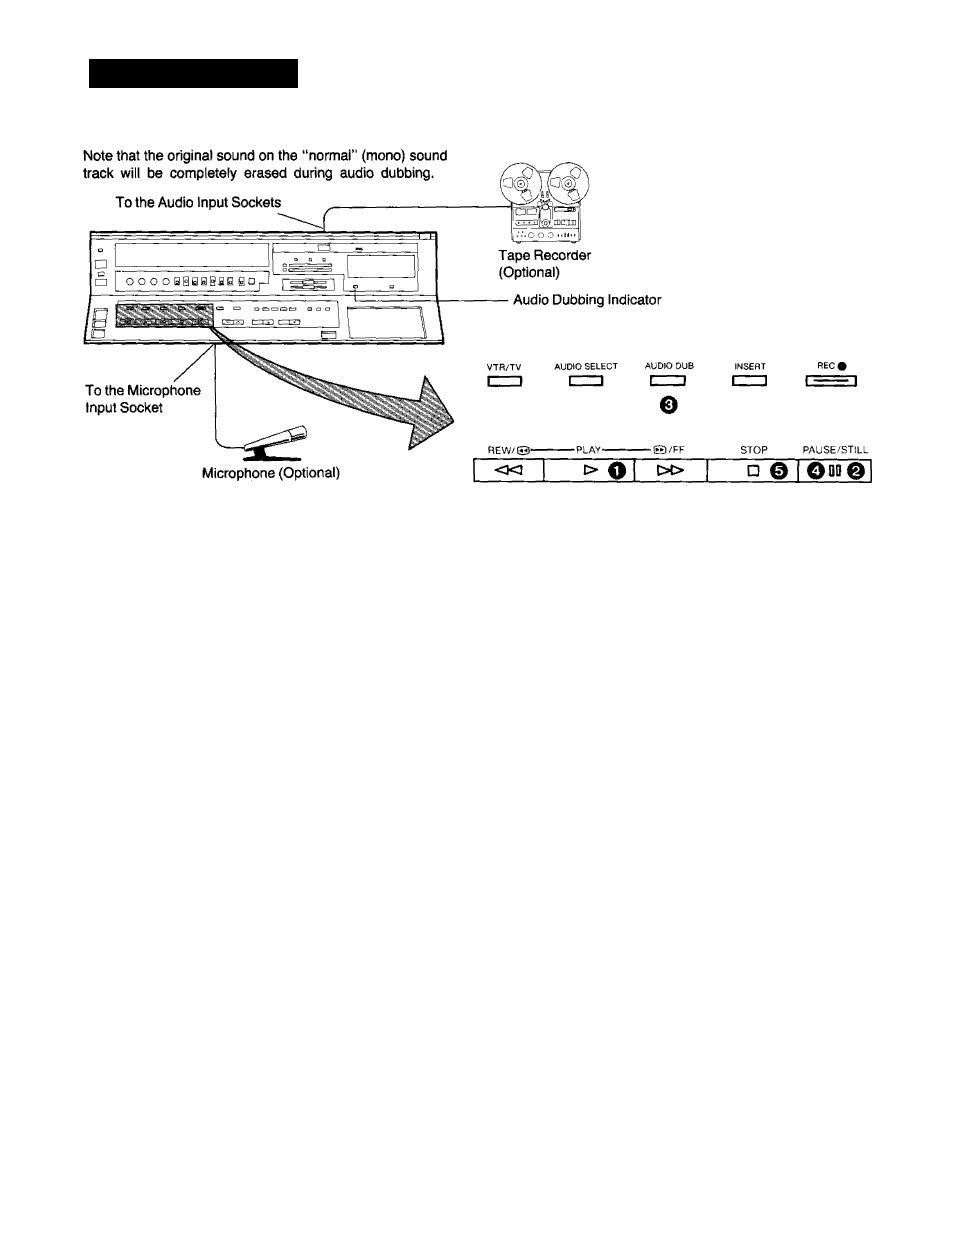
AUDIO DUBBING
Preparation
•Set the Input Signal Selector to “Line/Audio".
•Insert a video cassette with the erasure prevention tab
intact.
When a video cassette is already inside the VTR, press
the VTR On/Off Switch to turn it on.
•Reset the Tape Counter to “0:00.00’'.
•Turn the TV set on and select the video playback channel.
•Set the Audio Rec Level Control Selector to “AGC”.
•Select the “normal” (mono) sound track by repeatedly
pressing the Audio Playback Mode Selector until the
Audio Playback Mode Indicators “Left” and “Right” are
not lit.
O Press the Play Button {►) to look for the point where
you want to start the audio dubbing.
^ Press the Pause/Still Button
(II)
at the exact point
where you want to start the audio dubbing.
0 Press the Audio Dubbing Button (the indicator will light
up).
•Sound recorded by using the audio dubbing func
tion is recorded on the “normal” audio track (always
in mono).
•For playback, select the “normal” (mono) sound
track by repeatedly pressing the Audio Playback
Mode Selector until the Audio Playback Mode
Indicators “Left” and “Right” are not lit.
•When a microphone is used for dubbing, do not
place it near the speaker of your TV to prevent
howling noise (acoustic feedback).
•If the erasure prevention tab of the cassette is
missing, no audio dubbing can be made.
CD AUDIO DUB
0 Press the Pause/Still Button
(I I)
once again to release
the tape from pause, and at the same time start the
operation of the audio source. The audio dubbing will
start.
0 Press the Stop Button (■) to stop the audio dubbing.