Timer recording by using the digital scanner – Panasonic NVG40 User Manual
Page 20
Attention! The text in this document has been recognized automatically. To view the original document, you can use the "Original mode".
TIMER RECORDING BY USING THE DIGITAL SCANNER
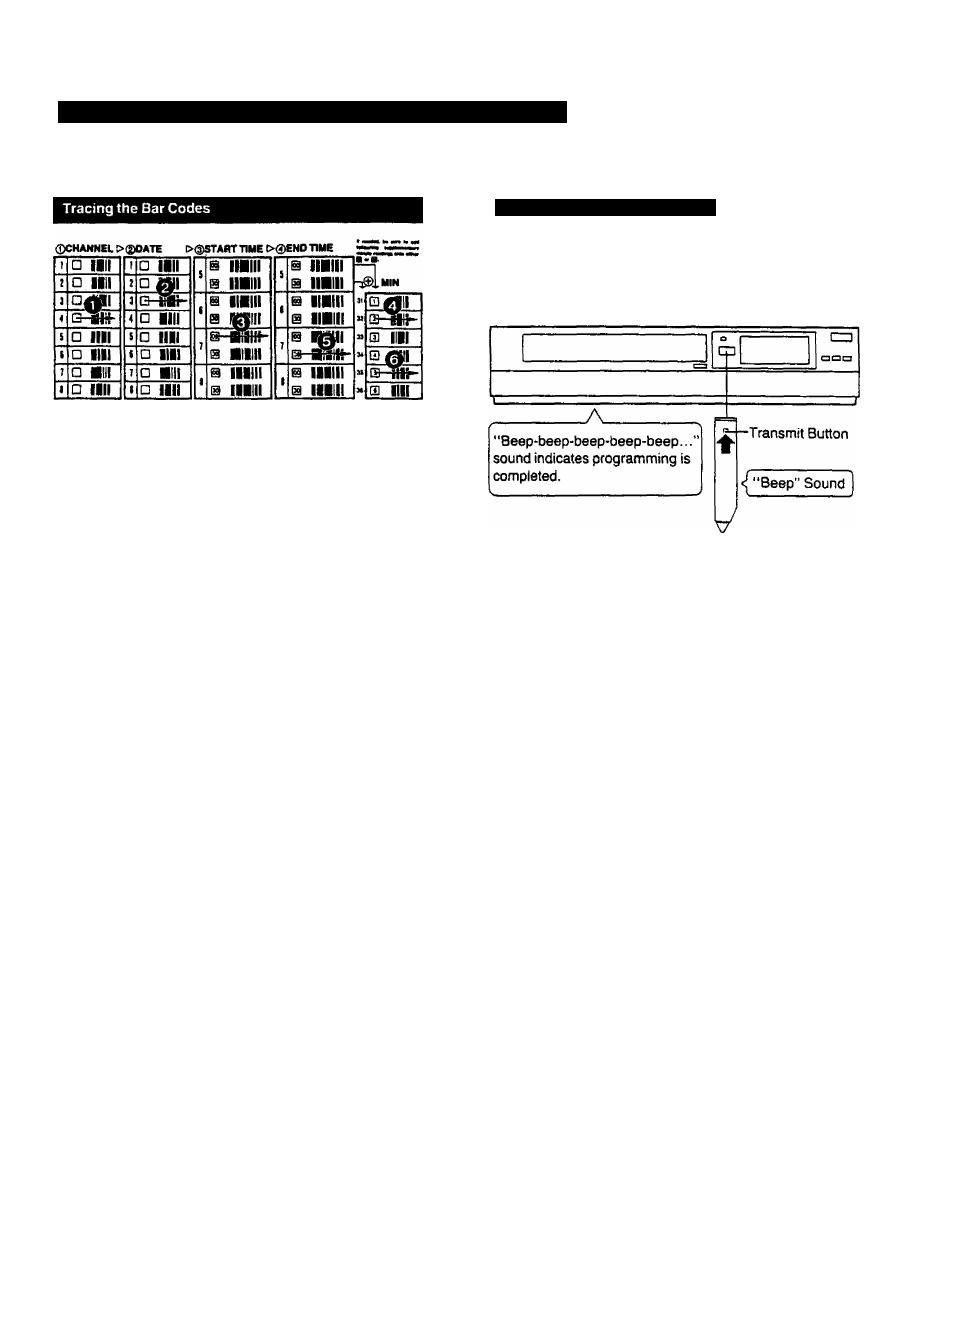
Example: When programming a timer recording for a
programme that will be broadcast on channel
position 4 on the 3rd of the month, from 7:02 to
-
7:35, trace the bar codes in the order of the
numbered arrows shown below.
O Trace the bar code for "CHANNEL".
© Trace the bar code for "DATE”.
© Trace the bar code for "START TIME”.
© Trace the bar code for "+MIN".
© Trace the bar code for “END TIME".
© Trace the bar code for “+MIN".
•When setting to a minute between 1 and 29, trace the
appropriate "+MtN" bar cpde after tracing the ®
bar code.
•When setting to a minute between 31 and 59, trace
the appropriate ‘'+MIN" bar code after tracing the
bar code.
Setting the Time in 30-minute Steps
•Trace the appropriate bar code in the 30-minute-step
column only.
•The "Bee Bee Bee Bee Beeeeep" sound signals
that the scanner is now ready for data transmission.
•When a timer bar code with ® or @ minutes is
traced for the end time, the "Bee Bee Bee Bee
Beeeeep” sound which indicates reading comple
tion is heard. When subsequently tracing a "+MIN”
bar code after tracing or 0 to choose another
minute setting, the reading completion sound will be
heard again.
•When no sound is heard, read the bar codes once
again.
•If more than one bar code is read in the same group,
only the last code will be effective.
•The bar codes for the time from “0:00" (midnight) to
“4:59" in the morning are on the back of the
Programming Sheet.
•If the "CANCEL" bar code is read, all bar codes that
have been read so far will be cancelled.
Transmit the Programming Data
Keep pressing the Trasmit Button and confirm that the
programmed data on the Multi-Function Display of the VTR
are as desired.
After reieasing the button, the data wiil continue to be
dispiayed for about 12 seconds.
•If the transmission was not received correctly, the
"Beep-Beep, Beep-Beep” sound from the VTR will warn
you. In this case, perform transmission again.
•The transmission is possible when the VTR is turned on
but is not in any of the recording or playback operation
modes. It is also possible when the VTR is in the timer
recording standby mode (Q indication is lit).
•The programming wiii be done on the next lower unoccu
pied timer programme number (4—1).
•If all programme numbers are occupied, the "Beep-Beep,
Beep-Beep” sound from the VTR wiil warn you that the
programming cannot be made.
•When the Transmit Button is pressed, the VTR will
automatically be put into the timer recording standby
condition and the VTR will be turned off.
•To operate the VTR before the timer recording wiil be
performed, press the Timer Rec. Button to suspend the
timer recording standby condition. After using the VTR, be
sure to press the Timer Rec. Button again, otherwise the
timer recording will not be made.
•If the VTR is not turned on when the Transmit Button is
pressed, no sound will be heard from the VTR to warn that
the transmission was not received.
-20-