Repair and adjustment, Figure 2s – Craftsman 917.254611 User Manual
Page 20
Attention! The text in this document has been recognized automatically. To view the original document, you can use the "Original mode".
GRASP
,
tJt^otr'
^
FiClMItM
REPAIR AND ADJUSTMENT
19. Hood Removal
HOOD
DASH
HOOD
SPRING
FIGURE 2S
HOOD
HINGE
BRACKET
GRASP
ucoc
GRASP
HERE
FIGURE 2S
GRASP
HERE
HINGE
BRACKET
SLOT
A
KEEP FEET CLEAR FROM UNDER
MOWER DECK.
A
DO NOT TOUCH HOT MUFFLER, EN
GINE CYLINDER OR COOLING FINS
AS CONTACT MAY CAUSE BURN.
a. Grasp hood at edge next to dash afKl open hood to
full up position (Fig. 25).
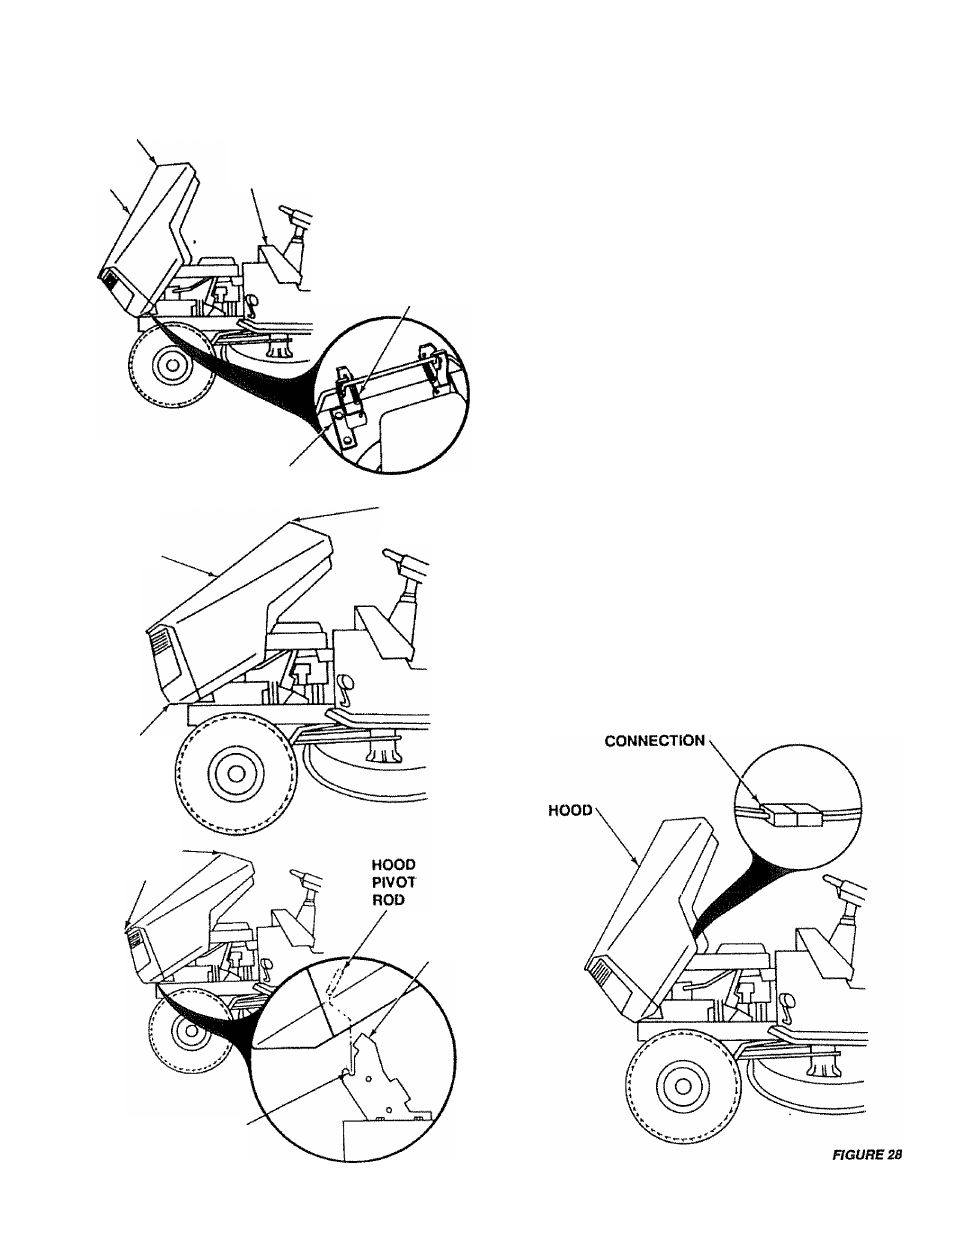
b. Disconnect headlight connection (Fig. 28)
c Carefully remove hood springs from hinge brack
ets (Fig. 25).
A
SPRINGS
ARE
UNDER
TENSION.
WEAR SAFETY GOGGLES DURING RE
MOVAL AND INSTALLATION.
20
.
d Lower hood half way and grasp at the bottom of the
grill and at the upper hood edge (Fig . 26). Lilt hood
up, out and away from tractor,
e.
Place hood carefully on the ground ,
Hood installation
a.
Pick hood up at top of grill and upper hood edge
(Fig. 27),
b Align hood pivot rod with hinge brackets. Rotate
hood halt way down, slide pivot rod in and down
into hinge slots (Fig. 27).
Open hood to full up position (Fig. 25).
Carefully reinstall hood hinge springs (Fig 25).
Reconnect headlight connection.
Close hood.
HEADLIGHT
FIGURE 27
20