Preliminary setup and chemical holder installation – Power Soak 27173 Chemical Dispenser Installation Guide User Manual
Page 2
2
Step #1
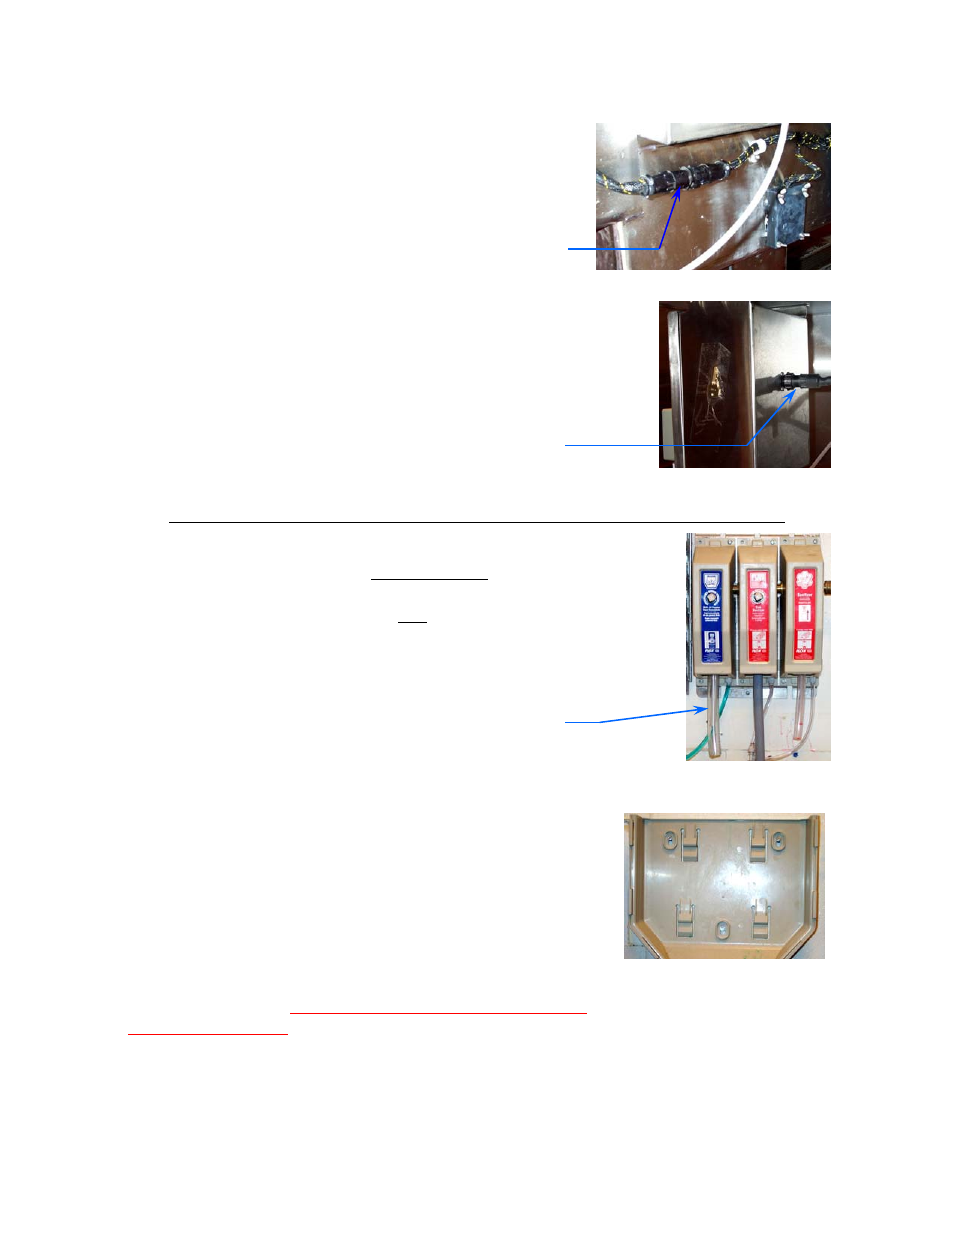
Verify that the male and female multi-pin connec-
tors of the wiring harness, between the two halves
of the unit, are tightened and secure.
Step #2
Locate the multi-pin connector that is underneath
the clean drain board (behind the dual dispenser
pump) and secure it to the back of the dispenser.
Preliminary Setup and Chemical Holder Installation
Step #1
Shorten the existing APSC DETERGENT outlet tube
to approximately 8 inches. This product will be
used for general cleaning but not for washing
dishes.
Note: In a new store, this equipment may not yet be
installed. If so, disregard this step.
Shorten to 8”
Step #2
Install the Liquid Storm bag holder. The holder
comes in two pieces. First, attach the wall
bracket. If space is available, mount the bracket to
the wall next to the Power Soak unit at the same
height as the detergent dispenser or, if necessary,
above the wash tank. Use the mounting screws
and anchors that are provided with the installation
kit to mount the bracket.
Important: Do not mount
the Liquid Storm bag holder above the Rinse Tank,
Sanitizer Tank or Clean Drain Board sections of the
Power Soak unit. Doing so may violate local health
and safety codes.
Step #3
Install the front section of the bag holder.
Multi-pin connector behind unit
Multi-pin connector behind
chemical dispenser