Step 4: install a power supply unit (psu) – IEI Integration RACK-2100G User Manual
Page 4
RACK-2100G QIG
IEI Technology Corp. Page 4
STEP 4: INSTALL A POWER SUPPLY UNIT (PSU)
Compatible IEI PS/2 and redundant type PSUs are listed in the table below.
Output Range
Model No.
Input
Type
Watt
+3.3V
+5V
+12V1 +12V2
-5V
-12V +5Vsb
RACK-2100G
ACE-832AP-RS
AC ATX
300W
28A 30A 15A N/A 0.3A 0.8A 2A
ACE-841AP-S-RS AC ATX
400W
28A 33A 20A N/A 0.5A 1A 2A
ACE-850AP-RS
AC ATX
500W
27A 29A 18A 18A 0.3A 0.8A 2A
RACK-2100GR
ACE-R4130AP-RS AC ATX
300W
18A 25A 16A N/A 0.5A 0.5A 2A
ACE-R4140AP-RS AC ATX
400W
25A 25A 30A N/A N/A 0.8A 2A
ACE-C232-RS AC
AT
230W
N/A
20A
10A
N/A
N/A
0.5A
0.5A
Table 2: Compatible IEI PSUs.
S
TEP
4.1:
I
NSTALL A
PS/2
T
YPE
P
OWER
S
UPPLY
Step 1:
Correctly position the PSU at the rear of the chassis
making sure the power switch and the cable socket both
face outwards.
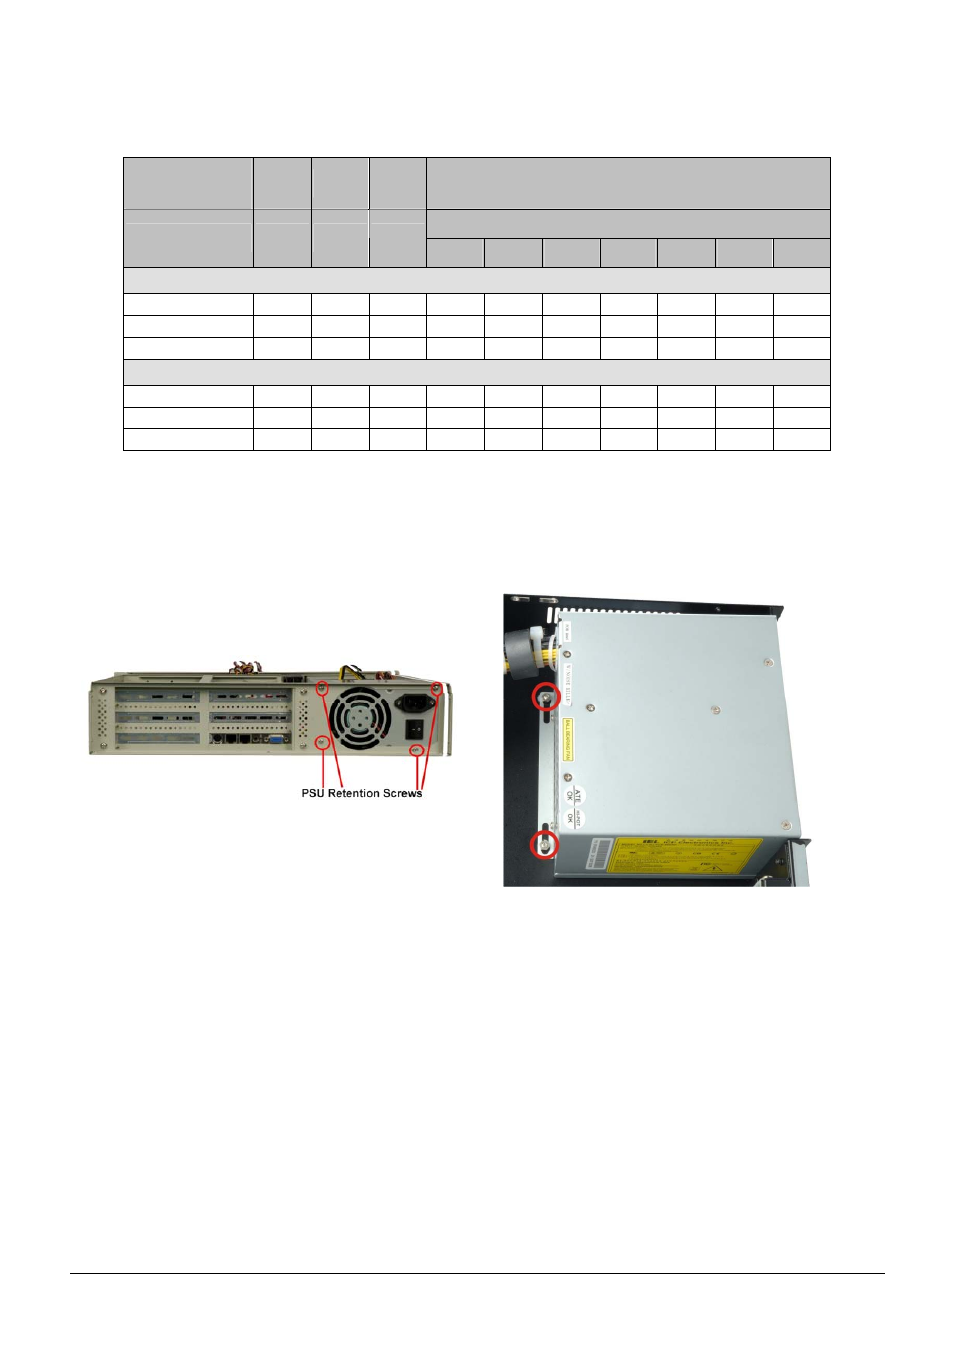
Step 2:
Once the PSU has been correctly positioned, secure the
PSU to the chassis by inserting four retention screws
from the rear of the chassis.
Figure 6: Insert PSU Retention Screws
Step 3:
Insert two screws through the bottom of the chassis and
rear mounting bracket of the power supply. Find the two
nuts supplied with the chassis and thread them onto the
screws and tighten until the PSU is secured to the
chassis.
Step 0:
Figure 7: Insert PSU Rear Bracket Screws and Nuts