IEI Integration RACK-2100G User Manual
Page 10
RACK-2100G QIG
IEI Technology Corp. Page 10
F
AN
R
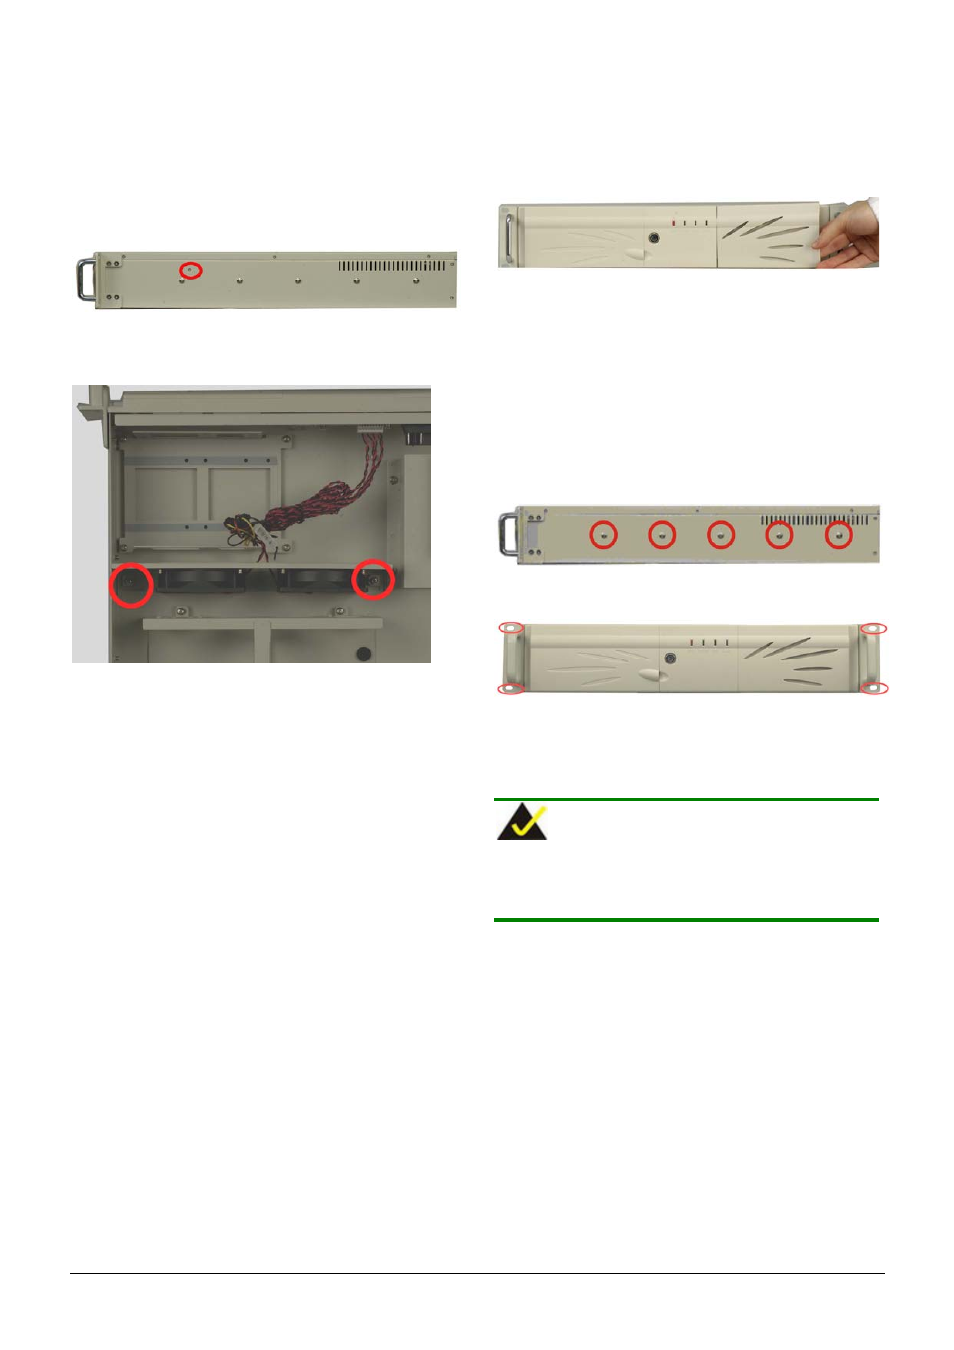
EPLACEMENT
There are two 8cm cooling fans secured to a fan bracket inside
chassis. Follow the steps below to replace a fan.
Step 1:
To remove the fan bracket, remove one fan bracket
retention screw from the right side of the chassis and
two internal fan bracket retention screws on the base of
the chassis.
Figure 28: External Fan Bracket Retention Screw
Figure 29: Internal Fan Bracket Retention Screws
Step 2:
Remove the retention screws that secure the fan to the
bracket.
Step 3:
Replace the replacement fan and reinsert the previously
removed retention screws.
Step 4:
Remount the fan bracket into the chassis and reinsert
the previously removed fan bracket retention screws.
Step 0:
F
AN
F
ILTER
R
EPLACEMENT
Follow the steps below to replace the fan filter.
Step 1:
Open the fan filter cover at the right side of the chassis
front panel.
Figure 30: Fan Filter Cover
Step 2:
Replace the filter pad inside.
Step 3:
Close the fan filter cover.
Step 0:
R
ACK
/C
ABINET
I
NSTALLATION
Supporting rails, rack trays, or slide rails can be can be used with the
mounting holes on the sides of the chassis for rack or cabinet
installation.
Figure 31: Rack/Cabinet Side Panel Mounting Holes
Figure 32: Rack/Cabinet Front Panel Mounting Holes
B
ACKING
U
P
D
ATA
NOTE:
If the system is running critical applications, find an
appropriate time to backup data and properly shut down the
system.