Operating, E-23 – PLUS Vision Data Projector User Manual
Page 23
E-23
Power Cable Connections and Switching the Power On/Off
ACCESS
ENTER
CANCEL
SELECT
+
-
POWER
POWER
STATUS
AUTO
SOURCE
MENU
AUDIO
VIDEO
S-VIDEO
RGB OUT
STATUS
STATUS
STATUS
POWER
POWER
POWER
There is an order in which the power cable is connected and the power is switched on/off.
Operating
1
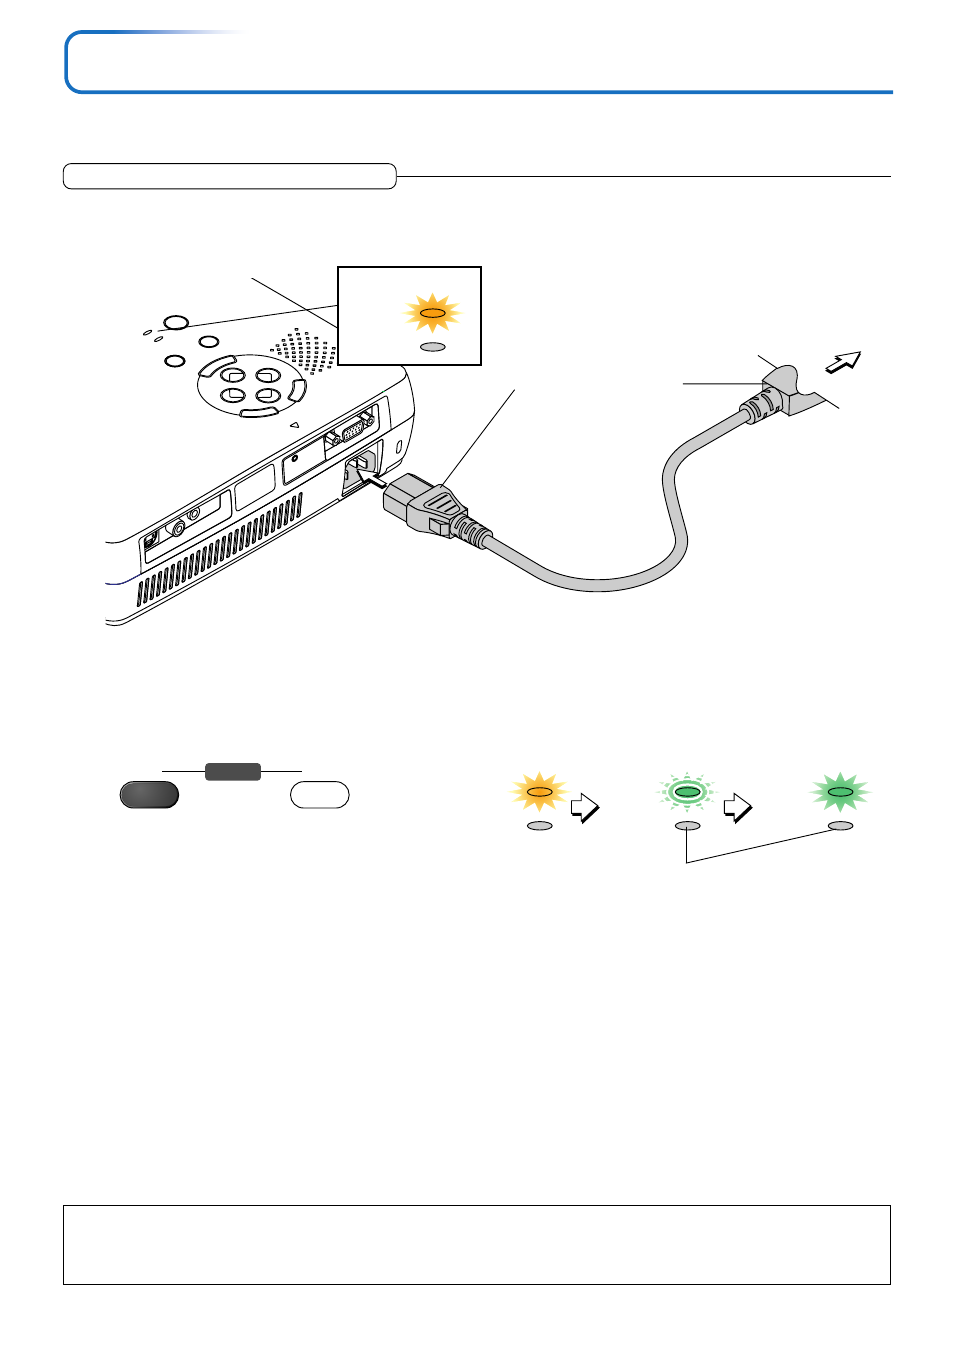
Connect the AC IN connector of the projector and the power outlet using the supplied power cable.
The POWER indicator will light in amber, and the unit will enter the standby mode.
POWER
STATUS
Lit amber
Firmly plug in all the way.
To wall outlet
2
Switch on the projector power
Projector operation: Press the POWER button.
Remote control operation: Press the POWER ON button.
This indicator is also lit green in Eco-mode.
Flashes green
(Approximately 60 seconds)
Lit green
Power is on
The first time the power is switched on after purchase, [Menu Language Select] will be displayed. See Page E-24 for
information about language selection.
• When the power is switched on, the POWER indicator changes to flashing green, then lights steadily after about 60
seconds and the projection screen is set to the brightness of normal mode. At this time, if the STATUS indicator is lit in
green, [Lamp Mode] is set to "Eco". See Pages E-30 and E-49 for information about the selection method.
• If the power does not come on, see "When the STATLIS Indicator is Lit or Flashing" on Page E-59.
• Your own logo can be projected at the time of startup. See "Startup Logo Creation" on Page E-57.
The projector is now capable of regular projection.
3
Switch on the power of the connected equipment
Note:
• When the power plug will be unplugged from the power outlet, please place the projector near the power outlet so that it may be reached
easily.
• Press the POWER button or the POWER ON button after the POWER indicator is lit in amber.
ON
OFF
POWER
Lit amber