Figure 9, Figure 8, Assembly - console & handlebar – Fitness Quest 491pr User Manual
Page 18
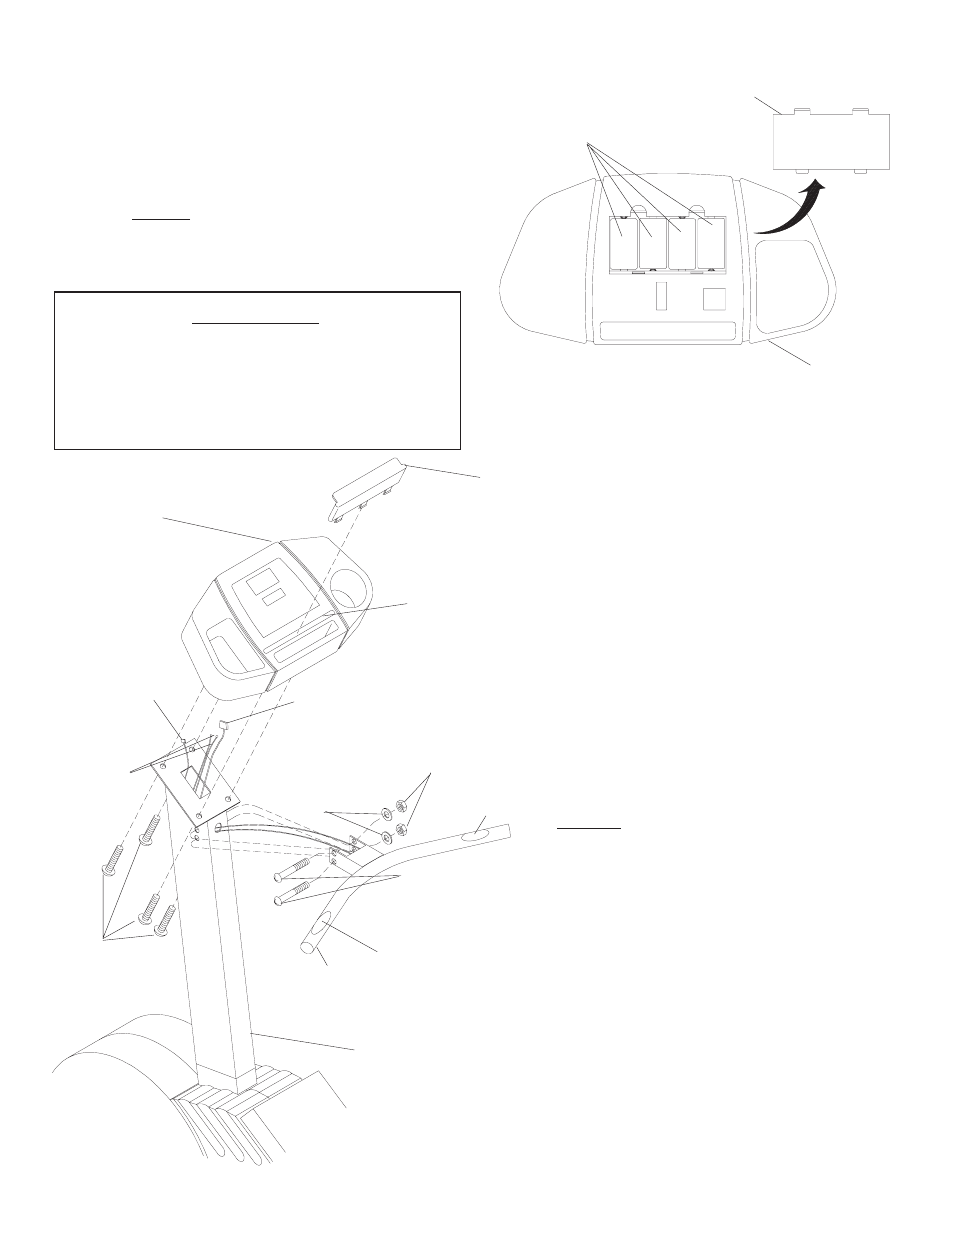
9
FIGURE 9
ASSEMBLY - Console & Handlebar
FIGURE 8
BATTERY
DOOR
FOUR "C" SIZE
BATTERIES
FIGURE 8
Step 18. Remove BATTERY DOOR of CONSOLE
(40) and insert four "C" SIZE BATTERIES
and replace BATTERY DOOR.
NOTE: DO NOT use rechargeable bat-
teries. Using rechargeable batter-
ies will cause a short circuit and
destroy CONSOLE (40).
40
CONSOLE
44
BOOK
HOLDER
PULSE
WIRES
39
CONSOLE
TUBE
43
MACHINE
SCREW
SLOT
4
M8
WASHER
PICKUP
WIRE
40
CONSOLE
FIGURE 9
Step 19. Insert PULSE WIRES from FRONT
HANDLEBAR (41) through HOLE in CON-
SOLE TUBE (39) and pull PULSE WIRES
up through top of CONSOLE TUBE.
Step 20. Attach FRONT HANDLEBAR (41), with
PULSE GRIPS up, to CONSOLE TUBE
(39) with MACHINE SCREWS (42), M8
WASHERS (4), and M8 LOCKNUTS (31).
NOTE: DO NOT pinch wires between
HANDLEBAR and CONSOLE
TUBE.
Step 21. Carefully plug PICKUP WIRE, EXTENSION
WIRE and PULSE WIRES into bottom of
CONSOLE (40).
Step 22. Remove MACHINE SCREWS (43) from
bottom of CONSOLE (40) and attach CON-
SOLE to CONSOLE TUBE (39) with MA-
CHINE SCREWS (43).
Step 23. Snap BOOK HOLDER (44) into SLOT in
CONSOLE (40).
31
M8
LOCKNUT
42
MACHINE
SCREW
41
FRONT
HANDLEBAR
IMPORTANT
Your monitor includes low grade batteries
that will operate the computer for display
purposes only. You will need to replace the
batteries shortly after using the bike for the
first few times.
PULSE
GRIP
PULSE
GRIP
EXTENSION
WIRE