Harbor Freight Tools 97503 User Manual
Page 13
Page 13
SKU 97503
For technical questions, please call 1-800-444-3353.
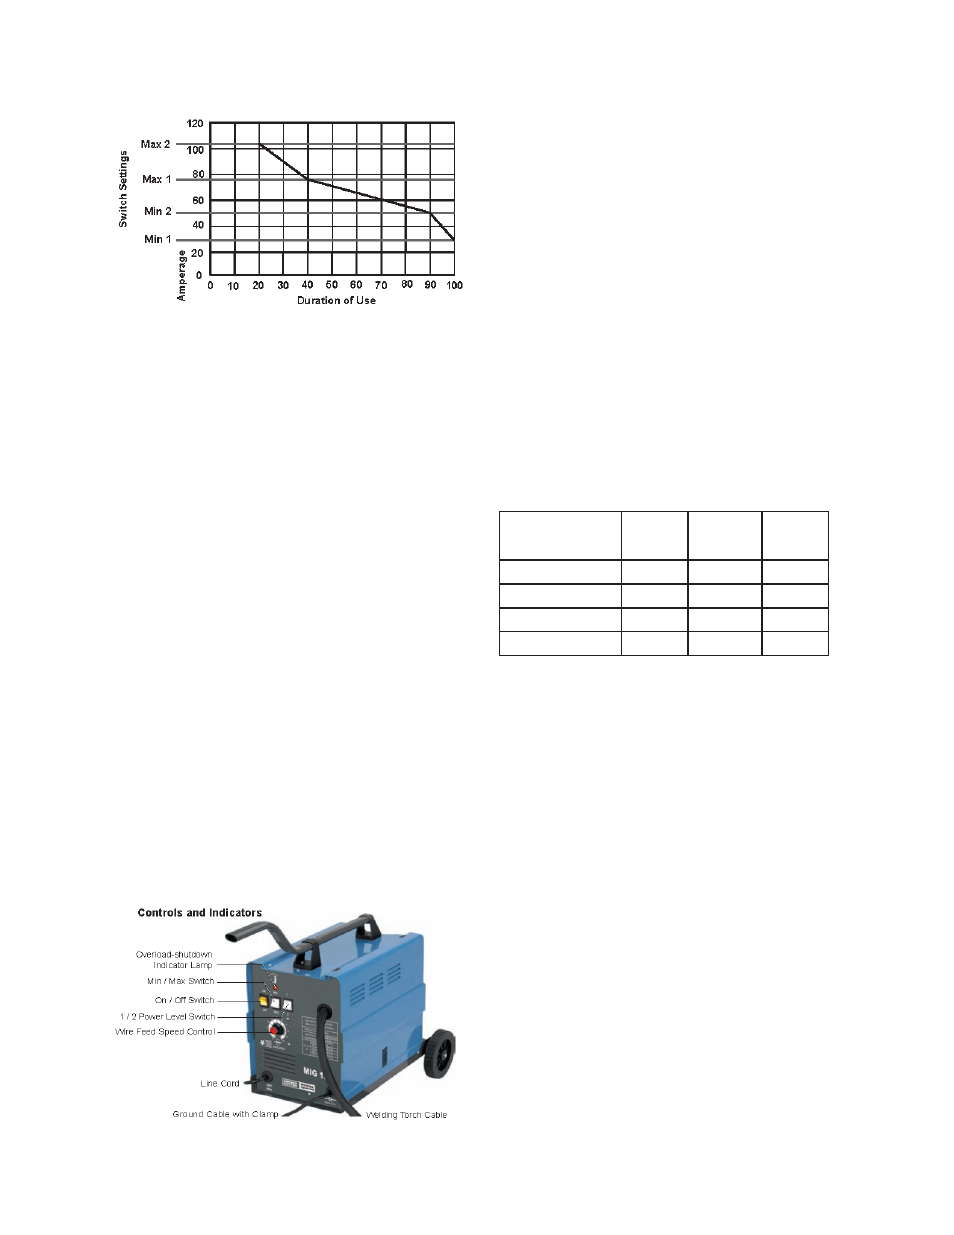
The duty cycle defines the number of
minutes, within a 10 minute period, during
which a given Welder can safely produce
a particular welding current. For example,
this Welder, with a 20% duty cycle at 105
Amps (setting Max 2), must be allowed
to rest for at least 8 minutes after two
minutes of continuous weld at 105 Amps.
Failure to carefully observe duty
•
cycle limitations can stress a
Welder’s power generation system,
contributing to premature Welder
failure.
This Welder is equipped with an
•
internal thermal protection system
to help prevent damage to the
unit. When the unit overheats; it
automatically shuts down, then
returns to service when it cools
down.
Once the unit returns to service,
•
follow a more conservative duty
cycle routine to help prevent excess
wear to the Welder.
Always read and follow wire
1.
manufacturer’s recommended
polarity. If using non-flux core wire,
secure the Argon/CO2 gas hose to
the rear of the MIG Welder.
(If using
flux core wire, protective gas is not
required.)
Attach the Ground Cable with Clamp
2.
(14) as close as possible to the metal
object to be welded.
Set the desired current (30~120
3.
amps) for the type of metal being
welded with the Temperature
Controller. Thin metals use low
current and heavy metals use high
current.
Set Switch amps Duty
cycle
Volts
Min. / 1
30
100%
15.2
Min. / 2
50
90%
16.5
Max. / 1
75
40%
17.7
Max. / 2
105
20%
19.2
Make sure the power switch is off,
4.
then plug the MIG Welder Power
Cord into a dedicated, 230 VAC, 20
amp line with delayed action type
circuit breaker or fuses.
While holding the Welding Torch
5.
handle, with the electrode wire clear
of grounded objects, turn the Power
Switch ON.
Momentarily press the Welding Torch
6.
trigger switch to test the wire feed
speed. Adjust the speed by turning
the Wire Speed Knob.
Hold the Arc Shaded Face Shield
7.
over your eyes.
Press (and hold) the Torch Trigger
8.
Switch and stroke the area to be