Step 4 - assembling the fan – Hunter Fan 41545 User Manual
Page 11
11
41545-01 6/10/2002
®
continued
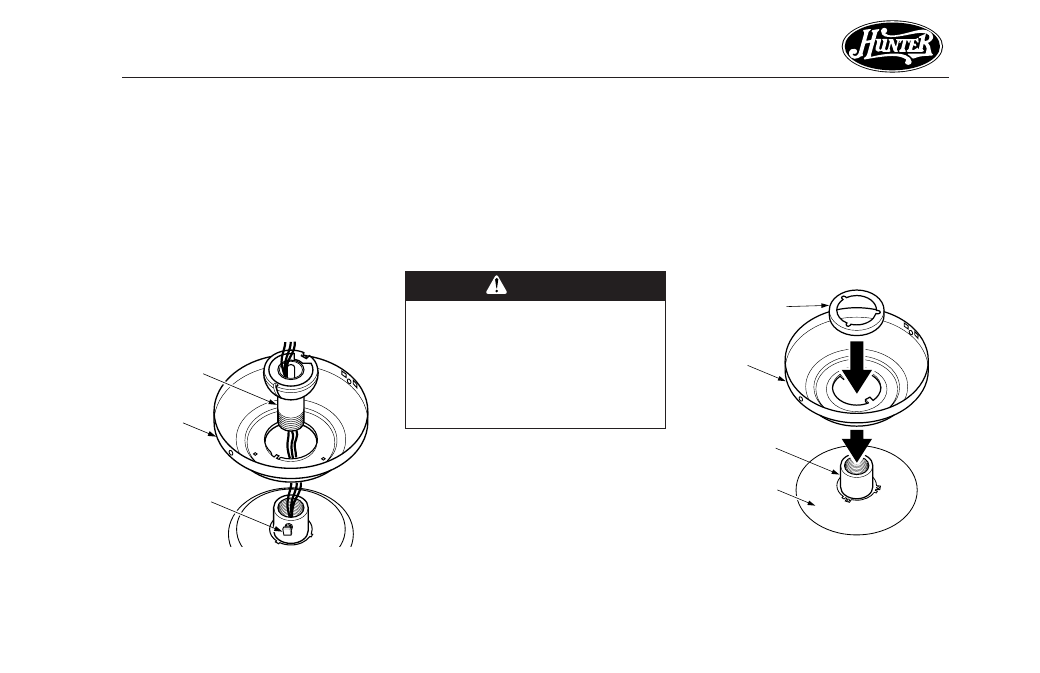
STEP 4 - ASSEMBLING THE FAN
Use the Step 4 instructions for the
type of mounting you have selected:
standard, angle, or flush.
STANDARD AND ANGLE
MOUNTING
For Standard 8-foot Ceilings and
Higher
1. Insert the pipe through the
canopy as shown in Figure 4a.
Feed wires from the fan through
the pipe.
2. Screw pipe into fan assembly un-
til tight. IMPORTANT! Tighten
pipe setscrew as shown in Figure
4a.
CAUTION
The pipe has a special coating on
the threads. Do not remove this
coating; the coating prevents the
pipe from unscrewing. Once as-
sembled, do not remove the pipe.
FLUSH MOUNTING
For Low Ceilings
1. Fit the canopy over the motor
hanger adapter as shown in Fig-
ure 4b. Make sure the canopy fits
snugly against the fan assembly
Figure 4a - Inserting Pipe through
Canopy
Pipe
Canopy
Pipe
Setscrew
Figure 4b - Placing Canopy and
Washer Over Adapter
Assembly
Washer
Canopy
Adapter
Top of Fan
with no space between the
pieces.
2. You will find a large assembly
washer included with the fan.
Place the washer over the adapter
and canopy as shown in Figure
4b.