Installation – Humminbird WIDE Paramount 3D User Manual
Page 6
INSTALLATION
TRANSOM INSTALLATION
Do not begin this transducer installation until you read the Installation
Preparation in the Operation Guide. This chapter contains information
critical to the correct installation of your transducer.
Due to the wide variety of boat hulls, only general instructions are
presented in the installation guide. Each boat hull represents a unique set
of requirements that should be evaluated prior to installation.
TRANSOM INSTALLATION
Step One - Determine Where to Mount the Transducer
Begin the transducer installation by determining where on the
transom to install the transducer. Consider the following to find
the best location:
•
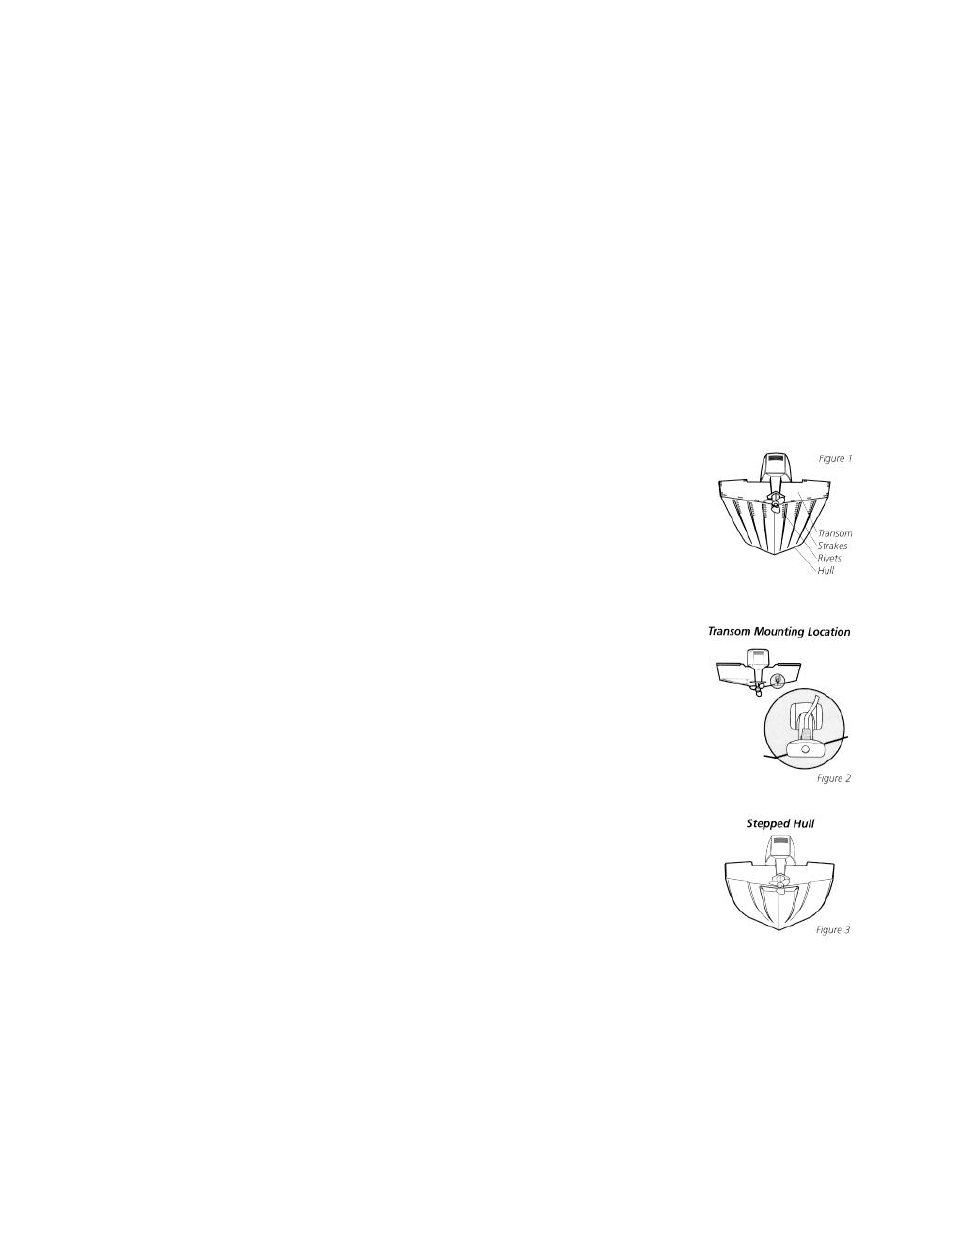
It is very important to locate the transducer in an area which is
relatively free of turbulent water, As a boat moves through the
water, turbulence is generated by the weight of the boat, and
the thrust of the propeller(s). This turbulent water is normally
confined to areas immediately aft of ribs, strakes or rows of
rivets on the bottom of the boat, and in the immediate area of
the propeller(s) (Figure 1). On outboard or inboard/outboard
boats it is best to stay at least 15” (40cm) to the side of the
propeller(s).
•
If possible, viewing the transom of the boat while the boat is
moving will provide the best means of locating turbulence free
water. If maximum high-speed operation is a high priority, this
is the recommended method. If this is not possible, select a
location on the transom where the hull forward of this location
is smooth, flat, and free of protrusions or ribs.
•
The transducer when mounted should point straight down.
The design of the transducer will accommodate a wide range
of deadrises and remain ported straight down (Figure 2).
•
On boats with stepped hulls, it may be possible to mount the transducer on
the step. Never mount the transducer on the transom behind a step, as this
area of the transom will not be in contact with the water at high speed (Figure
3).