Installation – Humminbird WIDE Paramount 3D User Manual
Page 11
INSTALLATION
TRANSOM INSTALLATION
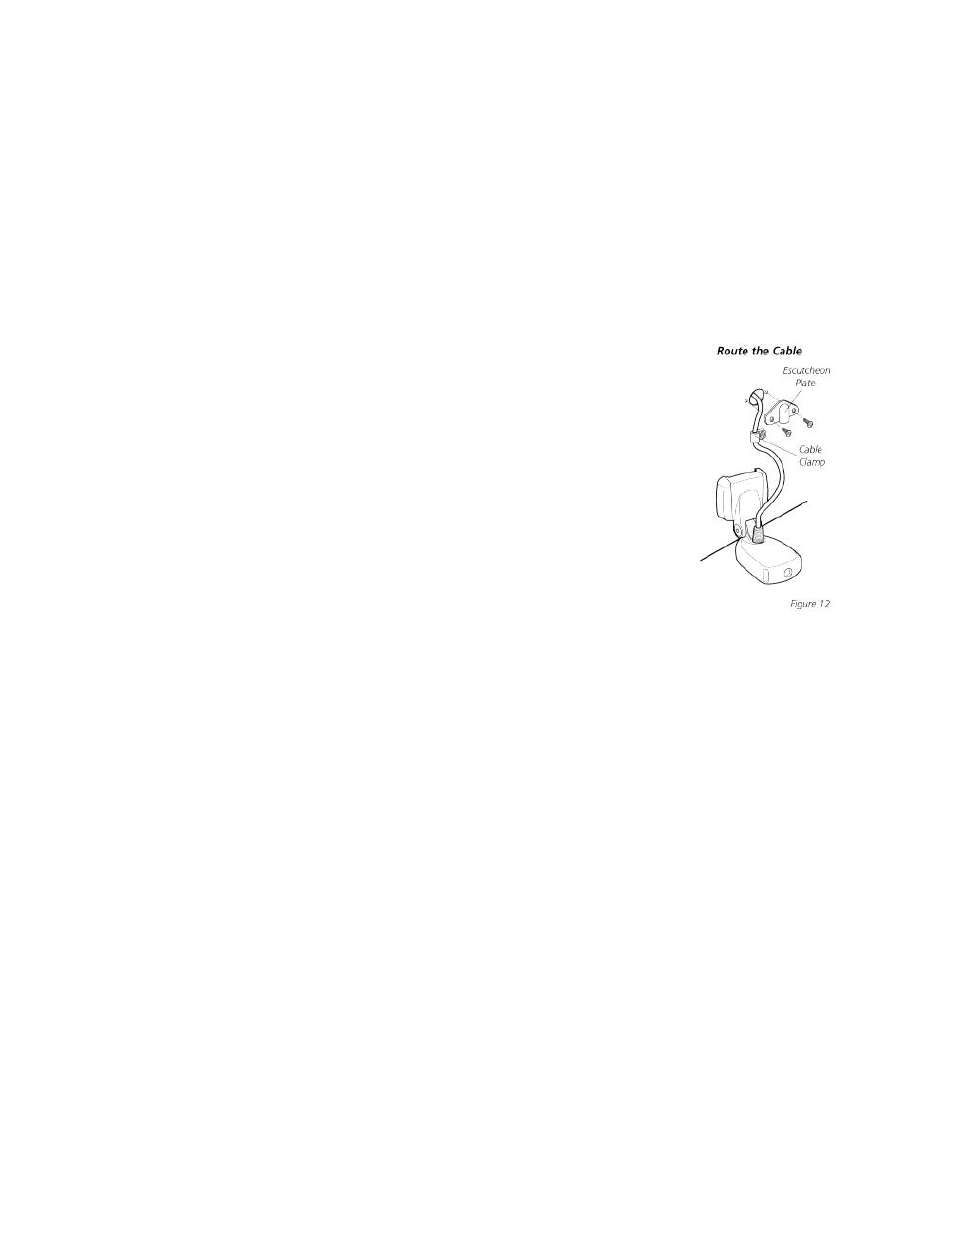
Step Six - Route the Cable
There are several ways to route the transducer cable to the to the area where the
control head will be installed. The most common procedure routes the cable
through the transom into the boat.
Inside the boat there is often a channel or conduit used for other
wiring that the cable can be routed along. Do not cut or shorten
the transducer cable and try not to damage the cable insulation.
Route the cable as far as practical from the VHF radio antenna
cables or tachometer cable to reduce the possibility of
interference.
If the cable is too short, extension cables are available to extend
the transducer cable up to a total of 50' (15 m). Call Humminbird
Customer Support for more information.
Follow these steps to route the cable through the transom:
1. Drill a 5/8” (16mm) hole above the water line. Route the
cable through the hole.
2. Fill the hole with silicone sealant.
3. Place the escutcheon plate over the hole and attach with the two #8 x 5/8”
(16mm) screws.
4. Secure the cable by attaching the cable camp to the transom using a #8 x
5/8” (16mm) screw.
Note: The transducer will pivot up to 90 degrees in the bracket. Allow
enough slack in the cable for this movement. It is best to route the cable to
the side of the transducer so the cable will not be damaged by the
transducer during movement.